7 Things (I think) Every Home Needs

I began writing this on the first day of spring. It was snowing. Which means that for the majority of the last — FOUR MONTHS — I’ve stayed inside, hiding from the hideous winter elements. Which is hilarious because that means that 1/3 of the year I’m staying inside a tiny space while living in a huge, ridiculously amazing city. So, I can’t be Carrie and keep my shoes in the oven. I can’t live in an ugly box that I pay too much for, only to be outside and enjoying the world every day. It means I need a space that’s warm, organized, comfortable – home.

So here’s my first list. If I were to move ANYWHERE, especially in a city, these are the items I know I couldn’t live without. Maybe because of how they look, mostly because of their practicality (even if just for my mental health), take a look, and let me know what you think.

1. Speakers! Even if you can hear your cell phone on vibrate in each part of your house, that doesn’t mean you don’t need speakers. Music sounds better with them. Bravo TV arguments will  intensify. And, no, silent discos weren’t invented for single dance parties at home. I have these Harman Kardon ones, and they’ve lasted forever. A bit pricey, but for $170 they look nice, are clean, won’t add clutter, and sound great.

photo

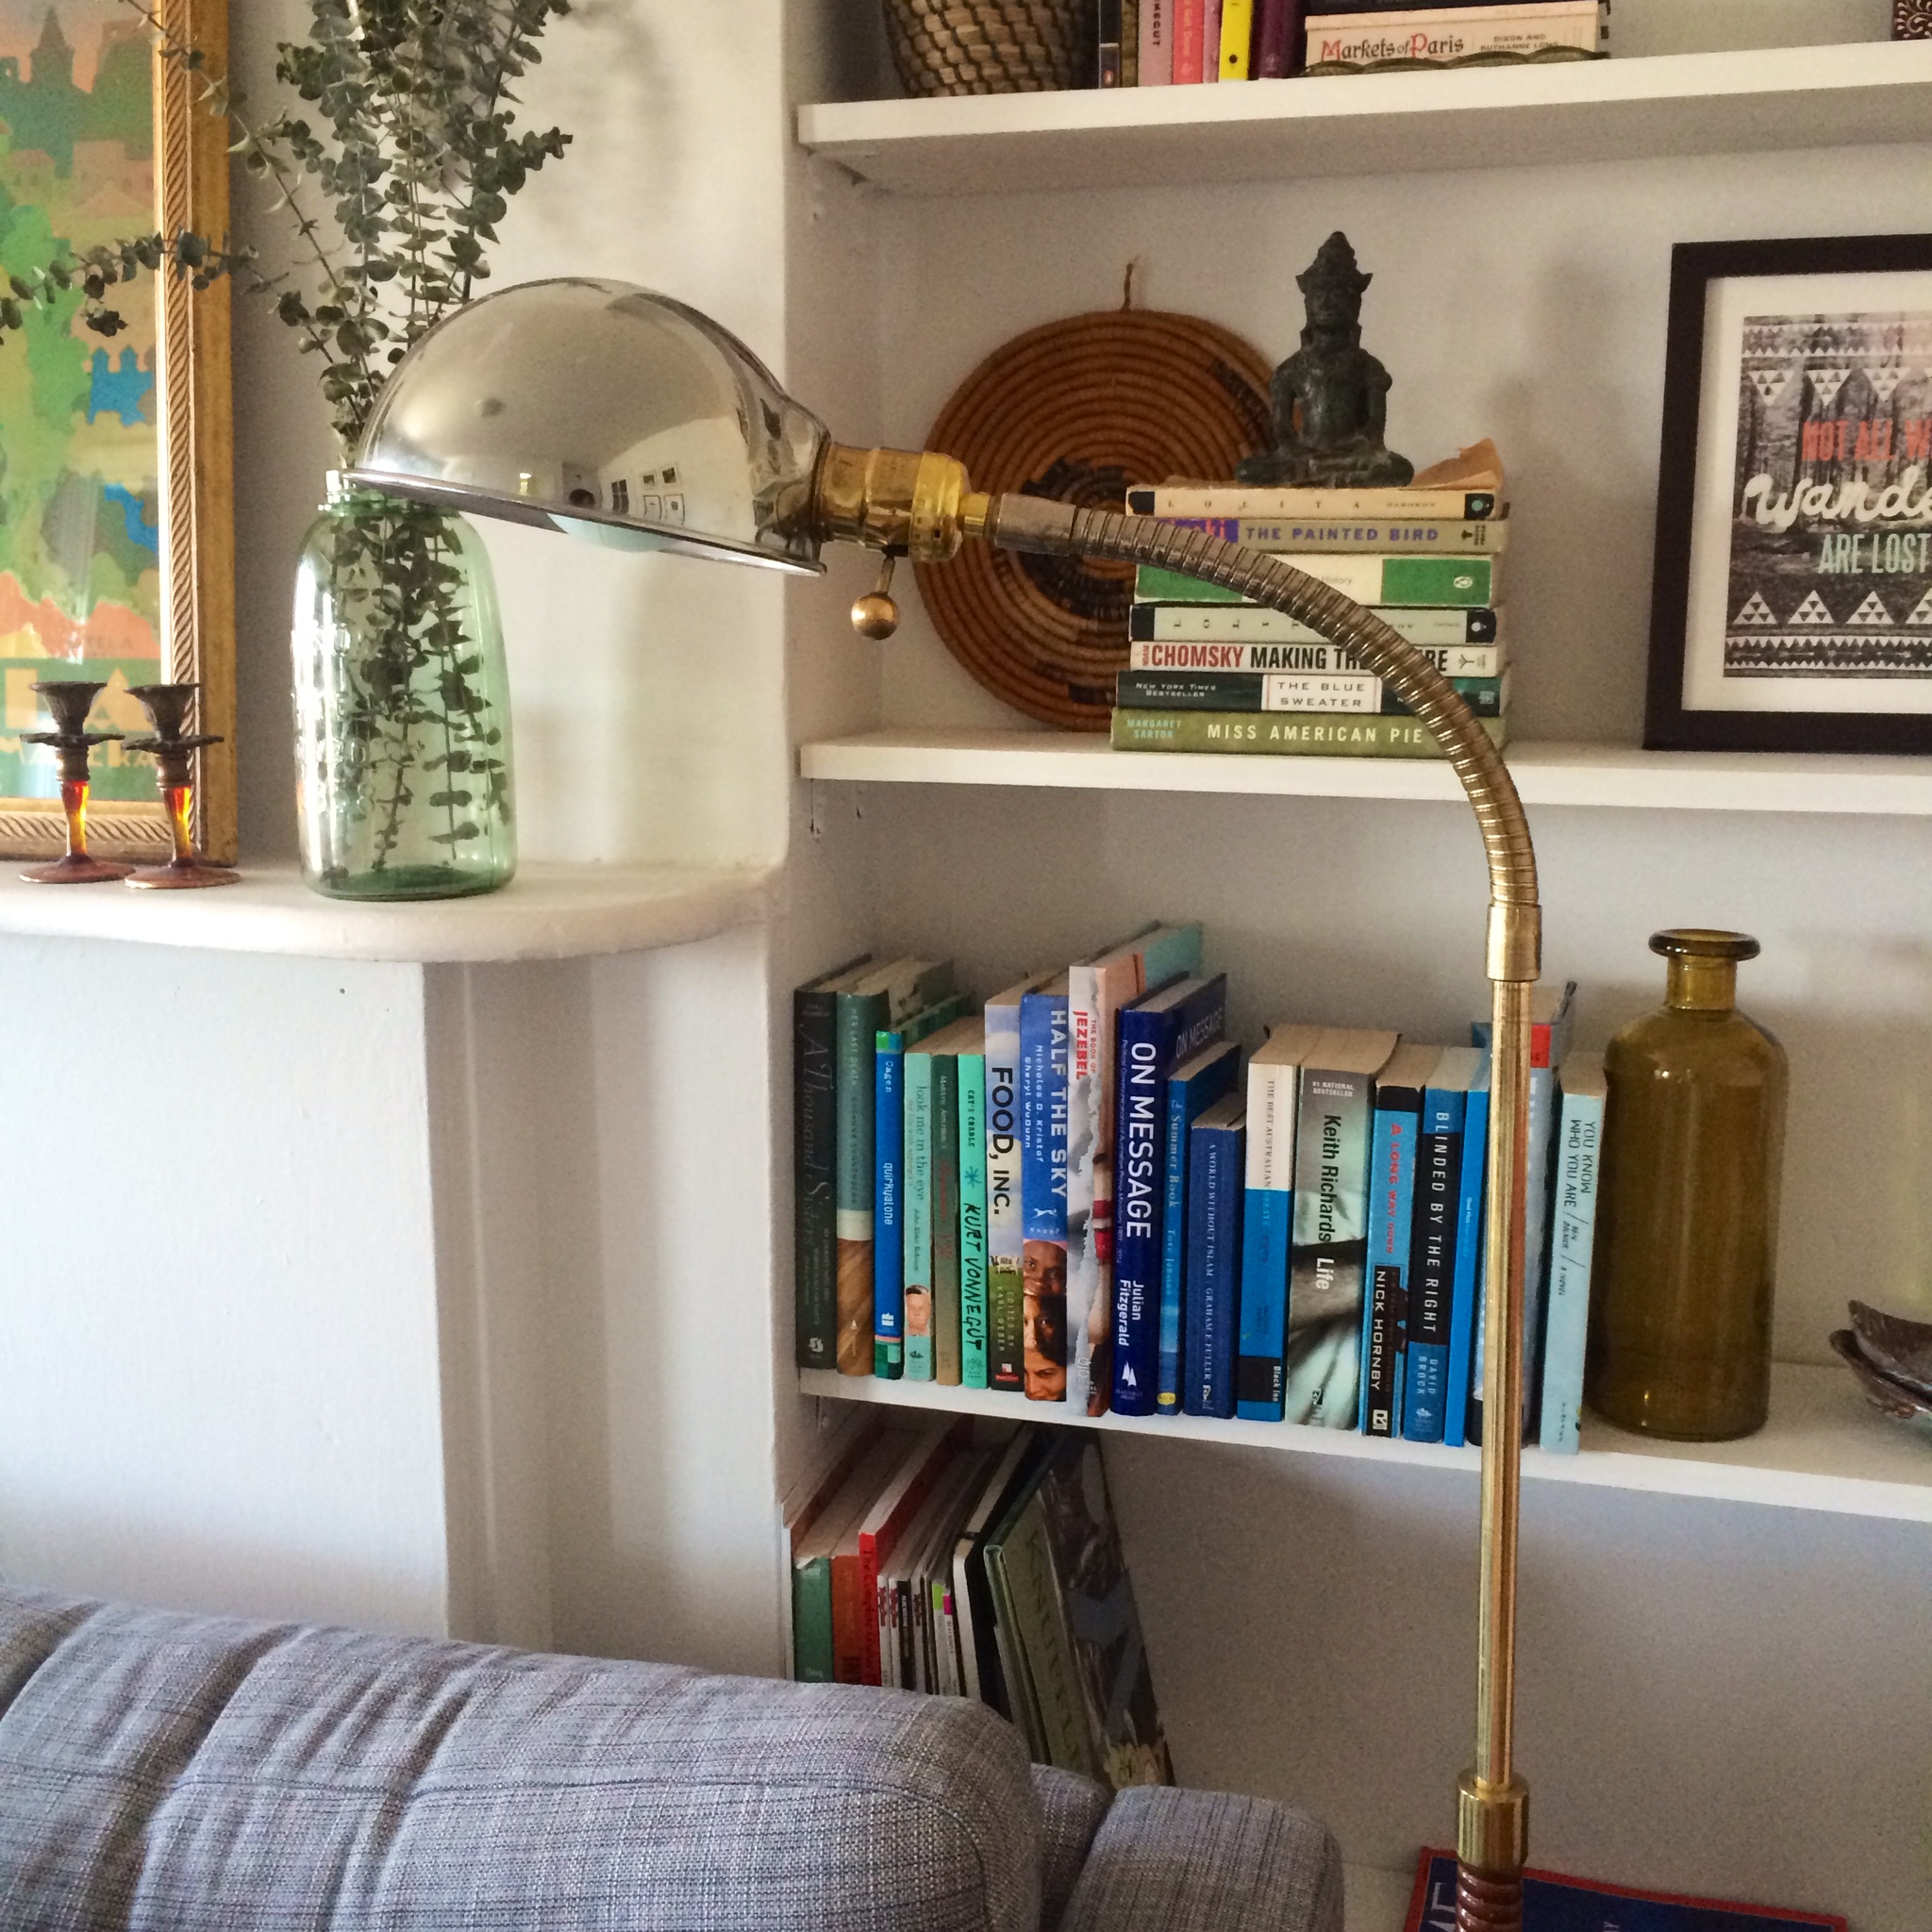
2. LIGHTING. Even if your apartment has ceiling lamps (lucky), you still should find some table and floor lamps, or more overhead lights to create a warm space that can help define areas, corners, and cubbies. I found this great floor lamp at the Brooklyn Flea (the best!)  that I use as a reading light in our living room. The table lamp was also a favorite find from Eastern Market in DC. Helpful hint: Buy a good lightbulb. It WILL pay off. I prefer the softer lighting bulbs like the GE White Hybrid Halogen. They’re energy smart and eco friendly! $12 each but they really do last forever.

photo


photo

3. Plants. Please don’t say you can’t because you just kill them. That’s why succulents and cacti were created. Plants keep your space bright, beautiful, feeling clean… and some even clean your air (yes, fact). Add a couple, take them to your new home, and they’ll make any space look good.  It’s genuinely the easiest, cheapest way to decorate. I love this Target Home find, a cement planter that could easily (stupidly) sell for $50, but was $13. Not everything needs to be a Pinterest DIY, where your supplies cost an obscene amount of money.

photo 3 photo 4

4. Extra Seating! I love having extra chairs around the house to make sure that if we do have a lot of guests around, everyone has somewhere to sit. We have a wood folding one that I stash behind the closet, a couple cute side chairs… Small chairs are super easy store and move apartments with. They can have a pattern, texture, unique wood… It’s a simple way to add decor to a space without feeling too “done”, and they don’t clutter. I love our West Elm John Vogel chair in charcoal.  The second one I bought from a previous tenant at an apartment I used to live in.

photo 1 photo 2

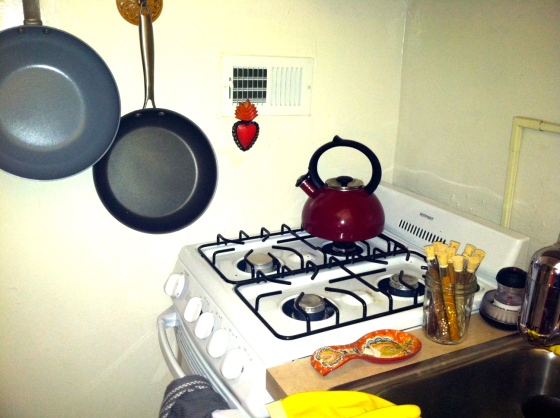
5. A good (electric) tea kettle. This seems random, but after living with an Australian, I’ve learned the power and beauty of a good tea kettle. Beyond making a cup of tea, an electric tea kettle will boil water for your pasta, french press coffee, rice, potatoes… EVERYTHING. It’s so much quicker than a stove top kettle, and I literally use it every day. I love this Capresso clear glass kettle. Buy it from Bed Bath and Beyond with a 20% off coupon, and it’s $50. Yes, you can get a cheap plastic one, but I prefer glass because you’re not ingesting toxins every time you heat the plastic, it’s much nicer to look at, and easier to clean because the kettle is separate from the electric plug. It’s also a good, small size that won’t take up too much space in your teeny kitchen.

photo-1

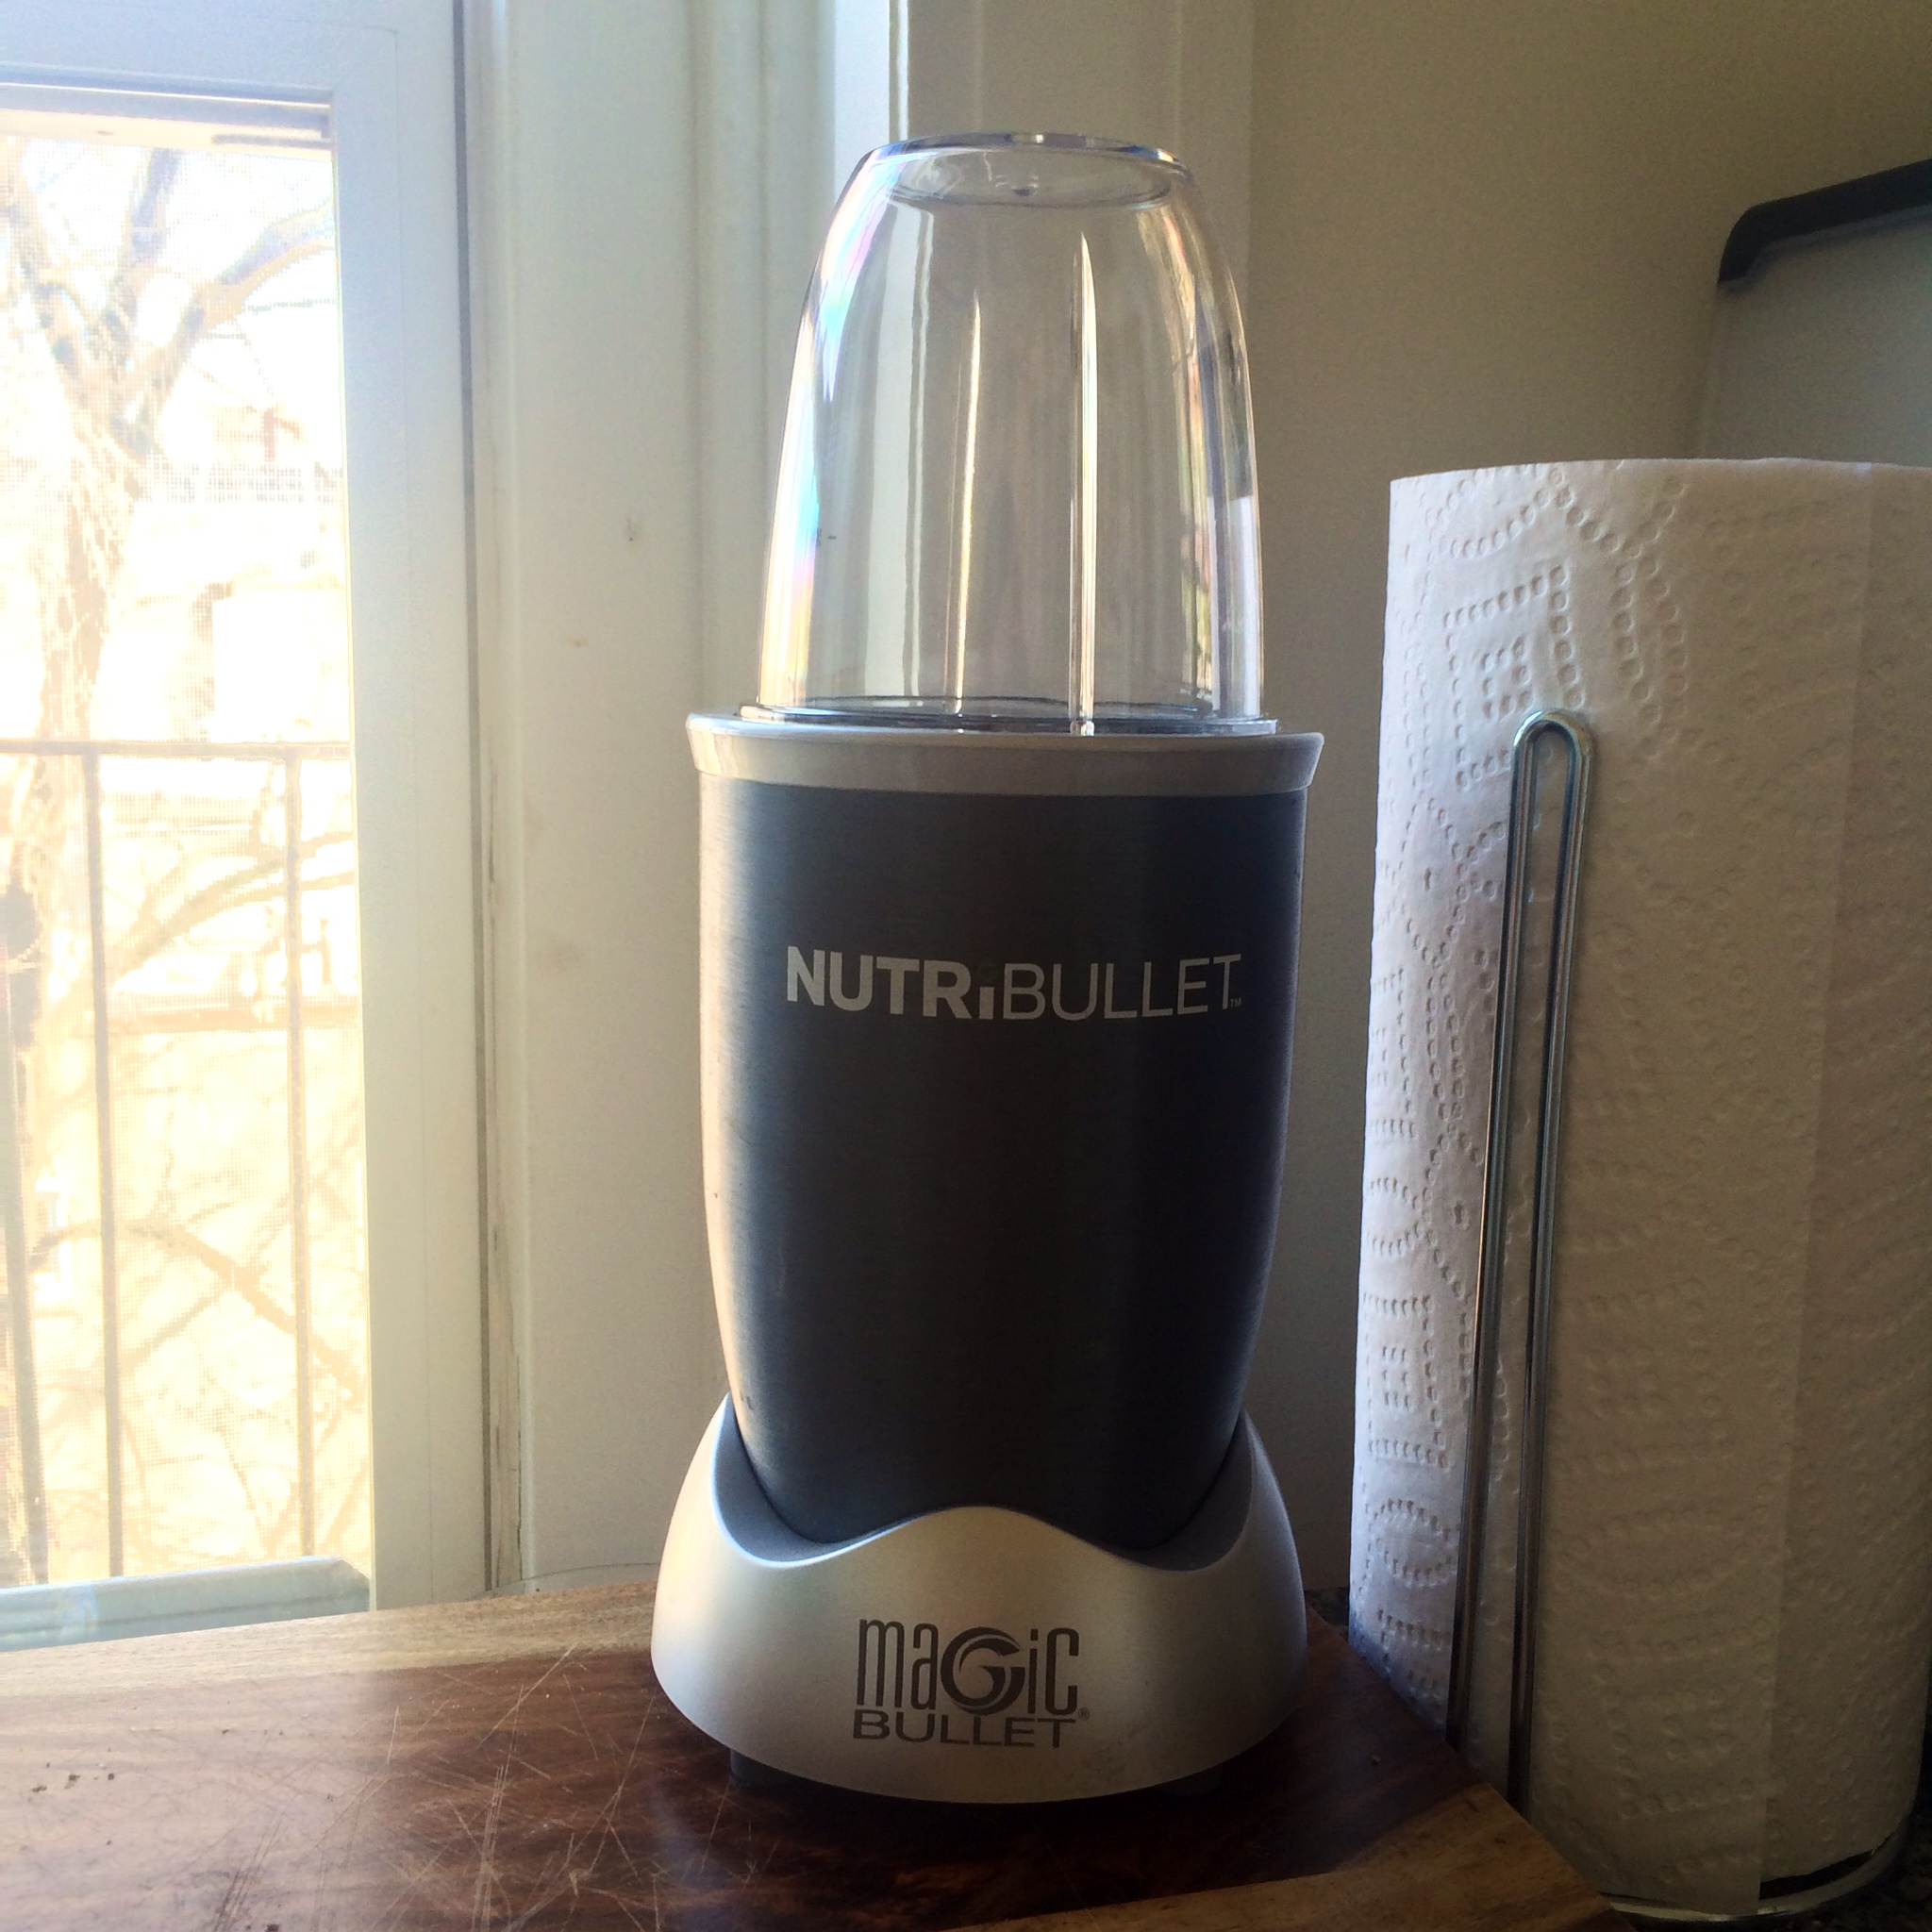
6. A magic bullet. If you have a teeny apartment, this is a LIFE SAVER. Beyond making that delicious kale juice we all pretend to love, you can also blend soups, yogurts, even use it as a food processor. It’s SO easy to clean, and is much smaller than a blender. I love our Nutri Bullet especially because I do think it breaks food down better than the other brands. Again, use a 20% coupon ala Bed, Bath & Beyond and buy it. The steel design also makes for a nicer looking appliance.

photo


7. STORAGE. I mean, obviously, right? That is the dream. But you can do storage right, and then you can do storage wrong. For example, do you need your winter coat in your closet, taking up space all year long? No. In fact, it doesn’t need to ever be in your closet. Get a hook, hang it by your door for four months (this also allows it to dry properly). Done.  And when you don’t use it, buy these ridiculously smart (and REUSABLE) Ziploc  vacuum hanging bags, put your stuff in it, and then either store them in the back of  your closet or better yet, under your bed. They keep stuff clean, won’t ruin the filling of your coat, and pro tip: You don’t need a vaccuum to suck out the air. You can literally sit on em, and push out the air (like rolling a sleeping bag), until all the air is out. Fact. (No personal picture because sadly we are still using our coats. :P)

In addition, because we really no longer need DVD players, DVDs, or really any TV equipment beyond a ChromeCast stick, use your “entertainment center” for other things! Serving dishes? A “linen closet”? A mini hardware tool box with your tools, extra lightbulbs and batteries? This is such an easy way to keep organized and clean. (You’ll never know what’s in our “entertainment center”. Another Eastern Market find:

photo-1

That’s all I’ve got. What are your “not living without” items? Share em in the comments!


how to fix up a new, old find (and remove the rust!)

Earlier this week I was walking to get my laundry, and happened across this retro, tiny, “little red dinette set.” It was made sometime around the late 40’s, early 50’s we’re guessing. On average, they can cost up to several hundred dollars, but this one was being sold for $150. And while a Johnny Rockets theme wasn’t ever what I thought would look good in our apartment — think boho, vintage, Anthro-feel, it really spoke to me. There is something really unique about the orangey-red, aluminum,  and grey seats. Plus, the size was perfect as we don’t have too much space for a dining table. (Also, ugh, I hate snow.)

photoAfter walking back and forth like three times, I knew I would miss out as it were to likely be purchased soon. The antique shop selling it had just got it in earlier that day, so we went for it. There was rust and dirt all over it, but I figured I’d clean it up some how.

::insert complaint about walking it six blocks and up three flights of stairs::

I called my mom for advice on how to clean it. She quickly knew the perfect trick, going back to her motorcycle days (Ha!) And based on my last post, she said I already had everything I needed to clean it up.

What you need:

— Steel Wool! Yup, the same wool I used to stick in the  mouse holes

— Aluminum foil

photo 1-1


See what we needed to clean:

photo 2photo 3


photo 5


It’s pretty gross, right? Before you start, make sure you are working on a surface you can easily clean — the wool particles and excess rust will get everywhere.

So first, wipe it all down and clean it as best you can. I prefer a natural cleaning product. Then, you’ll start to scrub down all the rust with the steel wool. You’ll quickly see a difference, the rust scrubs off quite easily. But note: be careful because the metal fibers in the wool will hurt your hands!

The side on the left was scrubbed with the steel wool:

photo 3-1


Next, use the shiny side of the aluminum foil, and scrub once again. The foil will make the metal shine! (Notice which part was cleaned with steel wool and foil?)

photo 2-1


Then, wipe it all down again with a cleaning agent. Use a mild one to ensure the shine keeps it’s pop. You may also want to use a little hand vac to suck up all the rust particles that fell off. Now, do the whole thing! This actually takes quite a bit of time, especially because of all the nooks and crannies. Remember to clean up even the little parts, like the screws and upholstery tacks. Take your time, and the results will amaze you.

Whoop!

photo 1-2


To curve that ‘diner’ feel, I added a teal blue platter (from Ikea!) with a couple succulents, and made it feel like ours. Now, for a dinner party!

photo 4-2


photo 5-2


Ew Mice. (and how to prevent them)

We just moved apartments! Again. Going from the Finance District to Carroll Gardens in Brooklyn, you quickly learn to transition from elevators, doormen, salted streets, and doorbells. A brand new building to one built in 1890. We now have character and charm. But word on the street is, we may also have mice.

I’m not a big fan of mice. (no, really?!) While often in old buildings, they can’t be helped, you can still try hardest to ensure you don’t see their cute (and bacteria infested) faces.

So besides cleaning, keeping food in the refrigerator and out of the pantry, cleaning dirty dishes, you can also make sure all those little holes – between the floor and the walls, under the stove, in the corners – are filled up and cleaned up! If you didn’t know you had them, start looking around, and you’ll be surprised how many there are!

Here’s what you need.

– Steel wool. This is (apparently) the only thing mice can’t chew through. Ew. I researched, and the one pictured below is the best, most durable.

– A screw driver or knife or scissors to use to squish the steel wool into said holes

– Silicone caulking. If you need help with where to find this, ask someone at Ace Hardware, they’ll know which one you want. It’s silicone and water based.

– A caulking gun. You don’t need a fancy one. The $7 one is fine.

– A spatula. Like the one you would use the cover holes from old nails.

photo 2


First, you’ll want to make sure the holes and edges between the wall and floor are clean, dust free, and dry. You’ll just make a dirty mess if you skip this part, so don’t forget!

Then, you’ll want to stuff the steel wool into the holes. It can be sharp, it can cut through yoga pants (don’t learn that the hard way), and it can cause more of a mess. So use sharp scissors, or pull it slowly using your hands. Next, you’ll use the screw driver to help push the wool into the holes.

photo 3


Do you see the steel wool in both holes? You may find that the hole is actually larger than you thought. I know, this is terrifying. Keep adding steel wool ’til you no longer can. Then, and I mean technically you don’t have to do this, because  mice can’t get through the wool, but to make it visually attractive, and for peace of mind, you can then add the caulking, and cover up the holes. {insert caulking joke here]

photo 4


See how it kinda just squiggles out? You can use either your finger (since it’s water based) or a spatula (this is less of a mess), to smooth out the caulking gel and finish.

photo 5


It’s not perfect. But holler! no more mice. (let’s hope) In addition, even if the hole is so small that you can’t fit any steel wool into the crack, you can still using the caulking gun to seal the space between the wall and the floor. You may even enjoy this nasty little project. It’s quite satisfying! (just make sure to smooth it all out!)

photo 2-1


So keep your kitchen clean, fill in those holes, and you’re set. And please don’t use those inhumane traps – live or dead ones – because seriously, what are you then gonna do with a mouse?


reupholstery is cake.

is that a mustache on your chartreuse chair?

is that a mustache on your chartreuse chair?

honestly, kinda an ugly chair from Ikea.

Before: Ikea could have done better. 

  1. Chair
  2. Paint – just buy a quarter gallon – indoor, with primer is lovely.
  3. Sand paper – if the chairs are already painted, get the medium grind. If they are basic unpainted food, the smoother paper is fine.
  4. A paint brush
  5. Staple fun
  6. Fabric of your choosing – make sure you buy enough. If you live in the city, I would recommend looking on Etsy for fabric… not too many places in DC. Make sure you buy enough!
  7. Scissors (cut your fabric)
  8. Hammer

First, you will want to wash and sandpaper down the chair – give it a clean, fresh feel. It will help making the paint go on smoother. At this time, if you can, unscrew the seat from the chair.

Screenshot_2013-06-06-22-04-07Then, you’re going to want to start painting. Make sure you shake and stir your paint to make it even. I recommend doing one basic coat, let it dry for 20 – 30 minutes, and then add another. I wanted a really bright, fun, summer color. Obviously throw-up green chartreuse was the answer. 

Screenshot_2013-06-06-22-04-16After your first coat, let the chair dry, and begin working on the reupholstery of the seat. As I mentioned, I purchased fabric from Etsy. Make sure  your order enough to go around the top, and underneath where there needs to be enough to staple that baby down.

IMAG0335Screenshot_2013-06-06-22-03-17The key is to pull the fabric firmly around each side, to ensure there are no kinks or wrinkles in the fabric. The corners are tricky, I recommend treating it as if you are wrapping a present. Now, if you’re terrible at wrapping gifts, try something else. 🙂 If you don’t have a staple gun, you can always nail in small hanging nails… but do consider buying a gun at Ace Hardware, they’re only like $30 and last forever. If not all of the staples go in completely (they can sometimes be a sucker), use a hammer to smooth them out.

Here you go! Mustaches!

Screenshot_2013-06-06-22-03-46After the first coat is dry, work on your second paint coat. Touch ups can always be done the next day, too. I recommend waiting 1-2 days after painting to ensure the paint is 100% dry before reattaching your seat.

Screenshot_2013-06-06-22-04-46

what’s inspiring me

Inspiring me, driving me crazy, coloring my mind.

photo 4

why yes I’m pumped for CSA fruits and veggies.

let the pickling games begin.

let the pickling games begin.

If Martha Stewart can make buttercream flowers, I'll be damned to say I can't.

If Martha Stewart can make buttercream flowers, I’ll be damned to say I can’t.

photo 3

I cooked carnitas in a slow cooker. This was the only photo I took.

I cooked carnitas in a slow cooker. This was the only photo I took.

sprinkles making the world go boom.

sprinkles making the world go boom.

my favorite lamp from a flea market. of course I never bought a lamp shade for it. Com-pro-mise.

my favorite lamp from a flea market. 

final thoughts on studio living

Sooo I’m like three months behind. I should be ashamed, but damn I’ve been busy. Started new school programs, been traveling back and forth for work, and oh yeah… I MOVED again.

Oh yes, I said it. I have moved again. But before I get to that, here are my last thoughts on studio living. While it was only six months, I loved living on my own in a tiny shoebox. I will definitely take the sustainability and basic living along with my new space. Here it goes:

1. Don’t let a small kitchen prevent you from cooking. No really, don’t. Enjoy cooking, and figure out a way to organize all of your equipment. Check it:

IMG_1210Here, I hung a coat/towel rack and embellished hooks onces used for jewelry to hang my pots and pans, mugs, colander, and dish drying rack (when I wasn’t using it). In the middle is an Ikea bathroom shelving unit that I used to store all of my dishes and baking sheets. On top, you’ll see recycled jars I kept to store my silverware.

IMG_3044

Magnetic knife strip: best. purchase. ever. Ok, maybe not best per say, but seriously, this saved space, and it actually got me using all of them, rather than than just a simple pairing knife. At the bottom right is a metal paper organizer I purchased in college for my desk. I hung it on the wall and actually kept mail, coupons, and recipes in it. Really helpful, and brought a little more personality to the space.

IMG_3301

So, that’s the kitch. See at the bottom right, my mini fridge. Perfect for one person. On the front is a magnetic hanging rack that I hung scissors, hot pads, and measuring cups on. It was purchased about a decade ago from the Container Store. Note to future self: Never age yourself by dating your kitchen equipment. Above the fridge is my favorite DIY item ever – spice rack in a mason jar.

Moving on…

IMG_3298When this studio was first built, a murphy bed was up in the closet where my bed is placed. As you can see, the perimeter insert is still there, making somewhat of a nook for my bed. It makes it private. Additionally, I placed my beast of an Ikea dresser as a room divider, between the bed and living area. When you walk in the front door, you can’t see the bed, and honestly, most assume it’s what’s behind the closet door. Win. For studios, less is more, and spacing things out the best you can will definitely help.

Lastly, you should definitely try and make one of these mason jar racks. They’re WAY fun, super easy to make, great storage, and just plain rad.

IMG_1854Cheers to fabulous studio living!


spice racks are so last year

This is my spice rack –

photo

It seems organized, consolidated, and just dandy. But good grief, I’m a lady in a studio with absolutely no space. Especially for spices! The cabinets aren’t tall enough to just stack spices, plus let’s be real, I’m way too OCD to have  little containers all over the place. When cooking, you want spices readily available, and ideally in front of you. I also like the beautiful colors of spices… so  let’s get creative, and find a way to show em off, without taking over my (no joke) 2X3 foot kitchen. Sad. Anyway, here’s what I did – test tubes! I chose glass ones with cute corks – ten for $10 on Amazon. (And if you have Prime – please, please, use Prime, it only makes sense – free shipping!) Anyway, I bought these, and made a little paper filter to pour the spices in each tube. I’m storing them in an old spaghetti sauce jar, and currently figuring out a way to hang them on the wall. Or, I might just keep them in the jar. I kept the rest of the spice jars under the sink in a box until they run out – when I need to buy new spices I’ll buy from a shop that sells in bulk. This saves space AND it’s sustainable. I’m also starting to think of ways to use the old spice jars in ways other than bringing salad dressing to work.

Sidenote: If you don’t know the smells of spices, make sure you write their names somewhere on the tubes. Use a Sharpie marker or something. That could get things messy.

Woohoo! So much more space!

photo 4So bright and rich!

photo 1


photo

photoDefinitely fits better in this little kitchen. Love it.

what I learned at Whole Foods…

…how to eat a pomegranate!

Silly to post about this? Perhaps. But if you’re like me, you end up eating only half the pomegranate. The other half is either juiced from being smushed by accident, has stained your clothes, was thrown away mistakenly with the rind, or thrown away purposely out of haste.

Anyway. Simply cut the fruit in half. Then in a bowl of water, peel out the fruit. The rind floats to the top, and the pieces of fruit don’t squirt everywhere. Peel all the fruit, throw about the floating pieces of rind, then pour out the water. Crazy easy, and you actually end up enjoying the fruit.

Enjoy!

make it a kitchen

I’m struggling with how in the world I’m going to not only cook and clean in what the realtor calls a kitchen, but how I’m going to organize all of it!

I don’t online shop for kitchen tools, I no longer even have one of those 1-800-Chop It’s! All I really have are the basics, but alas, three cabinets hold diddly squat. Check out what I’ve done to organize the space, utilize the cabinets to the best of my ability, and keep the itty bitty kitch lookin’ sweet.

1. While it’s all mismatched, I love my dishes. My mom’s made some of them, some are from Ikea, some were stolen from college roommates, and others were taken from free street sales. I figured I would need additional storage in the kitchen, so why not store my pretties — and not boxes of flax seed and canned beans — in the open space, leaving my food, what can quickly appear cluttered, in the cabinets. Check.

I made one purchase from Ikea. It’s a $40 shelving unit that I’m pretty sure is for storing towels and bathroom supplies, but hey, it works.

sadly the space is so small, it’s near impossible to get the whole unit in a photo

** Another trick — Use old jars to store your silverware. Those on top are the bruschetta jars from Trader Joe’s. Nice little addition, especially when you have no drawers.

2. Next, I needed somewhere to store my pans and colander, and heck, maybe some more space for mugs. I purchased a coat hanger for $10 at Ace Hardware, and reused a couple hooks I had purchased years ago from World Market (each were like $4). Since my apartment is way old, I needed to use my drill, and a drill bit for cement walls which you can easily buy at Ace for like $5. Not only are these handy things to have at home, but damn will you feel accomplished. Make sure you get the right screws, too.

3. Lastly, I must admit, I’m an old lady at heart, and try to save all my receipts, old cards, birthday cards, recipes, you name it. There was no space for my old desk (stay tuned for that project), so I decided to mount my paper holder to the wall. Find a magnetic one and you’ll be happy you bought all those cheesy magnets while traveling abroad. Again, get two cement friendly screws (30 cents a piece?) and begin!

Next up: the living room!

-Summer