Hand Stitched Pillows

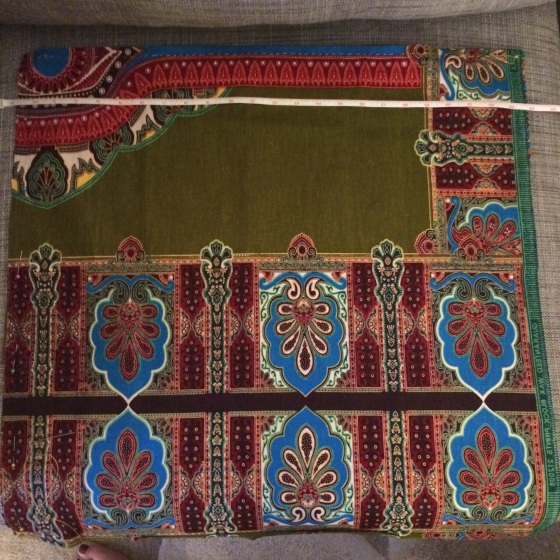
While traveling this past April and May, we made it to Kampala, Uganda. The main attraction was of course the mountain gorillas — absolutely amazing, you must go see them before they sadly become extinct. The second attraction, ok besides the chimps, was the fabric. A lot of the fabric is made in Uganda, and other pieces come from Nigeria. Our friends in Nairobi say that Uganda has the most gorgeous fabric in all of Africa. Can’t say I disagree. $30 later, I’m in heaven!

Recently we purchased the Karlstad, L-shaped sofa from Ikea, in isunda gray. It can be very big and plain, and I’ve been struggling to find pillows that are lounge-y, comfortable, beautiful, man-friendly, and inexpensive to go with it. So I thought making my own with purchased fabric would be the best bet. I purchased a couple various sized cushions from Ikea – like $7-$15 per pillow, that you can stuff in once stitched. If you’re like me and don’t have a sewing machine, these can be exceptionally time consuming… however…they’re SUPER easy to make, and Orange is the New Black Season Two was just released, so my guess is you have some time to kill.

For your encouragement, a finished photo:

photo 3-2

The black and white checkered one is from Ikea (actually went quite nicely with them!). The green and aqua are the fabric purchases I made in Kampala.

What You’ll Need:

  1. Scissors
  2. Measuring tape
  3. Fabric – really depends on the size you want your pillows to be. For the larger green pillow, I cut two pieces of 23X23 inches.
  4. The pillow or stuffing you want to use for the inside — Maybe you have an old pillow that you hate? Recycle it, and add new fabric!
  5. Needles and thread — I bought a basic pack of thread that offered a bunch of colors, and it included a couple needles ($5) I’d recommend a large needle if you can, they’re a bit easier to work with.
  6. Sewing pins ($3)
  7. Iron
  8. Patience, white wine, whatever gets you through it
  9. Scotch Guard (if you want to spray onto your pillows to prevent stains)

So first, cut two sheets of the size of fabric you need. I recommend cutting a bit smaller than the size that you measure when the pillow is fully fluffed. You will want a tight cover, and it’s ok to stuff the pillow in … will make the final fit tight, and create a better shape.

photo 2


Once you have both sheets, turn them inside out — That way, your stitches are on the inside, and make for a cleaner finish. You’ll sew one side at a time. To keep your fabric lined up, and to make sure you’re stitching in a straight line, use your sewing pins. Roughly half an inch from the bottom of each side of fabric:

photo 3

After lining up your pins, use the length of the fabric to determine how much thread you’ll use. To make sure you don’t run out, and have enough to tie at the end, add about six more inches. Then, double over your thread. Stitching two pieces of thread at one time will ensure it keeps sturdy. Starting at one end, tie through your thread, and begin stitching in and out. Try to keep your stitches as close as possible — this will keep the pillow from ripping.

Do this for three of the sides. Remember, double your thread! (For real, it helps.)

Then, put the fabric the right way out, and you’ll see your stitches look great

photo 5


After turning the fabric right-side out, get out your iron, and iron out any wrinkles that may have developed… you’ll want to make sure to do this before stuffing your pillow, to ensure that it’s smooth and wrinkle free when finished. Then, for the side that has not been sewed, fold each piece of fabric about 1/2 an inch in — so that the cut line is hidden from the outside. This will be necessary when stitching the final side, and will make sure the pillow looks finished. (Insert photo, oops, my bad).

Next, stuff in your pillow or stuffing (insert 2nd photo I did not take).

For the final side, you’ll use pins once again to keep the fabric together, and to create a line you may follow. Double your thread, and stitch from side to side once more — this is the one side you’ll definitely see stitched, so take your time, and try to create a straight line. Again, make sure your stitches are small to keep the pillow from ripping.
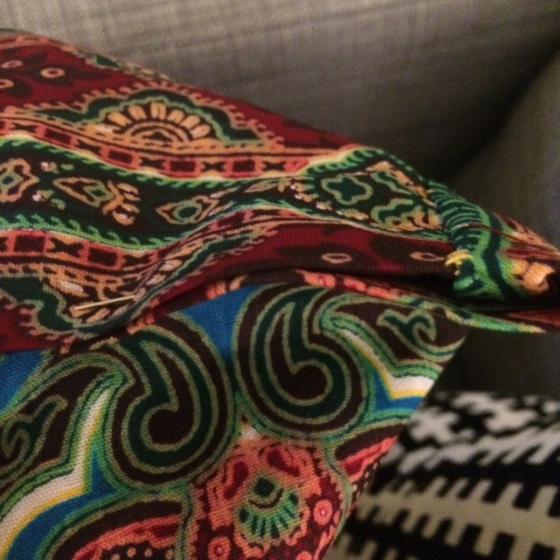
photo 3-1When finished, shake our your pillow, let the stuffing move around a bit, and ta-da! Here’s the final look. I’m pretty sure these pillows would cost you at least $75 in stores like West Elm or Pottery Barn. Now, they may have been machine stitched and therefore more sturdy, but how fun is that?

photo 5-1


spice racks are so last year

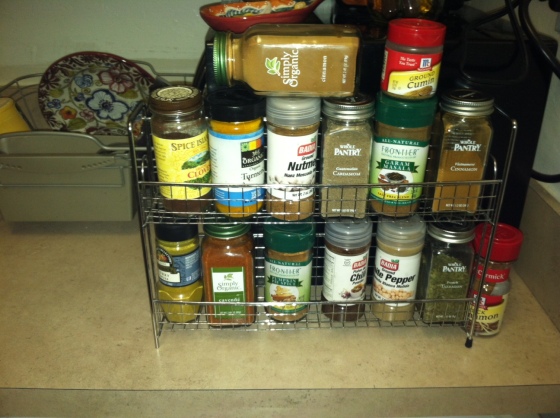
This is my spice rack –

photo

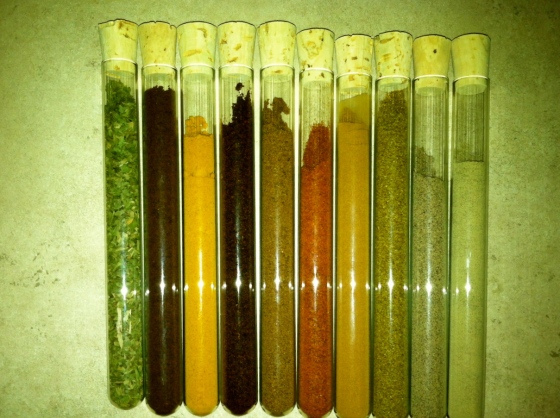
It seems organized, consolidated, and just dandy. But good grief, I’m a lady in a studio with absolutely no space. Especially for spices! The cabinets aren’t tall enough to just stack spices, plus let’s be real, I’m way too OCD to have  little containers all over the place. When cooking, you want spices readily available, and ideally in front of you. I also like the beautiful colors of spices… so  let’s get creative, and find a way to show em off, without taking over my (no joke) 2X3 foot kitchen. Sad. Anyway, here’s what I did – test tubes! I chose glass ones with cute corks – ten for $10 on Amazon. (And if you have Prime – please, please, use Prime, it only makes sense – free shipping!) Anyway, I bought these, and made a little paper filter to pour the spices in each tube. I’m storing them in an old spaghetti sauce jar, and currently figuring out a way to hang them on the wall. Or, I might just keep them in the jar. I kept the rest of the spice jars under the sink in a box until they run out – when I need to buy new spices I’ll buy from a shop that sells in bulk. This saves space AND it’s sustainable. I’m also starting to think of ways to use the old spice jars in ways other than bringing salad dressing to work.

Sidenote: If you don’t know the smells of spices, make sure you write their names somewhere on the tubes. Use a Sharpie marker or something. That could get things messy.

Woohoo! So much more space!

photo 4So bright and rich!

photo 1


photo

photoDefinitely fits better in this little kitchen. Love it.

Warmed millet, brussel sprout and carrot salad – with cranberries and walnuts

So this is the other recipe I made today which I found from Vegetarian Times magazine, in their October issue. The salad is super healthy, fiber-ous, filled with great vitamins, protein, and is really tasty. I added and changed a couple things around based on preference and what I had. I actually ended up doubling the recipe, my friend, who served as my sous chef, took home half to eat this week, too. Accompanied with the curried carrot soup, this is going to be a great meal. Filling but light. Looking forward to it. Again, this is vegan!


Millet Salad 

What You’ll Need – (for one batch)

3/4 lb of brussel sprouts

1/2 lb Carrots – I added carrots to the recipe, a nice autumn addition

olive oil

3/4 cup millet

2/3 cup chopped walnuts – you can toast them on top of your oven while the millet cooks

2/3 cup dried cranberries – you can chop or just leave them whole

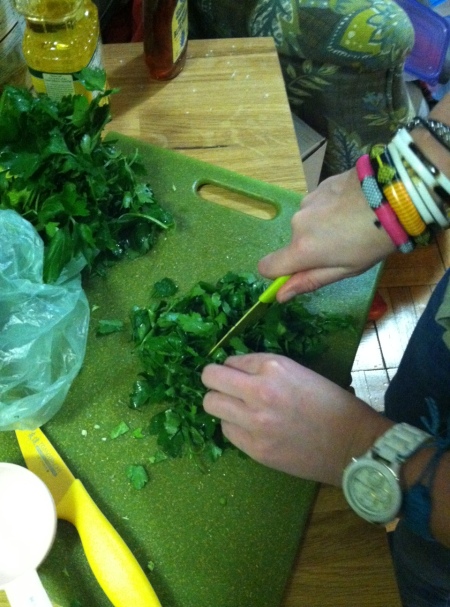
1/3 cup parsley – chop it up (I added more than the original recipe)

2 Tbs balsamic vinegar – I added a little more, base it off taste

1 Tbs maple syrup – I used agave nectar instead

Juice from 1/2 a large lemon, add a little zest too

Directions

Cut the brussel sprouts in 1/4’s. Cut up the carrots. Place both in a baking pan. Add olive oil, salt and pepper and some garlic. Mix it all up. Bake in 475 deg. oven. Depending on how much you are cooking and what kind of oven you have, cook for about 25 minutes. Check on them for a while, stir em around… I like cooking brussel sprouts until they are a little blackened and crunchy. The carrots should be soft. Mmm this alone is a tasty side dish to any meal.

While the veggies are cooking, put the millet in a frying pan, on medium, and let it cook for 6 minutes. Don’t add anything to the millet, let it brown, crackle a little. After it browns, add 2 cups of water – or veggie broth if you prefer. Let it boil, then turn down the heat, let it simmer, and then cover. Stir occasionally. Like quinoa, the millet will be ready when all of the water is absorbed.


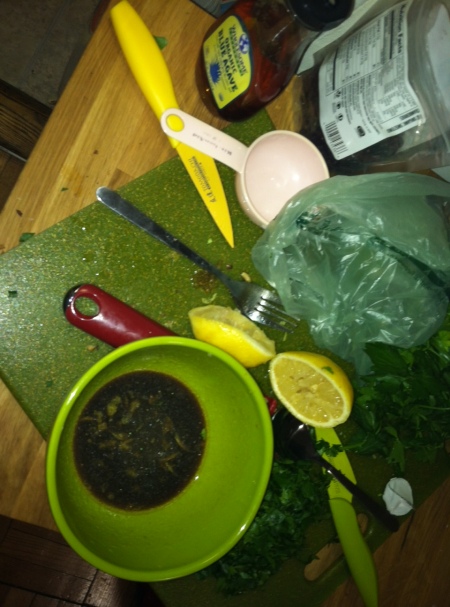
In the meantime, chop up the parsley and toast the walnuts. You’re also going to make the dressing. In a dish, add olive oil, lemon juice, lemon zest, the balsamic vinegar and the agave nectar. Maybe a little pepper. Stir it up, and taste it. I like the combination of the three flavors… lemony, sweet, and vinger. It’s a really nice dressing.

Check on the brussel spouts. Take them out of the oven, and let settle. Check on the millet. Once all of the water is absorbed, the millet will be fluffy. Take it off the stove, put in a bowl, and let it cool down a little.


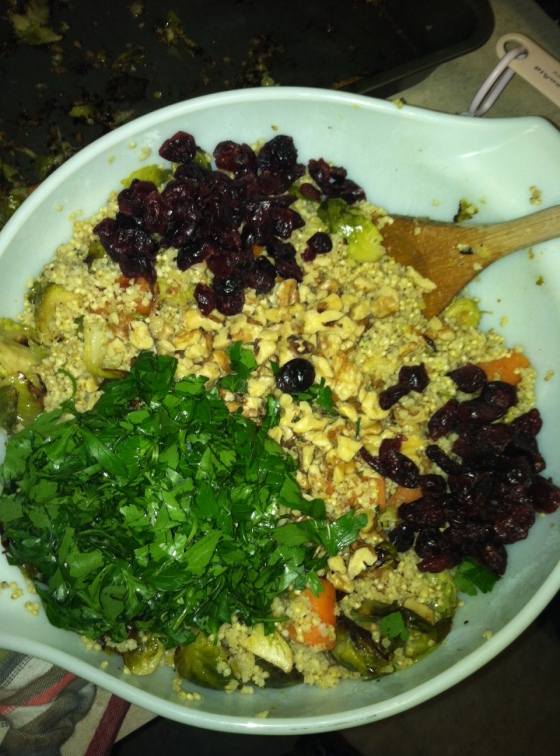
Now, fold the veggies into the millet. Then add the cranberries, walnuts, and parsley. Fold instead of stir, this will protect the softened vegetables.


Taste it! Maybe you like cranberries – add some more. Maybe you need more protein, add more walnuts. This meal was super inexpensive. Brussel sprouts are in season, cooked carrots are a popular fall dish, and most of the ingredients can be found in the large buckets at stores like Whole Foods – making sure you don’t waste or buy too much of anything. This is especially nice when living in a studio, where space is an issue. I love learning new recipes and making them my own. Like I mentioned in the last post, I think this will pair nicely with the curried carrot soup. I’m going to eat it warm, but it might also be nice cold. With the curried soup and the dressing on the millet, it would be interesting to try adding pan fried tofu to this. maybe cooked it in the lemon and agave nectar. Anyway, hope you try and enjoy it. Also, so nice to have lunch already made to fight your Monday blues. Enjoy!


Carrot Curry Soup. With pistachios. Boom.

Tonight I prepared two recipes I found in Vegetarian Magazine’s October Issue. I received a six month free gift earlier in late summer, and just received the October, November and December issues this week – Ha! Anyway, I went through them and cut out the recipes I was excited about. Today, I made the curried carrot soup with roasted pistachios AND this warm millet and brussel sprout salad. I’ll post that recipe next. I made both recipes for tonight’s dinner,  dinner tomorrow, and lunch on Tuesday (maybe I’ll freeze the rest)… with Thanksgiving on Thursday, I want something light and nutritious so I can eat a disgusting amount of stuffing, turkey, and pie. Not sure in what order. I. Can’t. Wait.

I changed some things around, based on what I had and how it tasted. Let me know your thoughts. Both recipes are vegan.

Curried Carrot Soup – 

What You’ll Need

Bag of carrots – the recipe called for grated, I just bought a bag of baby and chopped them up

2 large leeks – The grocery store ran out of leeks, so I bought a large white onion instead and chopped it up

4 cups of water – I didn’t want my soup that watery, so I only added two cups. (Note: maybe use vegetable broth, low sodium, next time)

handful of roasted pistachios – chop ’em, or don’t. they are a nice crunchy and salty garnish

olive oil

1/4 and 1/8 tsp. baking soda – not sure why the recipe adds this, but maybe it’s a thickening agent?

1/2 tsp. curry powder – what?!! In my humble opinion, that’s definitely not enough curry powder. I think I probably ended up tripling that… so add how much you want based on personal preference. I like spice. I also added cinnamon to mine.

Screw it – add cinnamon. It’s a nice, autumn-y touch. 🙂

Directions-

In a large pot, heat up the olive oil, probably like two splashes of it. Add the baking soda (Note: this feels like a science project) Then add the cut up carrots and onions. BOOM. Just kidding. Stir ’em up, close the pot, and let everything cook for like 15 minutes or less. Stir every couple minutes, and watch for the veggies to soften.

Add 2 cups water and curry powder. Let it cook a little. Then pour the soup into your blender (if you don’t have an immersion blender, ugh, sad face). Blend up, maybe add some black pepper.

Serve with pistachios on top. Maybe some raisins too, if you want something a little sweeter. If you aren’t going veggie, this might be nice with a savory, roasted rosemary chicken. Yum.

Seriously, this soup is SO easy, cheap, in season, and delicious. Carrots are one of the super veggies, spices are good for you system and your soul. And really, who doesn’t like pistachios?

Additionally, cook while listening to Mariah Carey, have football on mute, and you’ll have yourself a golden Sunday.


throw a Halloween party – on Nov. 1st.

While Hurricane Sandy did prevent my office from having our Halloween party on Tuesday, October 30th, we really can’t complain – our families and friends were safe, and our homes, unlike many in New York and New Jersey, were left in one piece.

That said – I wasn’t about to not have our Halloween party. Especially after buying decorations and makins for delightful food.

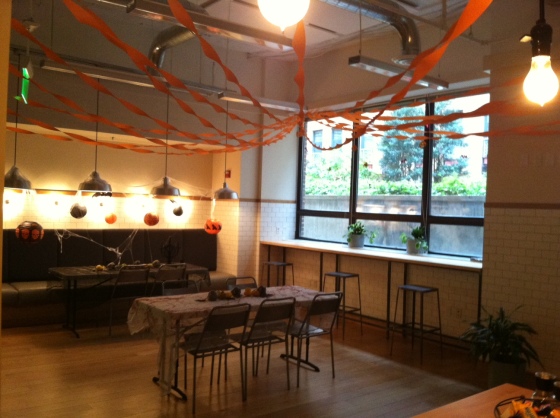
Here are a few pics for some party creation inspiration.

Make cupcakes. I prefer mini. They are cute. Little. Fun to decorate. Plus, large cupcakes go to waste and are messy to eat. This is also a decoration, so dress em up. People aren’t crazy about dessert at parties – they want something sustainable (pizza) to go with their beverage (whiskey). So make this fun, but don’t stress out!

Buy a mini cupcake tin. They also work for mini quiches, mini whoopi pies, cookies, and something bacon-wrapped – I’ll leave that to you to decide.

Next. Decorate. Mentioned in a previous post, I bought everything I needed from Amazon. com and Party City. Again – look for coupons online! You don’t need fancy noise making monsters or large cemetery displays to make your decorations rad. What I bought –

a couple bags of cob webs – make sure to spread em out!

black fall leaves

table netted cloths – black, blood-stained, and creepy

Something to hang – I chose paper lanterns and cheesy bats

This year, I found plastic wall decorations of zombies and creepy frames-these were fun and spooky

crepe paper. duh.

For food – I bought pizza and beer. Alright. I also bought a load of things to make for appetizers. Buy some apples, cheese, cured meat, and some veggies…make your own display tray. Cheaper than buying one, and this way you can decide what to include. Make sure to have veggie and vegan friendly options. Surprisingly, there are some options in the freezer aisle – spring rolls, falafel balls. Chips and guac. (a classic) Also – artichoke dip. Everyone loves it. And I know  you do, too.

**  Note – Yes. I would normally cook more items to share. But given this was a work party, after work, after the storm… time is everything. Choose your battles.

Another note – Make your spread pretty. Use bowls and plates to display everything. Bags of chips makes me think frat party. Ok for a Netflix Breaking Bad marathon. Not ok for a work event. Additionally, I always save the catering trays that places like Au Bon Pain use when catering. We work with them a lot for big meetings – wash em, reuse em. Win.

Lastly. I created a photo booth for folks to take pics in their costumes. Set the scene, and create a frame out of decorations that will be a nice backdrop. Check out what I’ve done here. Super cheap. Definitely worth it. For the photo booth – set up your laptop (I’m a MAC user), and use the photo booth app. You can change the settings to snap four pics in a row – hilarious.

That’s it! Have fun – don’t give yourself a lot of work. Set things up in advanced, and enjoy the party!

squash and KEEN-WA boats!

My mother passed this along via WebMD and I was immediately excited to try it. Check out the recipe, and see the step by step instructions below. Very simple, super easy, delicious, and vegan! In an effort to buy sustainable, local food, this recipe is great to make in the fall – Squash and pears are available locally, and the summer season of fresh herbs is just ending…

perfect and festive for fall

What you’ll need –

1. 1-2  kabocha squash – if you can’t find kabocha, you can try acorn

2. Quinoa! about 1 cup

3. 2 cups low sodium vegetable broth (I cook quinoa in it, more flavorful)

4. honey

5. olive oil

6. 2 1/2 cups fresh spinach

7. 1/2 cup fresh basil

8. a pear

9. lemon juice from one lemon

10. a shallot

11. cardamom

12. salt and pepper

First, cute the squash in half, and then pull out the seeds. Make two parts honey, one part olive oil, and spread it around the open part of the squash. Lay them open-part down, on a foil-lined baking sheet. Bake for about 20 minutes at 425 degs.

While the squash is baking, put two cups veg broth, and one cup quinoa in a frying pan. Cook on high til it boils, stir, and let simmer – with it covered – for about 10-15 mins. Don’t let it stick to the bottom or over cook. It will fluff when done.

veggie broth adds nice flavor when cooking quinoa

After the squash are cooked, turn em the other way, open side up, maybe add a little more honey, some pepper, and cook for another 15-20 minutes. They’ll be done when they look a little caramelized on top. 

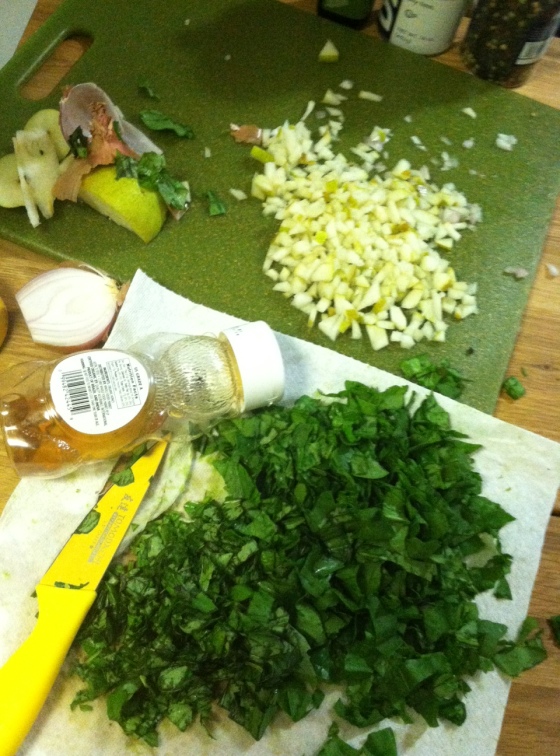
While the squash continue to cook, cut up the spinach, pear, and basil. In a bowl, combine the quinoa, lemon juice, minced up shallots (uncooked), and cardamom – to taste. Let the quinoa cool down a bit before adding the greens.

Add the basil, spinach, and pear to the quinoa. Add salt and pepper to taste.

When the squash are done cooking, let them set for just a second – they will be soft, and could brake open a little if you handle too quickly. Lastly, put the quinoa mixture in the squash, and serve.

I think this would be paired quite nicely with a piece of salmon, or rosemary chicken and garlic mashed potatoes. Great meal if you were hosting a dinner party. Maybe pumpkin-something for dessert. For one person, or two, these alone are great, and very filling… Eat the extra quinoa mixture cold for lunch, or cook up another squash the next day.

Enjoy, and happy fall!