They’re charming. They’re horribly painted, with maybe marble here or there. They’re a free shelf. A fake bed frame. Character. Pretend or real. Maybe 120 years old. In any case, they’re here to stay, and you gotta figure out what to do with it. Here’s what we did with ours. Print is from the National Gallery of Australia. Bottles are from a flea market + and an old kale juice pressed. Salmon pot from Target. Books, sadly, and most likely, Amazon. Ooh lala.
Category Archives: DIY
how to recycle your wedding decor at home
I got married! And it was the coolest thing ever! (and yes, I’ll write some more on that soon!)
But now, the sad part, is even the honeymoon is over. After months of planning, rearranging table settings, writing vows, and choosing flowers, glasses have been cheers’d, rings have been exchanged, and a killer honeymoon has been taken.
Ok, so it’s not really over. Our life together has just begun, ya ya ya…. but what about the decor?!!!
Between the wedding weekend and our honeymoon, we had an in-between day that allowed us to do laundry and re-pack bags. We traveled from the wedding (in San Diego), back to Brooklyn, washed clothes, repacked swimsuits, and quickly prepped … yes, in order to relax 🙂 But before we went, I hung up a few of the wedding flowers from our ceremony site in the closet to see if I could get them to dry nicely.
The flowers were from our beautiful, perfect, alter (thank you Organic Elements!) Mixing the culture of my – husband!- and I, we incorporated succulents from southern California and Arizona, and proteas, gum nuts, and kangaroo paw from beautiful Australia. Organic Elements made the ceremony site uniquely us. And I wanted a way to keep that with us.
So we tried our luck with drying, and I hung the flowers from a hanger in our closet (maybe it’s an old wive’s tale, but I think that’s how you do it!:
That was four days ago. We just got home, and before unpacking, I checked on them to see how it went. I then proceeded to grab a couple nails, a hammer, the leftover twine and gold spray painted mini clothes pins we used at the wedding (stay tuned!), and here’s how it turned out. Now, we have memories from our wedding that we can look at each day we wake up. I’m one lucky lady.
Paper Source’s succulent wreath (also known as, arts and crafts hour for adults)
Every once in a while, it’s nice to do something crafty. And it doesn’t have to be 100% unique or handmade. Sometimes, it’s nice to just rip out the cuts a store bought project has factory made, build some flowers, and call it a day.
We went to Paper Source this afternoon for a birthday card, and for an extra $25, I came out with this. Ok, we bought a couple other things, too. Man I love that store.
7 Things (I think) Every Home Needs
I began writing this on the first day of spring. It was snowing. Which means that for the majority of the last — FOUR MONTHS — I’ve stayed inside, hiding from the hideous winter elements. Which is hilarious because that means that 1/3 of the year I’m staying inside a tiny space while living in a huge, ridiculously amazing city. So, I can’t be Carrie and keep my shoes in the oven. I can’t live in an ugly box that I pay too much for, only to be outside and enjoying the world every day. It means I need a space that’s warm, organized, comfortable – home.
So here’s my first list. If I were to move ANYWHERE, especially in a city, these are the items I know I couldn’t live without. Maybe because of how they look, mostly because of their practicality (even if just for my mental health), take a look, and let me know what you think.
1. Speakers! Even if you can hear your cell phone on vibrate in each part of your house, that doesn’t mean you don’t need speakers. Music sounds better with them. Bravo TV arguments will intensify. And, no, silent discos weren’t invented for single dance parties at home. I have these Harman Kardon ones, and they’ve lasted forever. A bit pricey, but for $170 they look nice, are clean, won’t add clutter, and sound great.
2. LIGHTING. Even if your apartment has ceiling lamps (lucky), you still should find some table and floor lamps, or more overhead lights to create a warm space that can help define areas, corners, and cubbies. I found this great floor lamp at the Brooklyn Flea (the best!) that I use as a reading light in our living room. The table lamp was also a favorite find from Eastern Market in DC. Helpful hint: Buy a good lightbulb. It WILL pay off. I prefer the softer lighting bulbs like the GE White Hybrid Halogen. They’re energy smart and eco friendly! $12 each but they really do last forever.
3. Plants. Please don’t say you can’t because you just kill them. That’s why succulents and cacti were created. Plants keep your space bright, beautiful, feeling clean… and some even clean your air (yes, fact). Add a couple, take them to your new home, and they’ll make any space look good. It’s genuinely the easiest, cheapest way to decorate. I love this Target Home find, a cement planter that could easily (stupidly) sell for $50, but was $13. Not everything needs to be a Pinterest DIY, where your supplies cost an obscene amount of money.
4. Extra Seating! I love having extra chairs around the house to make sure that if we do have a lot of guests around, everyone has somewhere to sit. We have a wood folding one that I stash behind the closet, a couple cute side chairs… Small chairs are super easy store and move apartments with. They can have a pattern, texture, unique wood… It’s a simple way to add decor to a space without feeling too “done”, and they don’t clutter. I love our West Elm John Vogel chair in charcoal. The second one I bought from a previous tenant at an apartment I used to live in.
5. A good (electric) tea kettle. This seems random, but after living with an Australian, I’ve learned the power and beauty of a good tea kettle. Beyond making a cup of tea, an electric tea kettle will boil water for your pasta, french press coffee, rice, potatoes… EVERYTHING. It’s so much quicker than a stove top kettle, and I literally use it every day. I love this Capresso clear glass kettle. Buy it from Bed Bath and Beyond with a 20% off coupon, and it’s $50. Yes, you can get a cheap plastic one, but I prefer glass because you’re not ingesting toxins every time you heat the plastic, it’s much nicer to look at, and easier to clean because the kettle is separate from the electric plug. It’s also a good, small size that won’t take up too much space in your teeny kitchen.
6. A magic bullet. If you have a teeny apartment, this is a LIFE SAVER. Beyond making that delicious kale juice we all pretend to love, you can also blend soups, yogurts, even use it as a food processor. It’s SO easy to clean, and is much smaller than a blender. I love our Nutri Bullet especially because I do think it breaks food down better than the other brands. Again, use a 20% coupon ala Bed, Bath & Beyond and buy it. The steel design also makes for a nicer looking appliance.
7. STORAGE. I mean, obviously, right? That is the dream. But you can do storage right, and then you can do storage wrong. For example, do you need your winter coat in your closet, taking up space all year long? No. In fact, it doesn’t need to ever be in your closet. Get a hook, hang it by your door for four months (this also allows it to dry properly). Done. And when you don’t use it, buy these ridiculously smart (and REUSABLE) Ziploc vacuum hanging bags, put your stuff in it, and then either store them in the back of your closet or better yet, under your bed. They keep stuff clean, won’t ruin the filling of your coat, and pro tip: You don’t need a vaccuum to suck out the air. You can literally sit on em, and push out the air (like rolling a sleeping bag), until all the air is out. Fact. (No personal picture because sadly we are still using our coats. :P)
In addition, because we really no longer need DVD players, DVDs, or really any TV equipment beyond a ChromeCast stick, use your “entertainment center” for other things! Serving dishes? A “linen closet”? A mini hardware tool box with your tools, extra lightbulbs and batteries? This is such an easy way to keep organized and clean. (You’ll never know what’s in our “entertainment center”. Another Eastern Market find:
That’s all I’ve got. What are your “not living without” items? Share em in the comments!
How to hang a planter ala the ceiling (without Task Rabbit, a man, or breaking something).
TVs, ceiling lamps, hanging plants are DAUNTING. If not hung properly, they’ll crash and break and probably hurt someone in the process. I’m not denying I’ve learned this from experience. So, there’s limited space in our new apartment, which is why we (I) decided to follow the trend and hang a couple plants! I found this cool (and cheap!) $10 planter at Ikea. It’s simply, clean… and when I have time I may just paint some fun stripes on it.
To hang it, here’s what I bought:
1. Instead of a rope or rod, I liked the idea of hanging the planter from a gold chain. So for $2, I bought 2 feet of silver chain from our local lighting store. Then, I sprayed painted it gold 🙂 You can also sometimes find already sprayed gold chains. Use a set of pliers to make it the length you prefer by removing excess links. I wanted out planter lower than usual so I could see the flowers better, water them easier, give them good sun, and break up some of the empty space.
2. a proper SWAG hook kit — you can get these at your local hardware store for $1.50 — Ace Hardware! ( I bought a gold one to match) Make sure it includes a spring toggle wing and screw bolt. They usually come in two packs.
3. You’ll need a drill to make a hole to push the toggle and screw into the ceiling. Make sure the drill bit used is the same size as the bolt. The one I bought required a 3/16 in. bit. Also, know the material you are drilling into – if it’s cement or brick you’ll need a different type of drill bit. Check with your hardware store if you’re unsure.
How to Hang it
1. Drill a hole into the desired spot. Again, make sure you are using the correct bit, it matches the material you’re drilling into, and it’s the same size as the bolt.
2. Attach the hook on one side of the bolt. On the other side, screw the bolt into the hole between each side of the spring toggle. Make sure the toggle isn’t screwed on too far, as it needs to be able to close completely to get through the drilled hole.
3. After drilling the hole, you need to push the entire device into the hole — to the other side of the wall — except, of course, the hook. Once you do this, the spring toggle will pop back open – SUCCESS!
4. Once you’ve popped it in, pull down snuggly on the hook, and begin to turn the hook clockwise. This will screw the spring toggle closer to the hook (from inside the wall) so that all that is between the hook and the toggle is the wall – this will prevent the entire hook from falling out and ripping the ceiling on the way down. Whoop!
5. Then, hang yo shit and make it look good. (Who needs Task Rabbit anymore?) Daffodils and lavender purchased at Trader Joes! $5 each, what a deal. (Our local nursery is still closed for winter — on the first day of spring — and yes it’s about to snow. ugh).
Protip: Where’s all the water gonna drain? Below the plants, I placed a bunch of pebbles to help hold drained water. This will prevent your flowers from drowning. You can even buy pebbles at Ikea for like a buck.
add a little lime to your powder room (and while you’re at it, get rid of that mold! )
The walls in our apartment are all clean white. There’s original molding and glass, simply, they’re beautiful. Growing up in a house where the walls were always changing colors, and even the ceiling was a “white lime” color, I’ve learned to appreciate the spaciousness that white creates, especially in a small New York apartment. That said, you can take the girl out of the eccentric home, but you can’t take the eccentric home out of the girl.
More so, I wanted to see what we plausibly could get away with in regards to rental rights. Because after moving in two sofas, we’re never leaving.
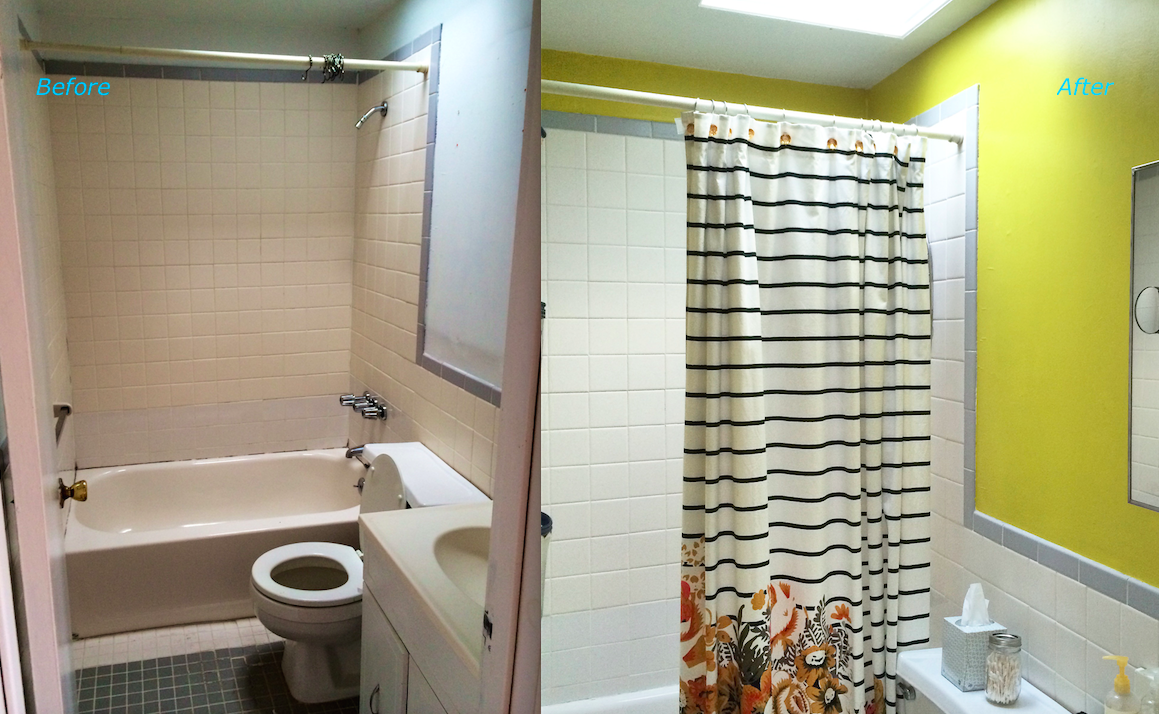
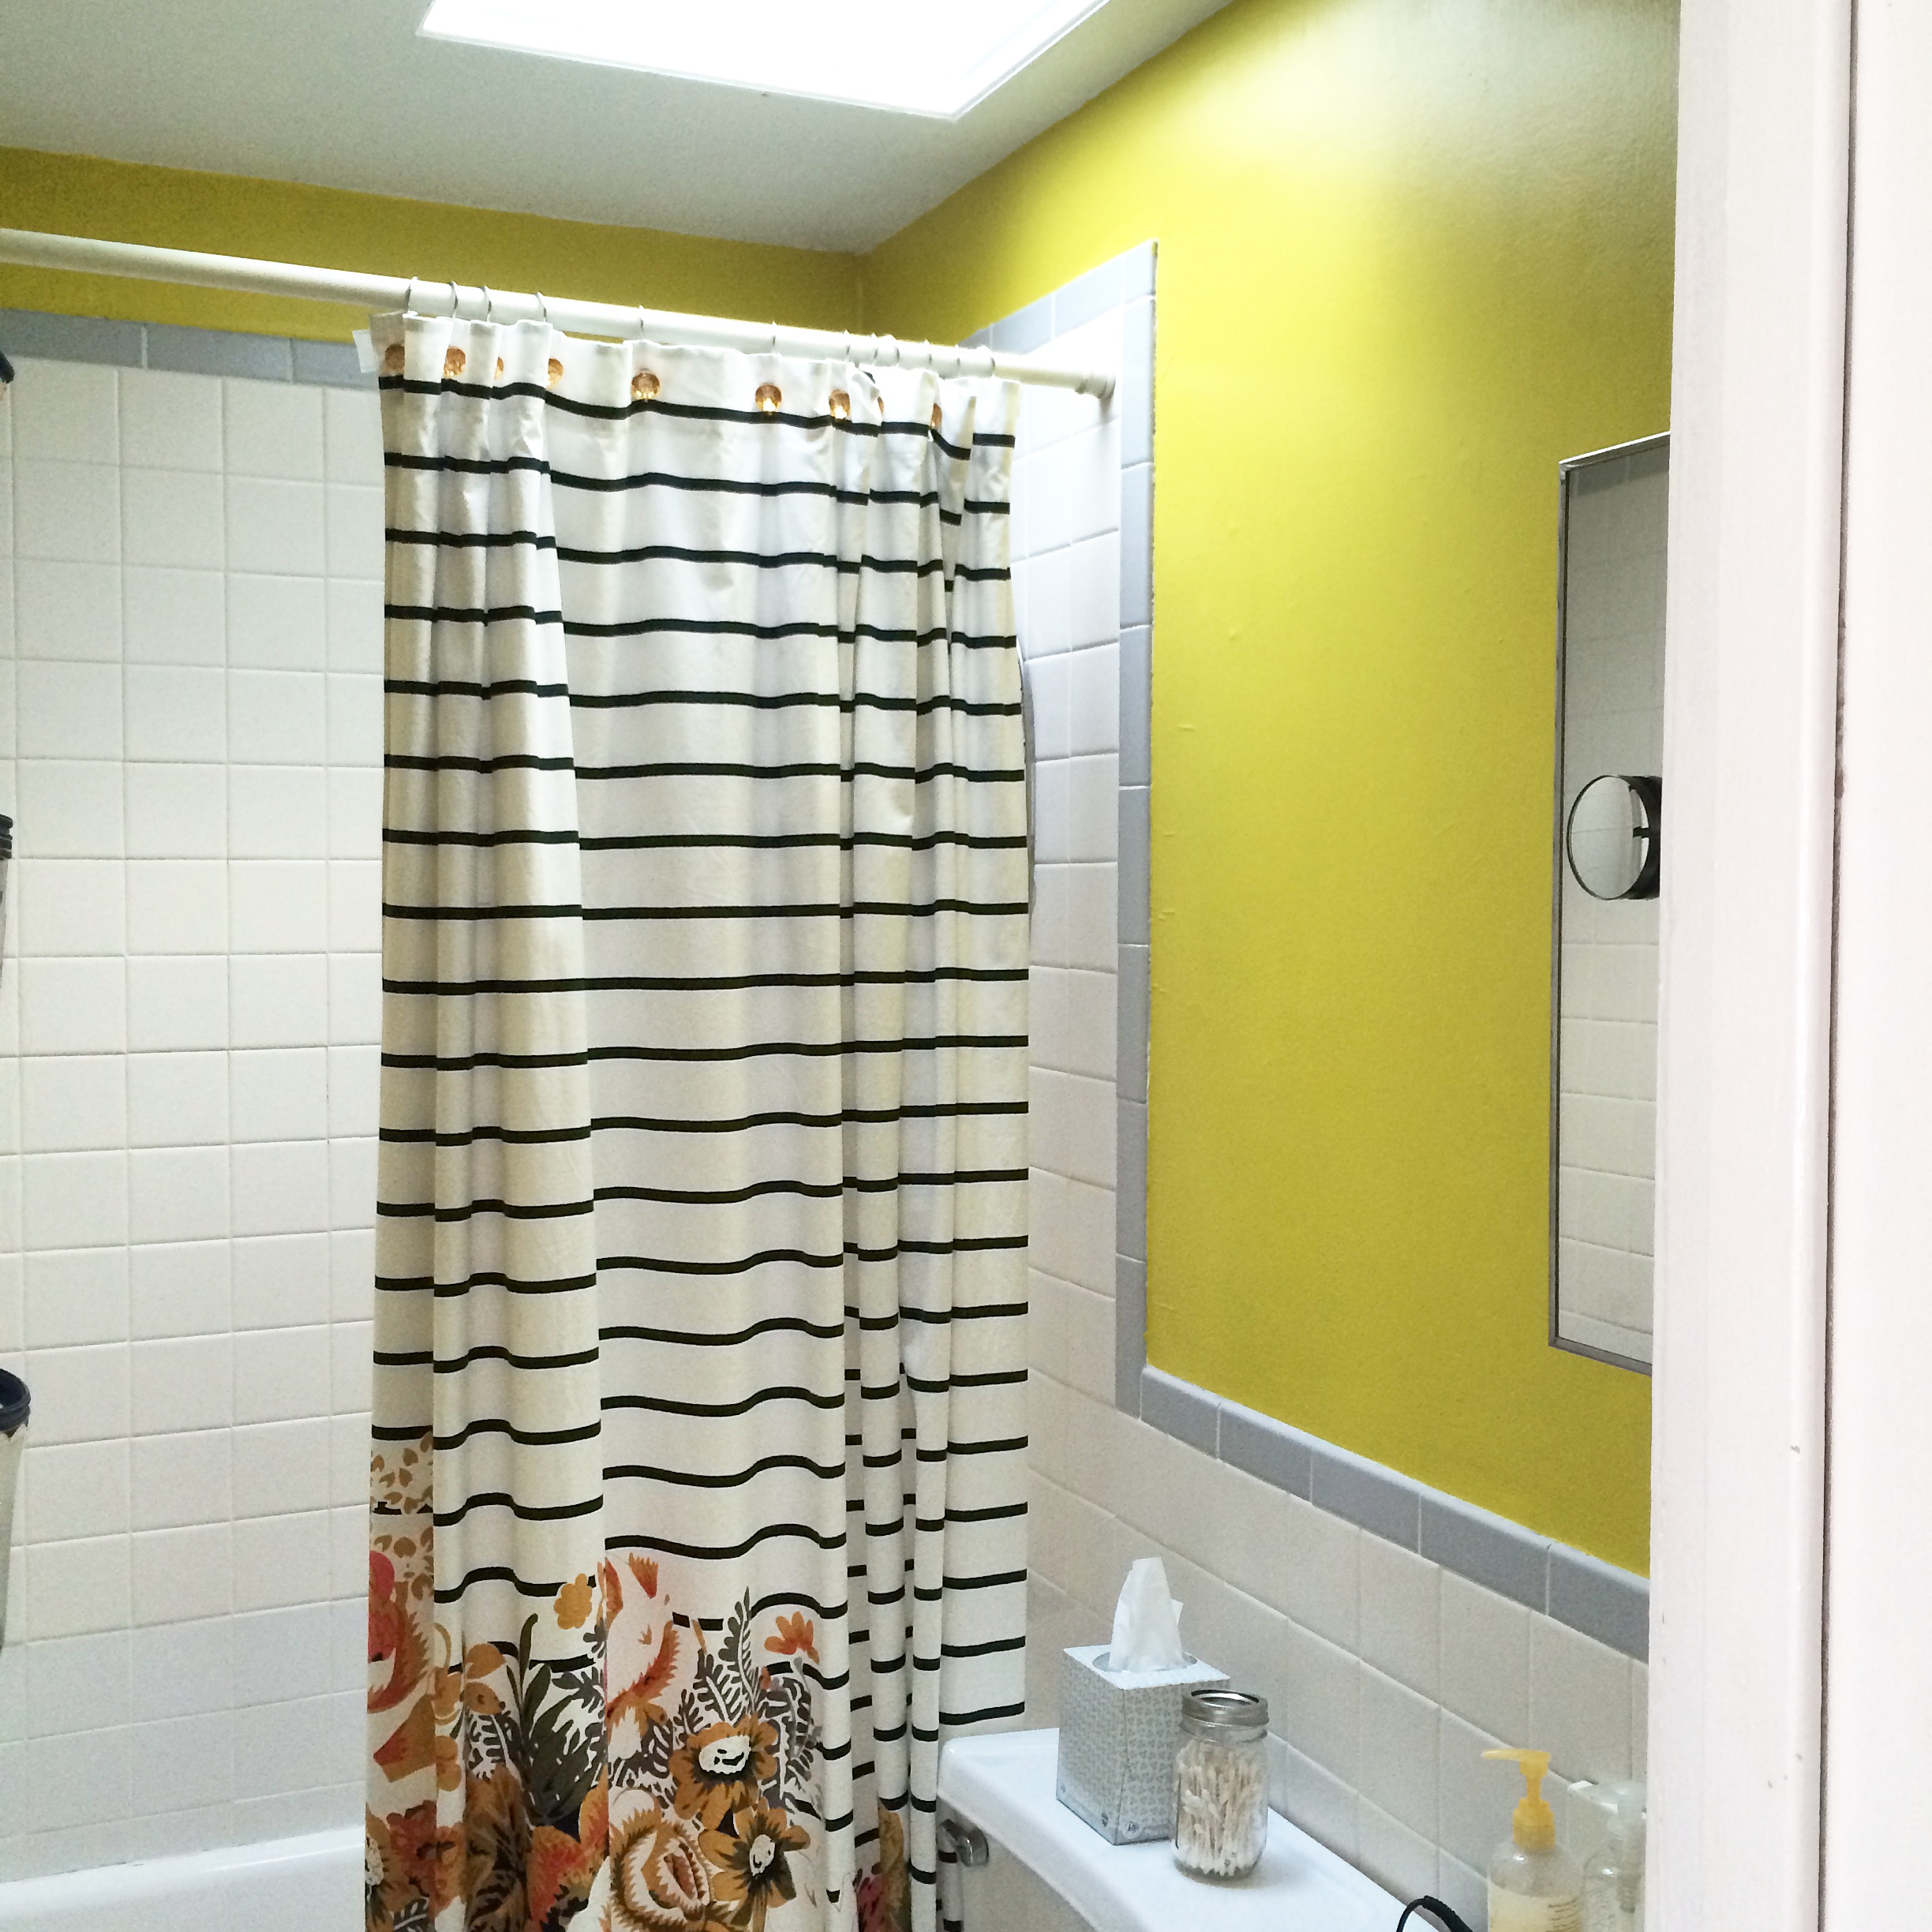
Our bathroom has a great sunlight, but other than that, it’s small. It’s mixed in white tiles where over time old ones must have broken off. There’s layers and layers of old paint, grey and white cements covering the tiles in illogical and messy ways. There’s also mold. A lot of mold. To top it off, the most recent paint job was one layer of white, so poorly painted you could see the lilac purple underneath.
I mean, it’s gross.
Originally I wanted to paint it a dark slate grey/blue. But who wants to poo in not only a small room, but a dark and small room? So we nixed that, and I went to, obviously, my favorite color in the world — chartreuse.
Adding a lick of paint to your walls not only brightens the space, it cleans it up, makes things feel fresh, and is an inexpensive way to redecorate.
What You’ll Need (to clean, caulk, and paint your poo room) —
1. a flat head screw driver
2. paint. our bathroom is teeny tiny, and the tiles cover a lot of the walls, so we only needed 1/4 gallon. I recommend making sure the paint is mold proof and bathroom friendly. We used a satin finish — not shiny, but not chalky-matte.
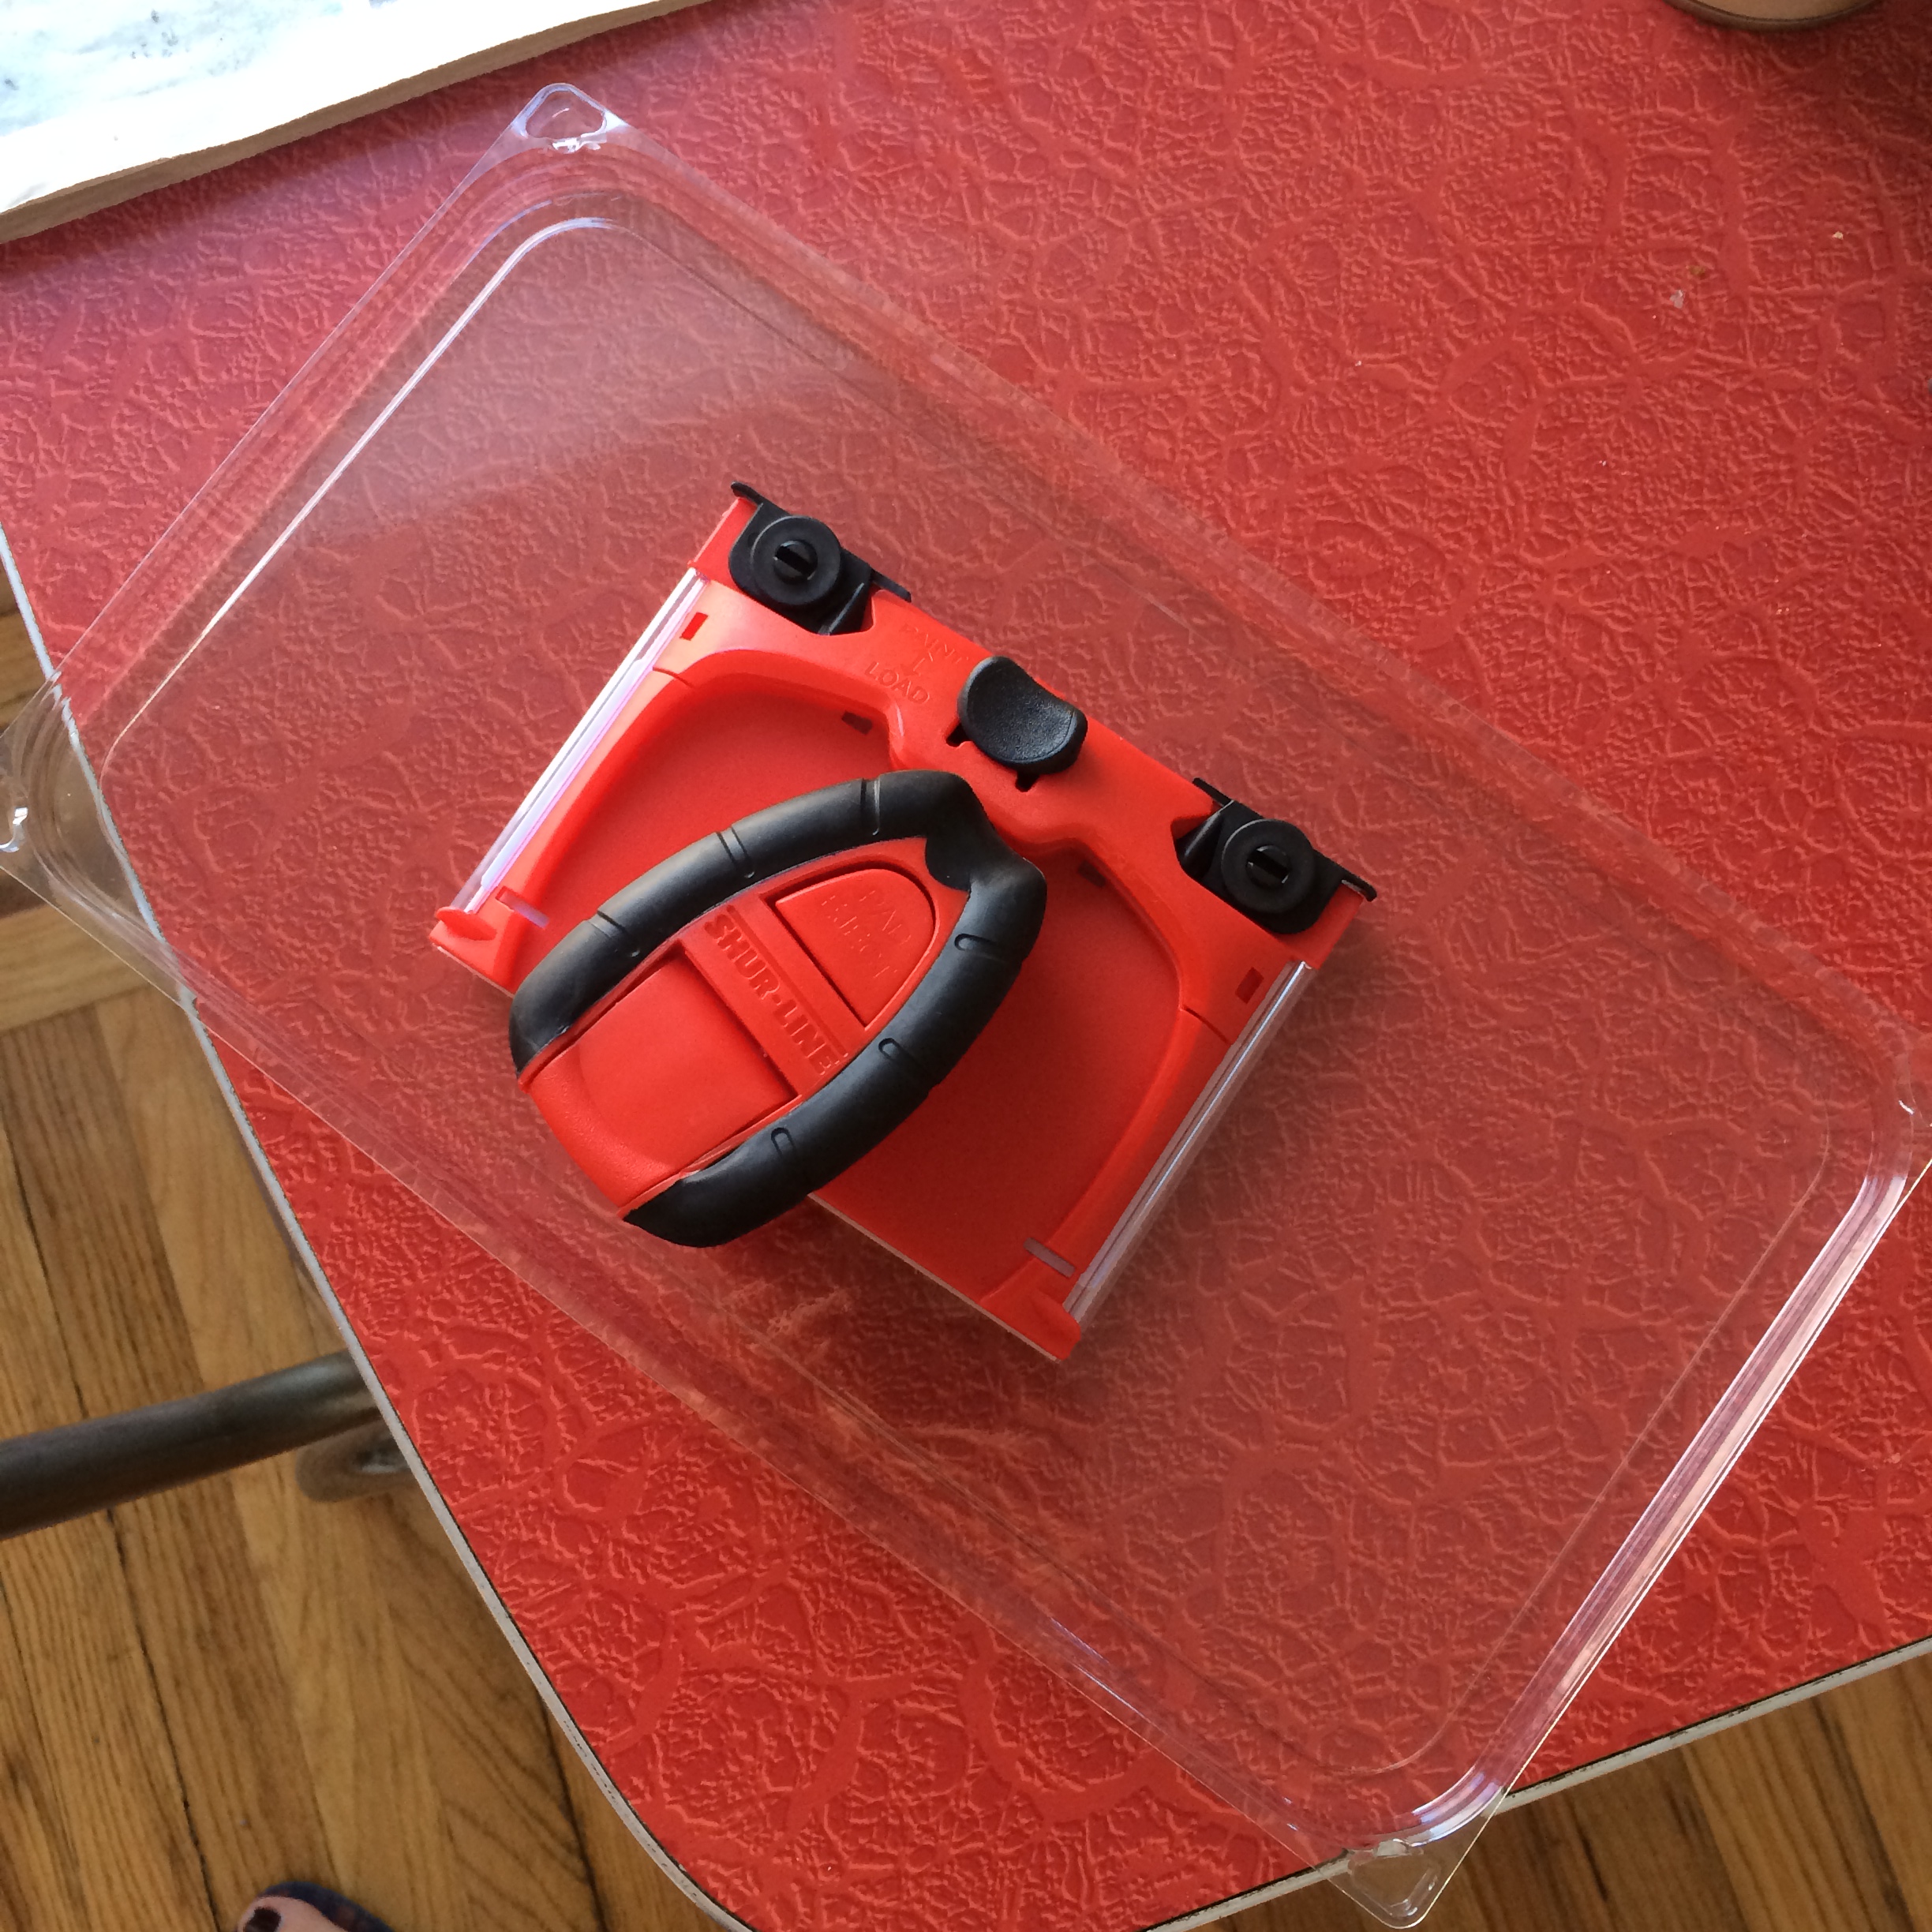
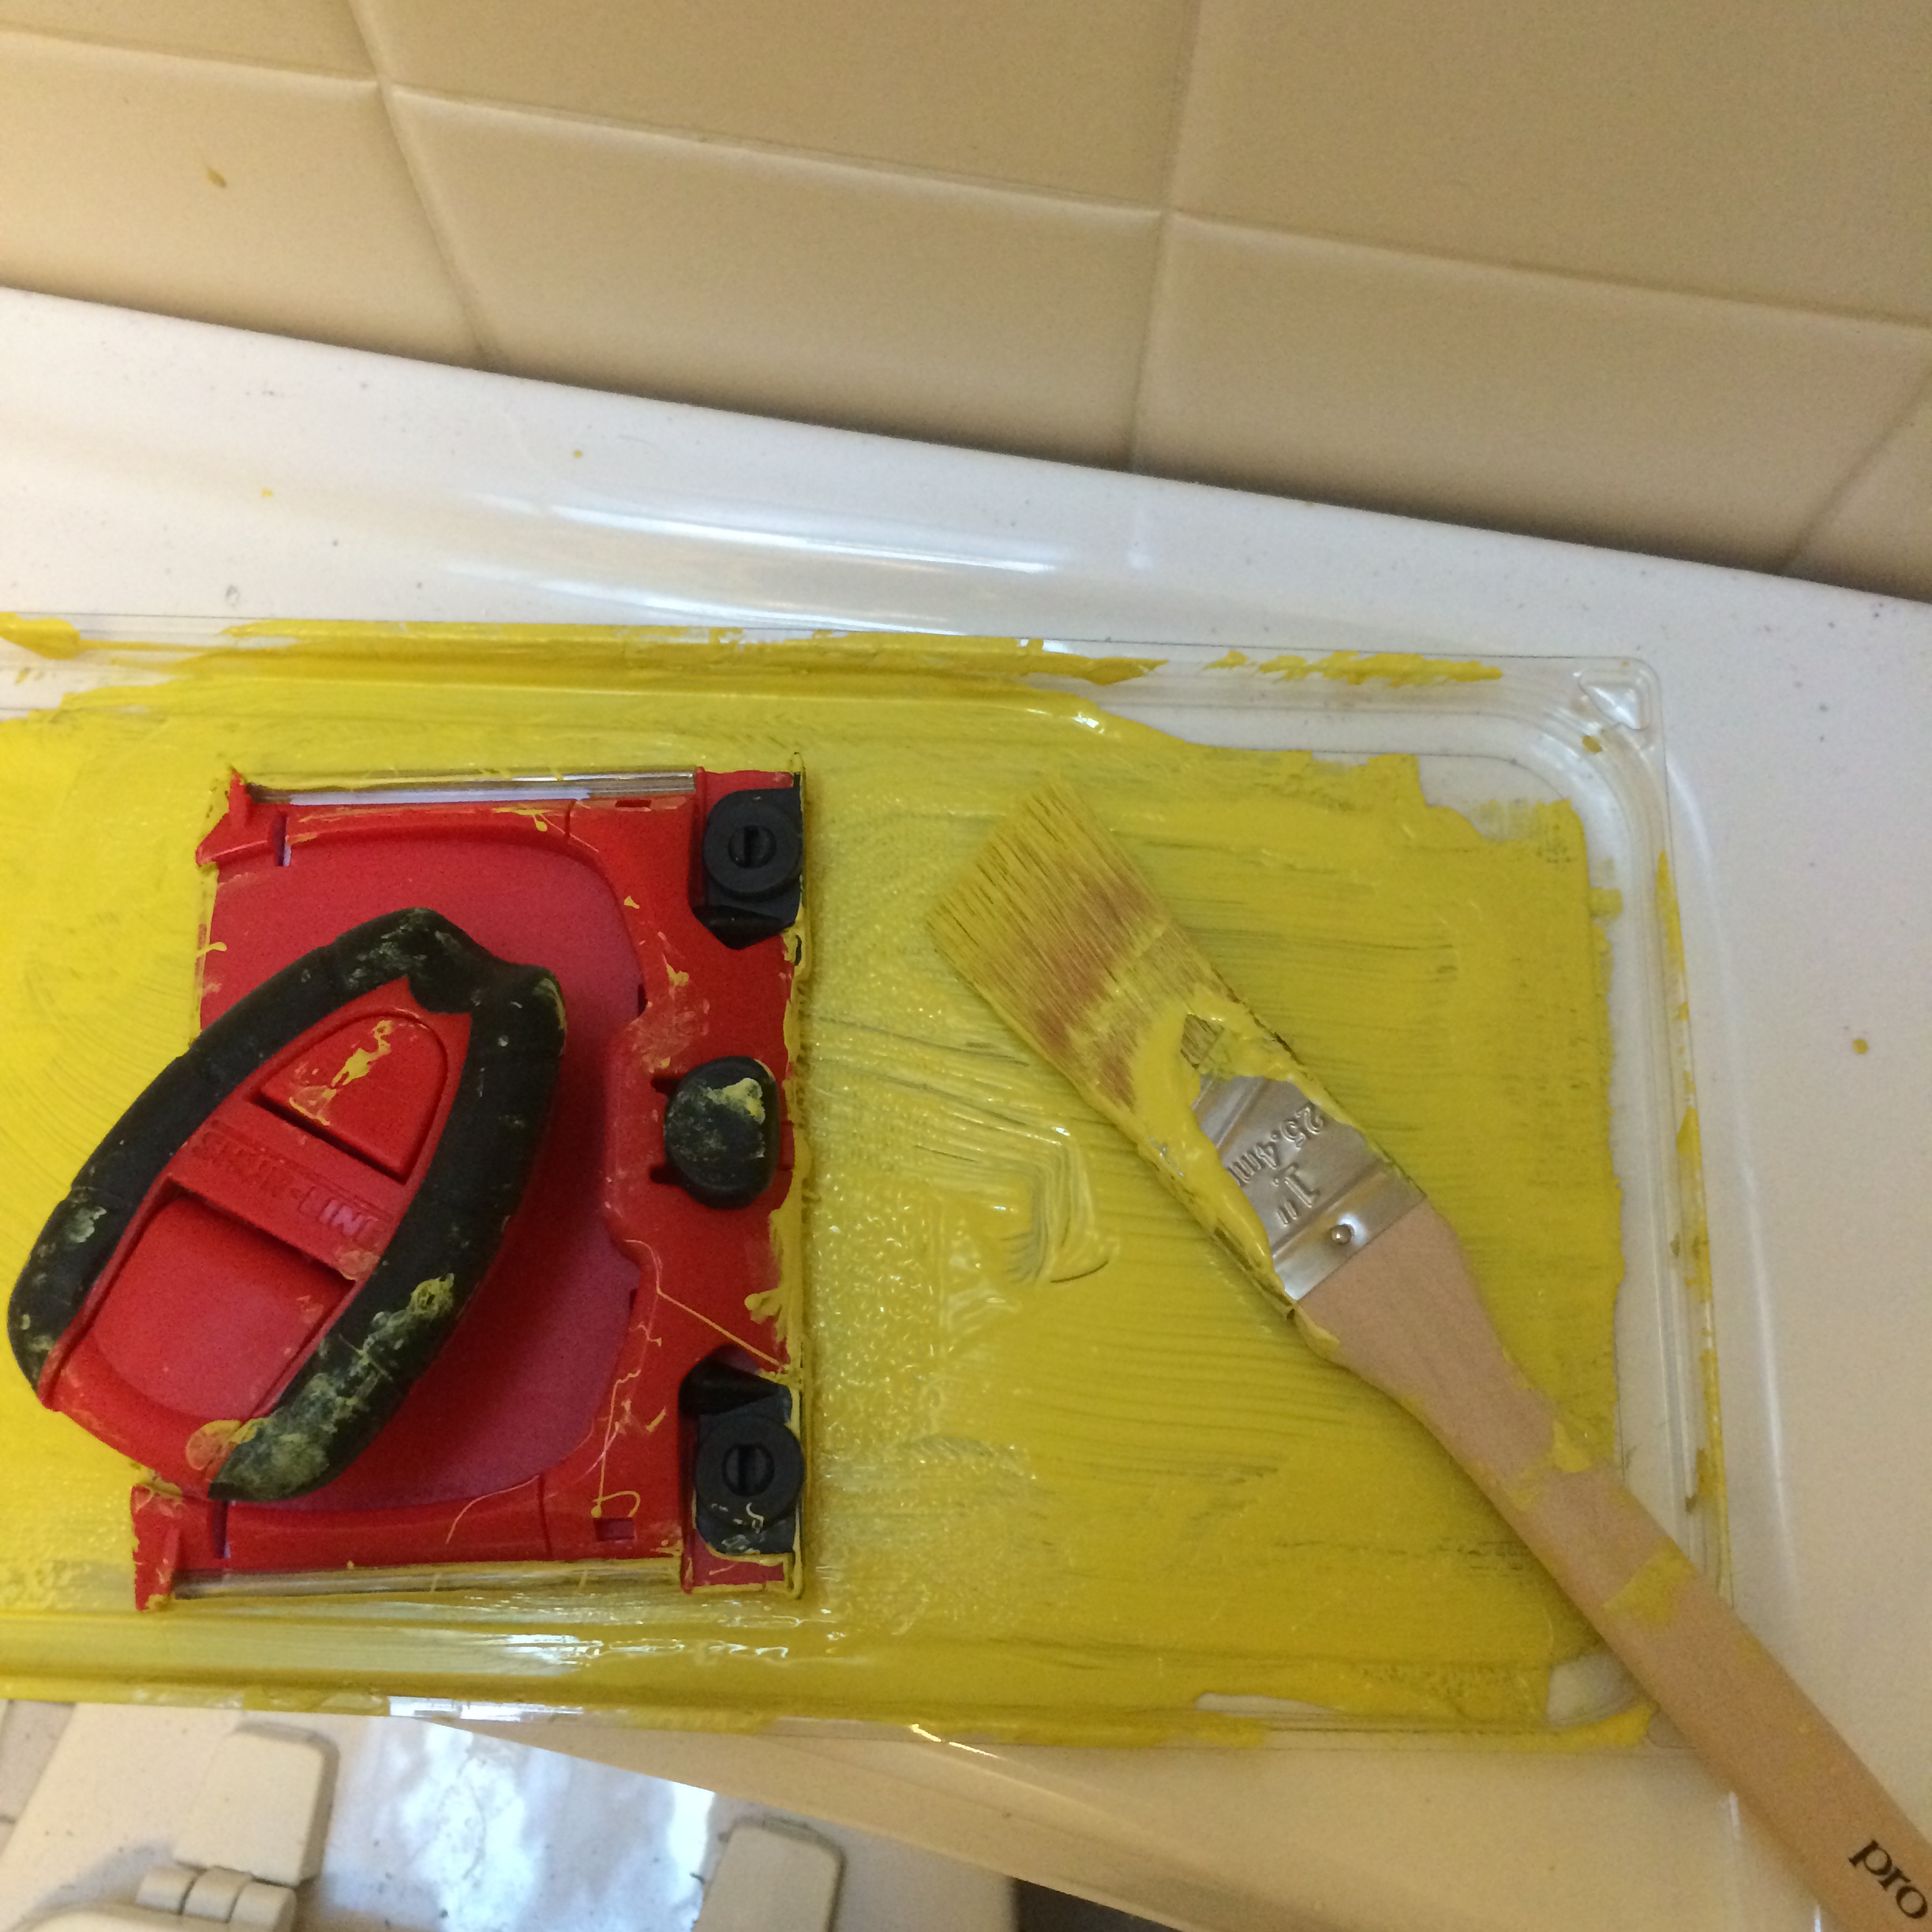
3. a couple paint brushes. I used a 1″ one that I already had, as well as the brush I swear by, the shur line paint edger — it’s smooth, and helps with painting corners and edges.
4. painter’s tape.
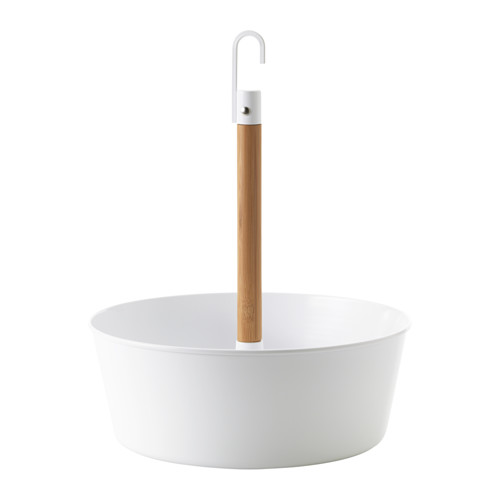
5. something to place the paint in. Incidentally, the plastic cover to a container of Swiffer mops works quite well (just make sure you don’t need to use it again!)
6. maybe a ladder, or you can do the little dance I did while painting on the edge of the tub.
7. brush or vacuum and cleaning all-purpose spray. I like Method.
8. Spatula and wall putty – in case you have old holes in the walls. Maybe some light sand paper.
9. bathroom caulk. This is different from caulk I used to cover mouse holes. But the practice is the same, so if you’re unsure how to use caulk, read this post.
Directions
Before you paint, clean up the space. wash the walls down — there’s definitely a layer of grime and water from showering, which also means gross bacteria that you don’t want under a new coat of paint. Wash down everything including all the tiles with a cleaning spay.
For us, there were holes all over the walls. And awkwardly placed HUGE screws, that of course were painted over from before. We patched them up, too. Once dried, I sanded them down just a bit with a light sandpaper to make sure the walls were smooth.
The bathroom tiles had old layers of paint and cement and caulk EVERYWHERE. Use a flat head screw driver to pull and scrape it up and off. Be careful to not make a hole into the wall. In addition, this is a great time to recaulk your tub. Where the caulk was once white and water proof, it’s now black (mold) and gross. Use the flat head to scrape out the mold. Once you’ve scraped out everything nasty, make sure it’s clean and dry, and then use the caulk tube, and slowly squeeze out the paste. It will need 24 hours to dry, so don’t do this right after working out (note to self).
Before the paint pic, check out this beauty. After pic of recaulking the tub. Hallelujah, I’m not getting some weird growth on my feet!
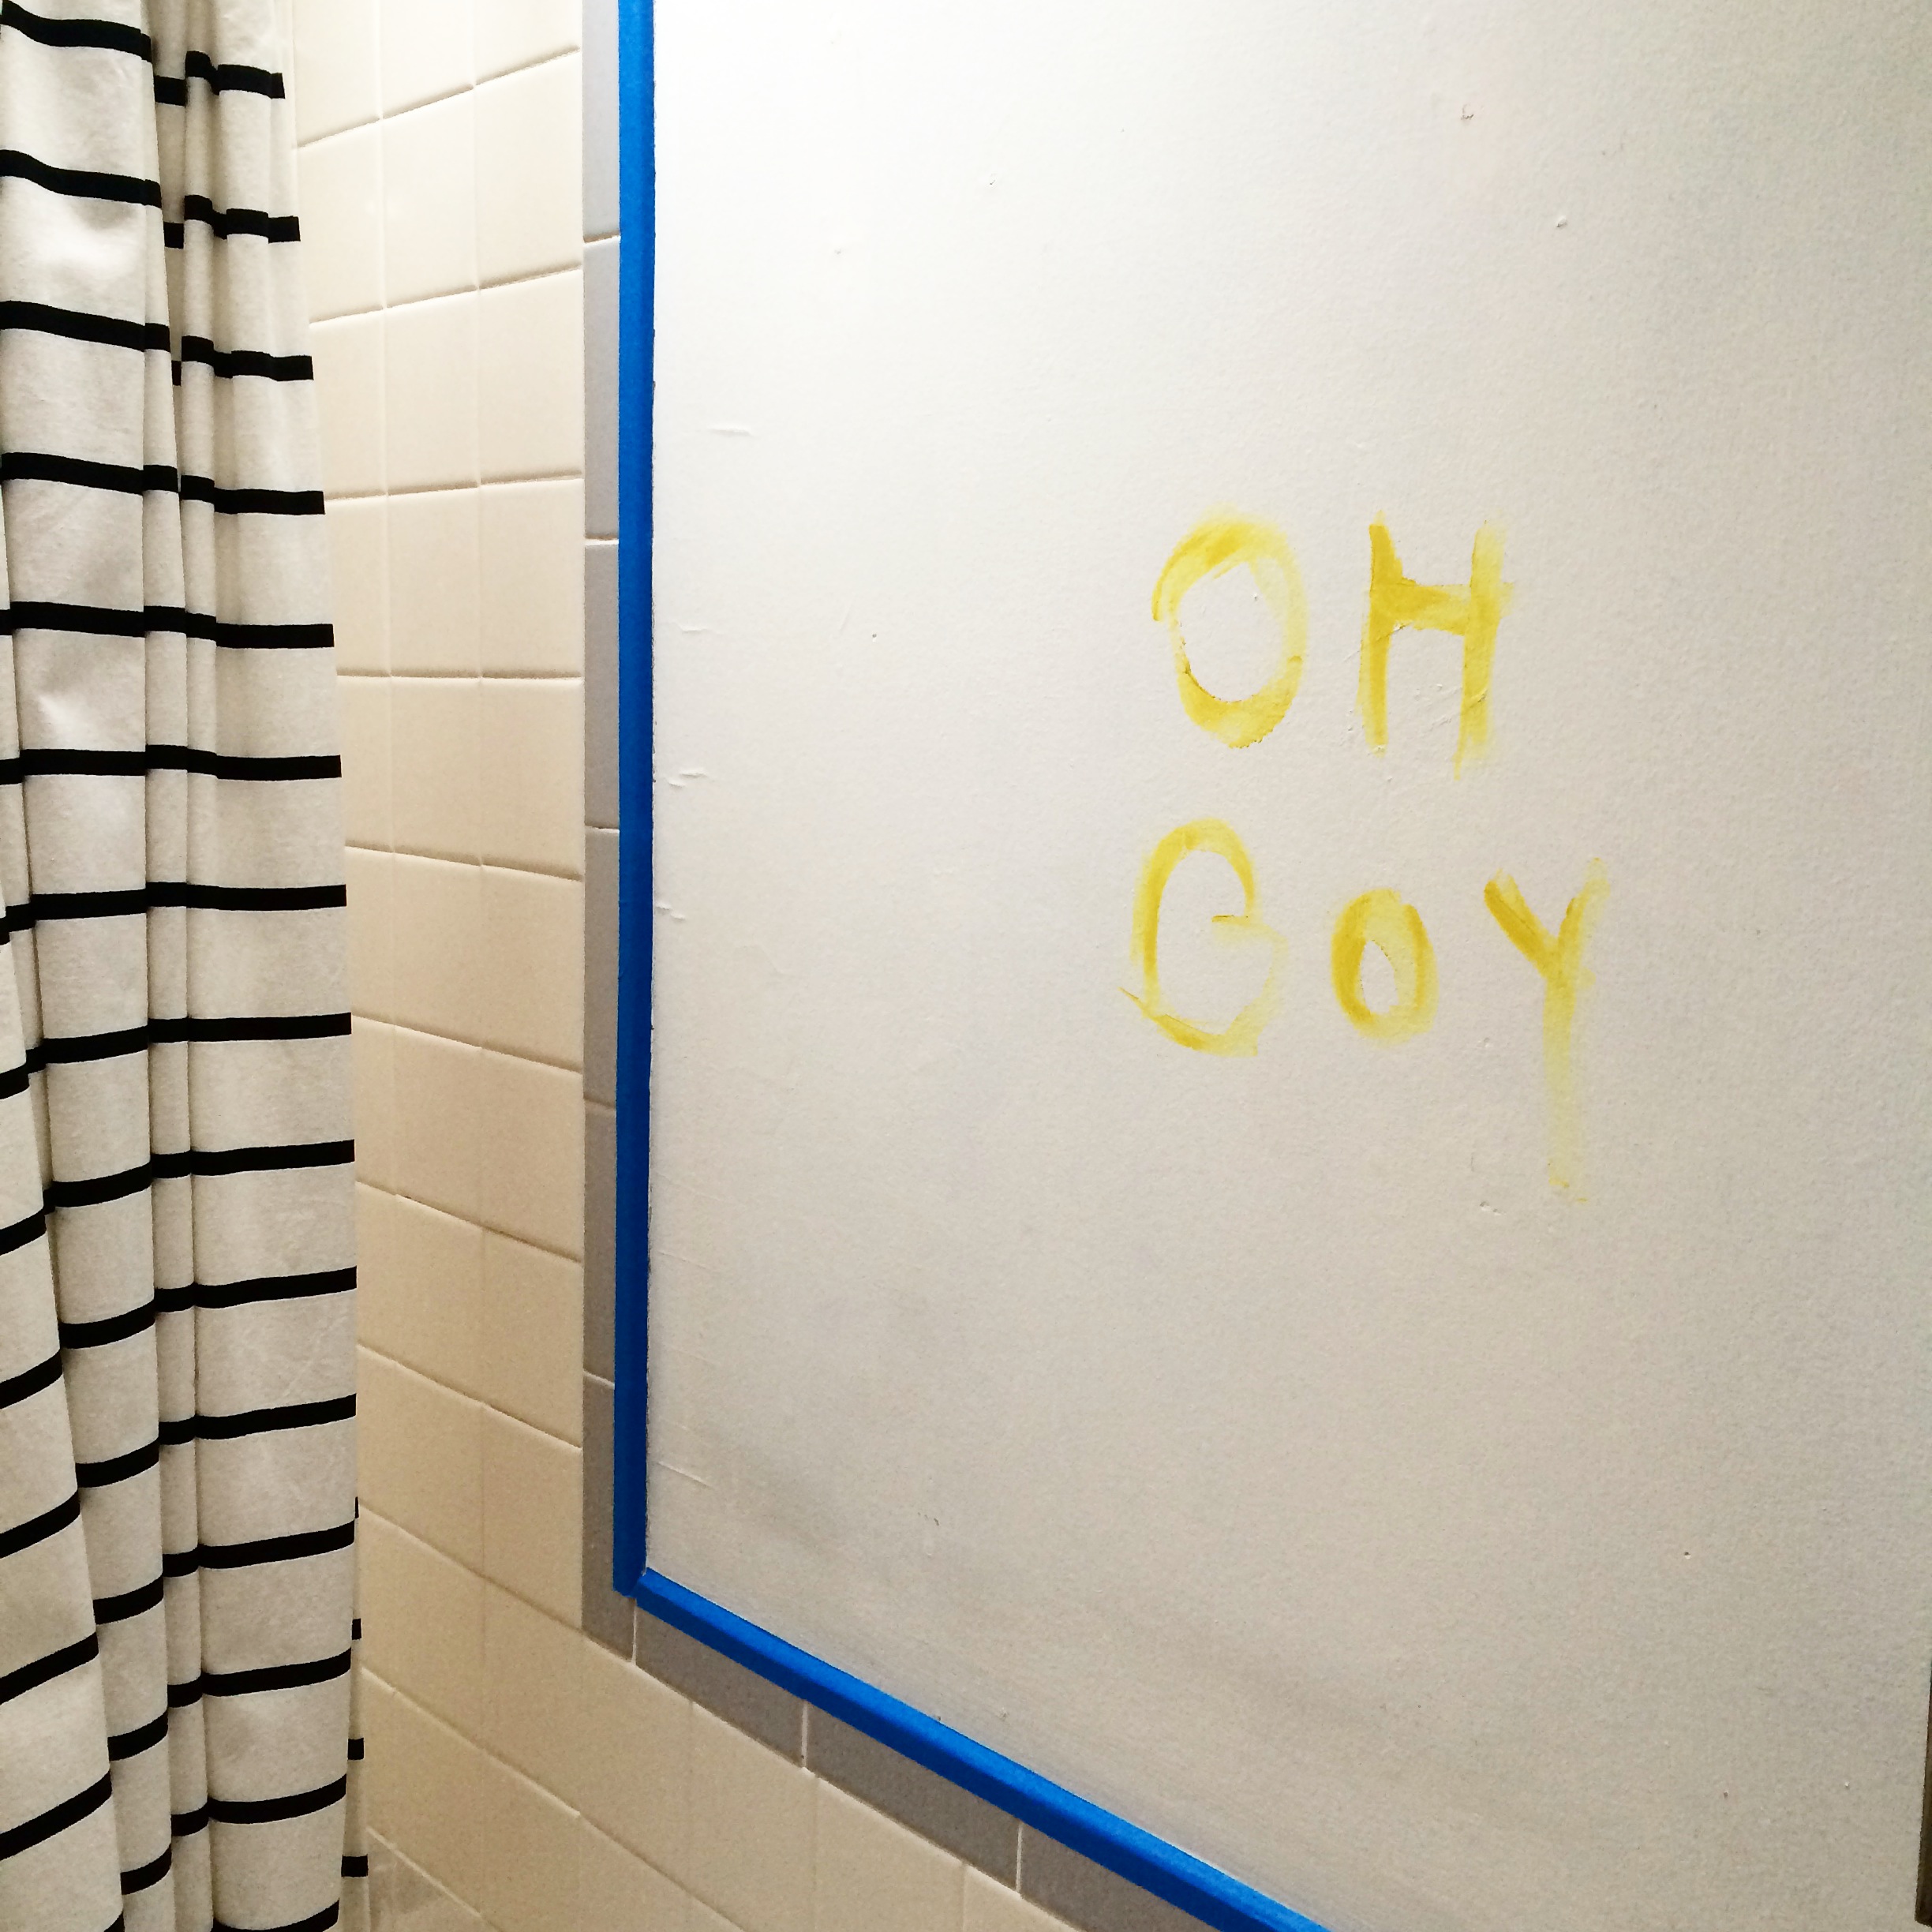
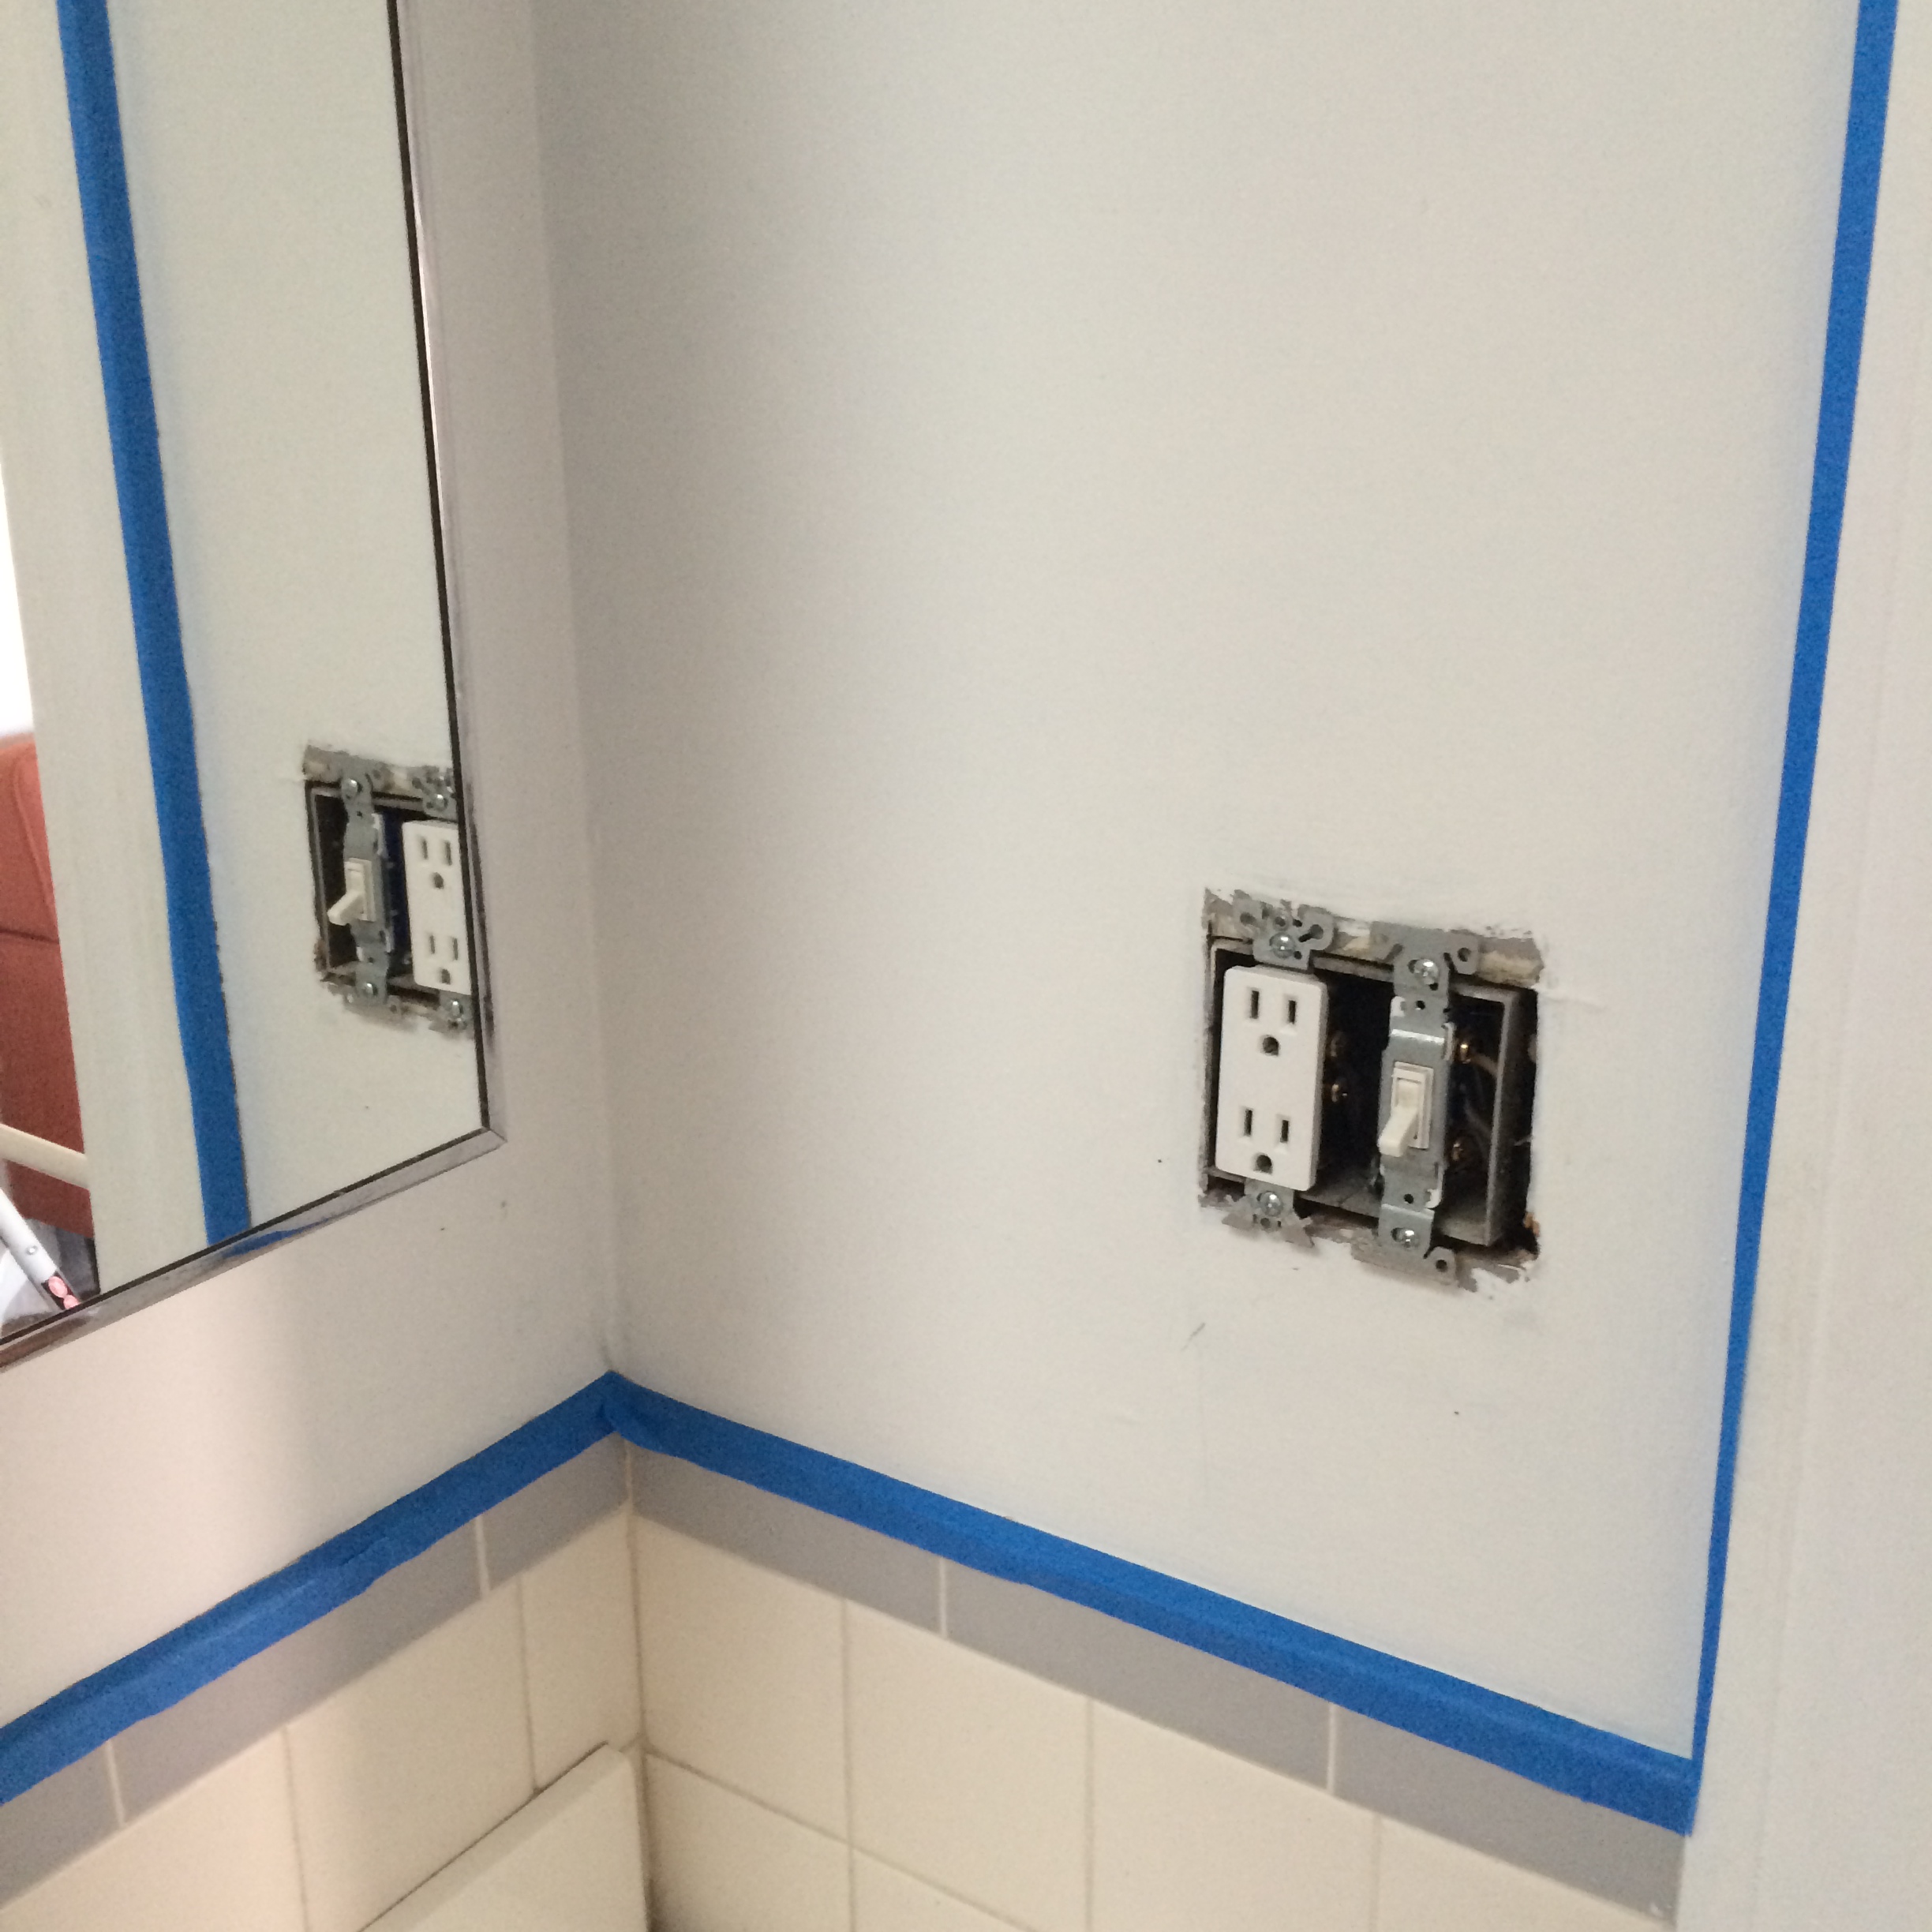
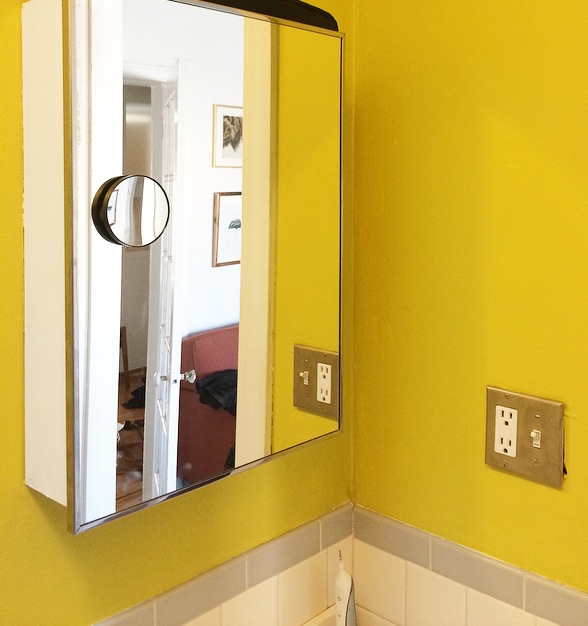
After you finish cleaning up the walls, removing old paint from the tiles, tape up where the wall meets the ceiling and the tiles. Oh yeah, remove the switch plates 🙂
Then, start painting. If you choose a bright color like we (ok, I) did, you’re gonna need to paint two layers. Use the edge brush to get the main bits, then use the smaller 1″ one to finish the corners or hard to reach areas.
Between coats, spend your time getting crazy with spray paint. Just ask, would Beyoncé had a gold switch plate? Probably. (Make sure to spray by layer).
Then, after painting your second coat wait like 30 mins, and remove the painters tape. Waiting too long can sometimes pull up the paint if it’s dried on top of the tape.
Not only is our bathroom brighter, it’s cleaner, the tiles aren’t covered in decades of paint, and it’s mold free!
Next up, the kitchen!
how to fix up a new, old find (and remove the rust!)
Earlier this week I was walking to get my laundry, and happened across this retro, tiny, “little red dinette set.” It was made sometime around the late 40’s, early 50’s we’re guessing. On average, they can cost up to several hundred dollars, but this one was being sold for $150. And while a Johnny Rockets theme wasn’t ever what I thought would look good in our apartment — think boho, vintage, Anthro-feel, it really spoke to me. There is something really unique about the orangey-red, aluminum, and grey seats. Plus, the size was perfect as we don’t have too much space for a dining table. (Also, ugh, I hate snow.)
After walking back and forth like three times, I knew I would miss out as it were to likely be purchased soon. The antique shop selling it had just got it in earlier that day, so we went for it. There was rust and dirt all over it, but I figured I’d clean it up some how.
::insert complaint about walking it six blocks and up three flights of stairs::
I called my mom for advice on how to clean it. She quickly knew the perfect trick, going back to her motorcycle days (Ha!) And based on my last post, she said I already had everything I needed to clean it up.
What you need:
— Steel Wool! Yup, the same wool I used to stick in the mouse holes
— Aluminum foil
See what we needed to clean:
It’s pretty gross, right? Before you start, make sure you are working on a surface you can easily clean — the wool particles and excess rust will get everywhere.
So first, wipe it all down and clean it as best you can. I prefer a natural cleaning product. Then, you’ll start to scrub down all the rust with the steel wool. You’ll quickly see a difference, the rust scrubs off quite easily. But note: be careful because the metal fibers in the wool will hurt your hands!
The side on the left was scrubbed with the steel wool:
Next, use the shiny side of the aluminum foil, and scrub once again. The foil will make the metal shine! (Notice which part was cleaned with steel wool and foil?)
Then, wipe it all down again with a cleaning agent. Use a mild one to ensure the shine keeps it’s pop. You may also want to use a little hand vac to suck up all the rust particles that fell off. Now, do the whole thing! This actually takes quite a bit of time, especially because of all the nooks and crannies. Remember to clean up even the little parts, like the screws and upholstery tacks. Take your time, and the results will amaze you.
Whoop!
To curve that ‘diner’ feel, I added a teal blue platter (from Ikea!) with a couple succulents, and made it feel like ours. Now, for a dinner party!
Ew Mice. (and how to prevent them)
We just moved apartments! Again. Going from the Finance District to Carroll Gardens in Brooklyn, you quickly learn to transition from elevators, doormen, salted streets, and doorbells. A brand new building to one built in 1890. We now have character and charm. But word on the street is, we may also have mice.
I’m not a big fan of mice. (no, really?!) While often in old buildings, they can’t be helped, you can still try hardest to ensure you don’t see their cute (and bacteria infested) faces.
So besides cleaning, keeping food in the refrigerator and out of the pantry, cleaning dirty dishes, you can also make sure all those little holes – between the floor and the walls, under the stove, in the corners – are filled up and cleaned up! If you didn’t know you had them, start looking around, and you’ll be surprised how many there are!
Here’s what you need.
– Steel wool. This is (apparently) the only thing mice can’t chew through. Ew. I researched, and the one pictured below is the best, most durable.
– A screw driver or knife or scissors to use to squish the steel wool into said holes
– Silicone caulking. If you need help with where to find this, ask someone at Ace Hardware, they’ll know which one you want. It’s silicone and water based.
– A caulking gun. You don’t need a fancy one. The $7 one is fine.
– A spatula. Like the one you would use the cover holes from old nails.
First, you’ll want to make sure the holes and edges between the wall and floor are clean, dust free, and dry. You’ll just make a dirty mess if you skip this part, so don’t forget!
Then, you’ll want to stuff the steel wool into the holes. It can be sharp, it can cut through yoga pants (don’t learn that the hard way), and it can cause more of a mess. So use sharp scissors, or pull it slowly using your hands. Next, you’ll use the screw driver to help push the wool into the holes.
Do you see the steel wool in both holes? You may find that the hole is actually larger than you thought. I know, this is terrifying. Keep adding steel wool ’til you no longer can. Then, and I mean technically you don’t have to do this, because mice can’t get through the wool, but to make it visually attractive, and for peace of mind, you can then add the caulking, and cover up the holes. {insert caulking joke here]
See how it kinda just squiggles out? You can use either your finger (since it’s water based) or a spatula (this is less of a mess), to smooth out the caulking gel and finish.
It’s not perfect. But holler! no more mice. (let’s hope) In addition, even if the hole is so small that you can’t fit any steel wool into the crack, you can still using the caulking gun to seal the space between the wall and the floor. You may even enjoy this nasty little project. It’s quite satisfying! (just make sure to smooth it all out!)
So keep your kitchen clean, fill in those holes, and you’re set. And please don’t use those inhumane traps – live or dead ones – because seriously, what are you then gonna do with a mouse?
Hand Stitched Pillows
While traveling this past April and May, we made it to Kampala, Uganda. The main attraction was of course the mountain gorillas — absolutely amazing, you must go see them before they sadly become extinct. The second attraction, ok besides the chimps, was the fabric. A lot of the fabric is made in Uganda, and other pieces come from Nigeria. Our friends in Nairobi say that Uganda has the most gorgeous fabric in all of Africa. Can’t say I disagree. $30 later, I’m in heaven!
Recently we purchased the Karlstad, L-shaped sofa from Ikea, in isunda gray. It can be very big and plain, and I’ve been struggling to find pillows that are lounge-y, comfortable, beautiful, man-friendly, and inexpensive to go with it. So I thought making my own with purchased fabric would be the best bet. I purchased a couple various sized cushions from Ikea – like $7-$15 per pillow, that you can stuff in once stitched. If you’re like me and don’t have a sewing machine, these can be exceptionally time consuming… however…they’re SUPER easy to make, and Orange is the New Black Season Two was just released, so my guess is you have some time to kill.
For your encouragement, a finished photo:
The black and white checkered one is from Ikea (actually went quite nicely with them!). The green and aqua are the fabric purchases I made in Kampala.
What You’ll Need:
- Scissors
- Measuring tape
- Fabric – really depends on the size you want your pillows to be. For the larger green pillow, I cut two pieces of 23X23 inches.
- The pillow or stuffing you want to use for the inside — Maybe you have an old pillow that you hate? Recycle it, and add new fabric!
- Needles and thread — I bought a basic pack of thread that offered a bunch of colors, and it included a couple needles ($5) I’d recommend a large needle if you can, they’re a bit easier to work with.
- Sewing pins ($3)
- Iron
- Patience, white wine, whatever gets you through it
- Scotch Guard (if you want to spray onto your pillows to prevent stains)
So first, cut two sheets of the size of fabric you need. I recommend cutting a bit smaller than the size that you measure when the pillow is fully fluffed. You will want a tight cover, and it’s ok to stuff the pillow in … will make the final fit tight, and create a better shape.
Once you have both sheets, turn them inside out — That way, your stitches are on the inside, and make for a cleaner finish. You’ll sew one side at a time. To keep your fabric lined up, and to make sure you’re stitching in a straight line, use your sewing pins. Roughly half an inch from the bottom of each side of fabric:
After lining up your pins, use the length of the fabric to determine how much thread you’ll use. To make sure you don’t run out, and have enough to tie at the end, add about six more inches. Then, double over your thread. Stitching two pieces of thread at one time will ensure it keeps sturdy. Starting at one end, tie through your thread, and begin stitching in and out. Try to keep your stitches as close as possible — this will keep the pillow from ripping.
Do this for three of the sides. Remember, double your thread! (For real, it helps.)
Then, put the fabric the right way out, and you’ll see your stitches look great
After turning the fabric right-side out, get out your iron, and iron out any wrinkles that may have developed… you’ll want to make sure to do this before stuffing your pillow, to ensure that it’s smooth and wrinkle free when finished. Then, for the side that has not been sewed, fold each piece of fabric about 1/2 an inch in — so that the cut line is hidden from the outside. This will be necessary when stitching the final side, and will make sure the pillow looks finished. (Insert photo, oops, my bad).
Next, stuff in your pillow or stuffing (insert 2nd photo I did not take).
For the final side, you’ll use pins once again to keep the fabric together, and to create a line you may follow. Double your thread, and stitch from side to side once more — this is the one side you’ll definitely see stitched, so take your time, and try to create a straight line. Again, make sure your stitches are small to keep the pillow from ripping.
When finished, shake our your pillow, let the stuffing move around a bit, and ta-da! Here’s the final look. I’m pretty sure these pillows would cost you at least $75 in stores like West Elm or Pottery Barn. Now, they may have been machine stitched and therefore more sturdy, but how fun is that?
So many materials.
I visited the Material ConneXion library this afternoon. I’ve decided to take on the certificate program at Parsons, and one of the courses they offer is Showrooms — where basically, you have the opportunity to visit amazing showrooms throughout New York: Large ones, historical ones, hipster-Williamsburghy-ones, you name it. Today we visited the Material ConneXion library located in Mid-town. This place is INSANE. Basically they are a data collection (the world’s largest collection!) of every known material that’s out there — ceramic, fiber, metals, cement, processes, and polymers. Their collection is roughly 7500, and at any given time they display 2500 of them. Unfortunately you have to have a membership to the museum (which is crazy expensive), but as a student at Parsons you can go for free. Whoop! Check out some of these killer materials I captured. It’s a pretty inspiring and an interesting space. Plus: you’re allowed to touch everything.
Recycled skateboards – could be used for a wide variety of things, including rad wall coverings.
This may be my favorite: handwoven wall coverings of recycled maps. Exceptionally expensive, I mean, it’s HANDWOVEN, but how cool would a bathroom, or wall in your office look with this all over it?
This is also a natural material — made of cork and woven cotton. It could be used to reupholster a piece of furniture, shoes, clothes, the list is endless.
So this one is kinda crazy — it’s a wood veneer with leather substrate. It’s flexible and therefore can be used again for many purposes.
These. I want a belt made out of each one. Low and hold, it’s all mosaic wood veneer. So, no belt for me, but it could be beautiful trimming, paneling, or framing (so the details read!)
I love this one! There’s glitter, there’s cork, there’s layers of paper. It’s really just cool. And it can be from recycled material which is even better.
So many mateeeerriaaalllsssss!!!