add a little lime to your powder room (and while you’re at it, get rid of that mold! )

Screen Shot 2015-02-28 at 3.41.14 PM

The walls in our apartment are all clean white. There’s original molding and glass,  simply, they’re beautiful. Growing up in a house where the walls were always changing colors, and even the ceiling was a “white lime” color, I’ve learned to appreciate the spaciousness that white creates, especially in a small New York apartment. That said, you can take the girl out of the eccentric home, but you can’t take the eccentric home out of the girl.

More so, I wanted to see what we plausibly could get away with in regards to rental rights. Because after moving in two sofas, we’re never leaving.

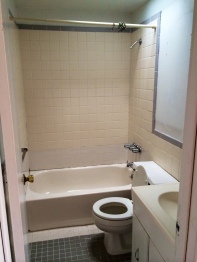
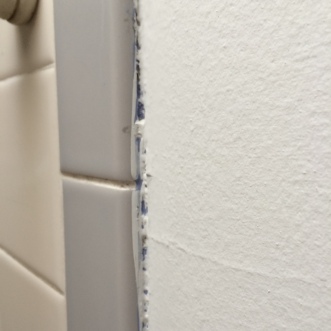
Our bathroom has a great sunlight, but other than that, it’s small. It’s mixed in white tiles where over time old ones must have broken off. There’s layers and layers of old paint, grey and white cements covering the tiles in illogical and messy ways. There’s also mold. A lot of mold. To top it off, the most recent paint job was one layer of white, so poorly painted you could see the lilac purple underneath.

I mean, it’s gross.

photo-1 photo-2

photo 5photo-3

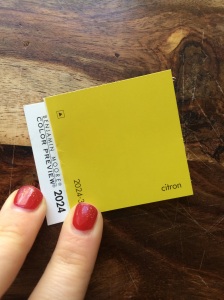
Originally I wanted to paint it a dark slate grey/blue. But who wants to poo in not only a small room, but a dark and small room? So we nixed that, and I went to, obviously, my favorite color in the world — chartreuse.

Adding a lick of paint to your walls not only brightens the space, it cleans it up, makes things feel fresh, and is an inexpensive way to redecorate.

What You’ll Need  (to clean, caulk, and paint your poo room) — 

1. a flat head screw driver

2. paint. our bathroom is teeny tiny, and the tiles cover a lot of the walls, so we only needed 1/4 gallon. I recommend making sure the paint is mold proof and bathroom friendly. We used a satin finish — not shiny, but not chalky-matte.

photo 1

3. a couple paint brushes. I used a 1″ one that I already had, as well as the brush I swear by, the shur line paint edger — it’s smooth, and helps with painting corners and edges.

photo 1-1

4. painter’s tape.

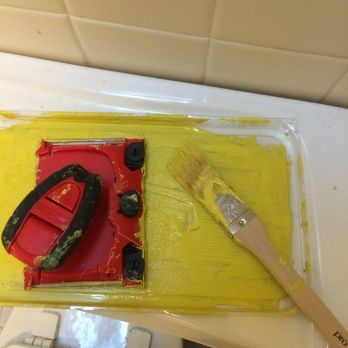
5. something to place the paint in. Incidentally, the plastic cover to a container of Swiffer mops works quite well (just make sure you don’t need to use it again!)

6. maybe a ladder, or you can do the little dance I did while painting on the edge of the tub.

7. brush or vacuum and cleaning all-purpose spray. I like Method.

8. Spatula and wall putty – in case you have old holes in the walls. Maybe some light sand paper.

9. bathroom caulk. This is different from caulk I used to cover mouse holes. But the practice is the same, so if you’re unsure how to use caulk, read this post.

Directions 

Before you paint, clean up the space. wash the walls down — there’s definitely a layer of grime and water from showering, which also means gross bacteria that you don’t want under a new coat of paint. Wash down everything including all the tiles with a cleaning spay.

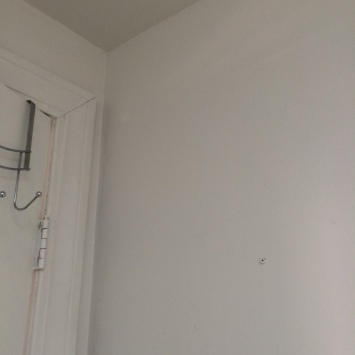
For us, there were holes all over the walls. And awkwardly placed HUGE screws, that of course were painted over from before. We patched them up, too. Once dried, I sanded them down just a bit with a light sandpaper to make sure the walls were smooth.

The bathroom tiles had old layers of paint and cement and caulk EVERYWHERE. Use a flat head screw driver to pull and scrape it up and off. Be careful to not make a hole into the wall. In addition, this is a great time to recaulk your tub. Where the caulk was once white  and water proof, it’s now black (mold) and gross. Use the flat head to scrape out the mold. Once you’ve scraped out everything nasty, make sure it’s clean and dry, and then use the caulk tube, and slowly squeeze out the paste. It will need 24 hours to dry, so don’t do this right after working out (note to self).

Before the paint pic, check out this beauty. After pic of recaulking the tub. Hallelujah, I’m not getting some weird growth on my feet!

photo

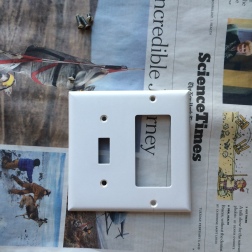
After you finish cleaning up the walls, removing old paint from the tiles, tape up where the wall meets the ceiling and the tiles. Oh yeah, remove the switch plates 🙂

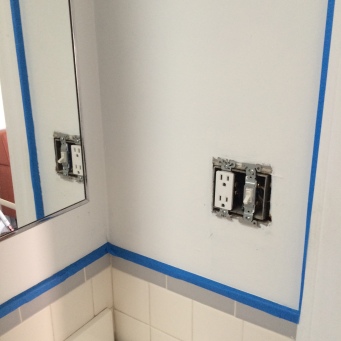
photo 2-2 photo 5-1 Then, start painting. If you choose a bright color like we (ok, I) did, you’re gonna need to paint two layers. Use the edge brush to get the main bits, then use the smaller 1″ one to finish the corners or hard to reach areas.

photo 3-2

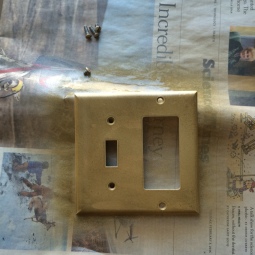
Between coats, spend your time getting crazy with spray paint. Just ask, would Beyoncé had a gold switch plate? Probably. (Make sure to spray by layer).

photo 2-1    photo 3-1

Then, after painting your second coat wait like 30 mins, and remove the painters tape. Waiting too long can sometimes pull up the paint if it’s dried on top of the tape.

Not only is our bathroom brighter, it’s cleaner, the tiles aren’t covered in decades of paint, and it’s mold free!

photo 5-2    photo 4-2  photo 1     photo 2

Next up, the kitchen!
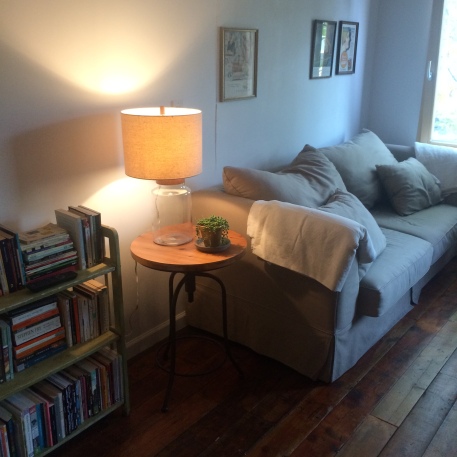
Mathilde & Jason’s Space

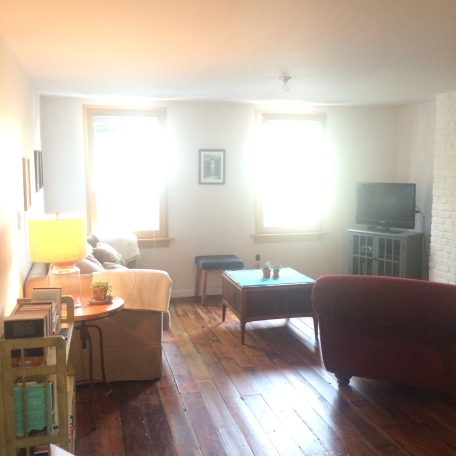
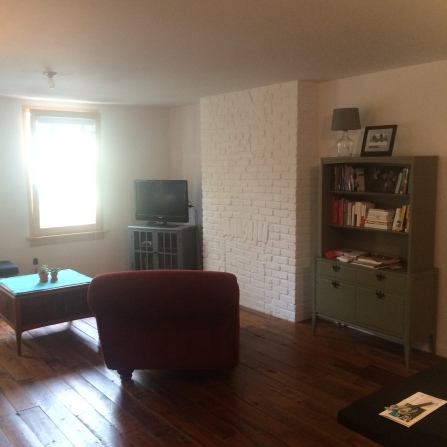
My friend Mathilde lives in a gorgeous home in Williamsburg. She and her husband have the top two floors — the upper level being used as a massive office and spare room. Their living room has so much potential – beautiful wide panel flooring, a maintained brick wall, bright, big windows. The space is great, and allows for a dining area and living room.

Like so many of us, Mathilde is on a budget! So most of her furniture came from Craig’s List, Housing Works, and the likes. She also has a great collection of art work, but isn’t sure exactly how to present it.

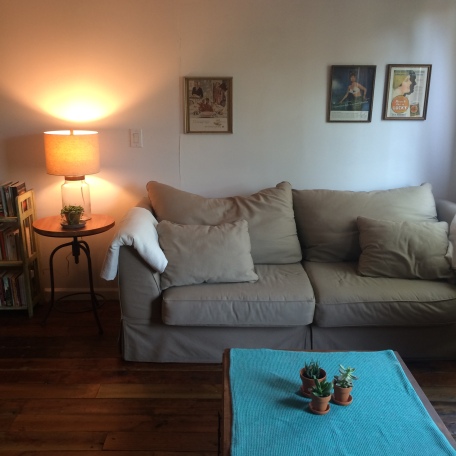
While we didn’t get a before pic (of course!), the space felt a little backwards – their large dining table was in front of the windows, and the sofa and red chaise were spread out. Because of the office upstairs, it was important that we make her living room feel private and spacious, and utilize the sunlight to the best of our ability. So we rearranged a bit. With a $500 budget (we only spent $450!), we went to Target and bought a couple basics — a foot rest, a couple lamps, a side table, an entertainment center (actually, the same one we used in Jenna’s space), light bulbs, and a hammer and nails. We also went to the nearby hardware store and nursery and bought — you know it — succulents! And some cute, eclectic pots. Check out what we did. A quick revamp, space changer, and now it totally feels personal, private, bright, and uses the space perfectly!

photo 4

photo 3

Can  you BELIEVE that side table is from Target? What a deal, and it’s quite good quality for the price we paid! I personally like that the top moves up and down, which made matching it to fit the sofa height quite easy. Same with the lamp — great lamp, neutral but authentic feeling. For those of us that don’t have a massive budget, Target is SO great, especially their Threshold brand.

photo 1-1

Mathilde had this great large wood coffee table, and topped it with a bright and cheerful teal cloth. It was a perfect pop of color, and I loved the square shape of the table… breaks up the monotony of everything being rectangular in a space.

photo 1

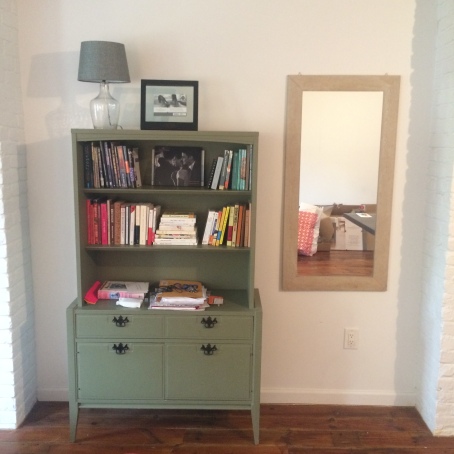
And how great is this buffet/book shelf? We rearranged the books and photos, and tidied it up. Doing this changed the piece from a tool that organized books into a piece of decor — that’s high functioning.

photo 5-1

photo

For next steps, we’re looking for a neutral, perhaps lightly patterned, rug. We think that’ll pull it all together.  In addition, we’re working on the dining space (not shown), and a bar station Mathilde has envisioned. Until then!
how to fix up a new, old find (and remove the rust!)

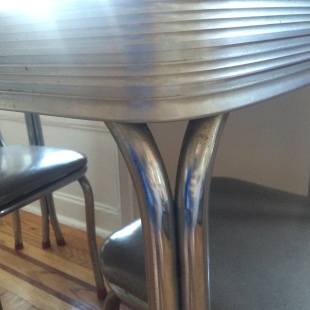
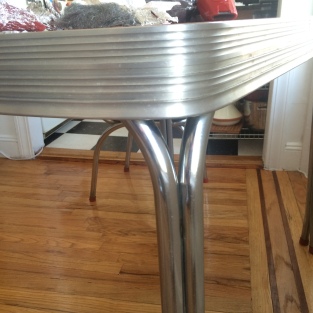
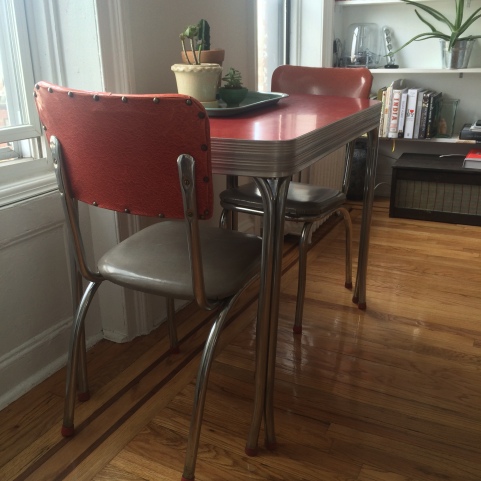
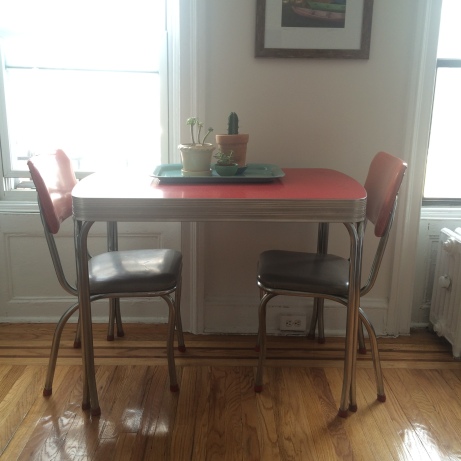
Earlier this week I was walking to get my laundry, and happened across this retro, tiny, “little red dinette set.” It was made sometime around the late 40’s, early 50’s we’re guessing. On average, they can cost up to several hundred dollars, but this one was being sold for $150. And while a Johnny Rockets theme wasn’t ever what I thought would look good in our apartment — think boho, vintage, Anthro-feel, it really spoke to me. There is something really unique about the orangey-red, aluminum,  and grey seats. Plus, the size was perfect as we don’t have too much space for a dining table. (Also, ugh, I hate snow.)

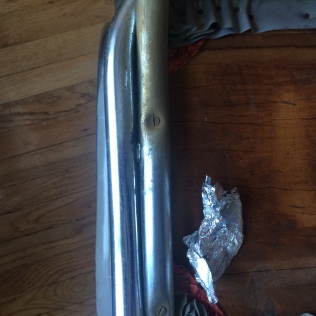
photoAfter walking back and forth like three times, I knew I would miss out as it were to likely be purchased soon. The antique shop selling it had just got it in earlier that day, so we went for it. There was rust and dirt all over it, but I figured I’d clean it up some how.

::insert complaint about walking it six blocks and up three flights of stairs::

I called my mom for advice on how to clean it. She quickly knew the perfect trick, going back to her motorcycle days (Ha!) And based on my last post, she said I already had everything I needed to clean it up.

What you need:

— Steel Wool! Yup, the same wool I used to stick in the  mouse holes

— Aluminum foil

photo 1-1


See what we needed to clean:

photo 2photo 3


photo 5


It’s pretty gross, right? Before you start, make sure you are working on a surface you can easily clean — the wool particles and excess rust will get everywhere.

So first, wipe it all down and clean it as best you can. I prefer a natural cleaning product. Then, you’ll start to scrub down all the rust with the steel wool. You’ll quickly see a difference, the rust scrubs off quite easily. But note: be careful because the metal fibers in the wool will hurt your hands!

The side on the left was scrubbed with the steel wool:

photo 3-1


Next, use the shiny side of the aluminum foil, and scrub once again. The foil will make the metal shine! (Notice which part was cleaned with steel wool and foil?)

photo 2-1


Then, wipe it all down again with a cleaning agent. Use a mild one to ensure the shine keeps it’s pop. You may also want to use a little hand vac to suck up all the rust particles that fell off. Now, do the whole thing! This actually takes quite a bit of time, especially because of all the nooks and crannies. Remember to clean up even the little parts, like the screws and upholstery tacks. Take your time, and the results will amaze you.

Whoop!

photo 1-2


To curve that ‘diner’ feel, I added a teal blue platter (from Ikea!) with a couple succulents, and made it feel like ours. Now, for a dinner party!

photo 4-2


photo 5-2


Ew Mice. (and how to prevent them)

We just moved apartments! Again. Going from the Finance District to Carroll Gardens in Brooklyn, you quickly learn to transition from elevators, doormen, salted streets, and doorbells. A brand new building to one built in 1890. We now have character and charm. But word on the street is, we may also have mice.

I’m not a big fan of mice. (no, really?!) While often in old buildings, they can’t be helped, you can still try hardest to ensure you don’t see their cute (and bacteria infested) faces.

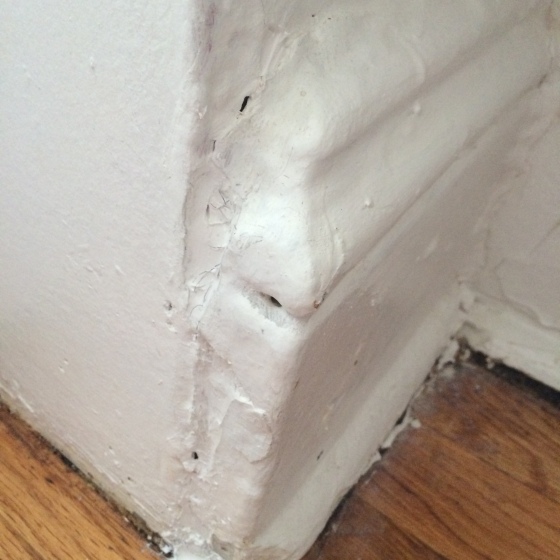
So besides cleaning, keeping food in the refrigerator and out of the pantry, cleaning dirty dishes, you can also make sure all those little holes – between the floor and the walls, under the stove, in the corners – are filled up and cleaned up! If you didn’t know you had them, start looking around, and you’ll be surprised how many there are!

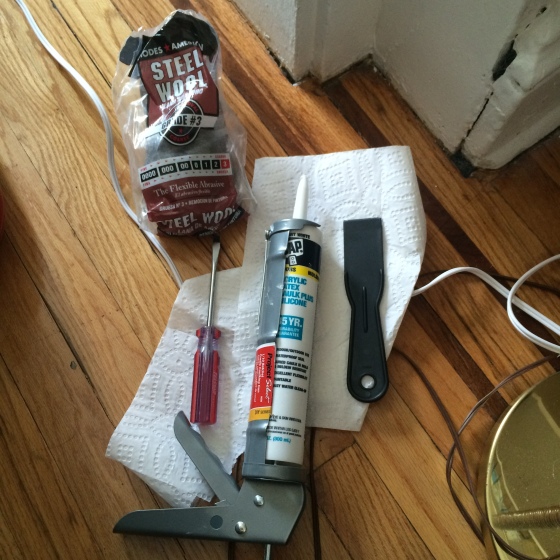
Here’s what you need.

– Steel wool. This is (apparently) the only thing mice can’t chew through. Ew. I researched, and the one pictured below is the best, most durable.

– A screw driver or knife or scissors to use to squish the steel wool into said holes

– Silicone caulking. If you need help with where to find this, ask someone at Ace Hardware, they’ll know which one you want. It’s silicone and water based.

– A caulking gun. You don’t need a fancy one. The $7 one is fine.

– A spatula. Like the one you would use the cover holes from old nails.

photo 2


First, you’ll want to make sure the holes and edges between the wall and floor are clean, dust free, and dry. You’ll just make a dirty mess if you skip this part, so don’t forget!

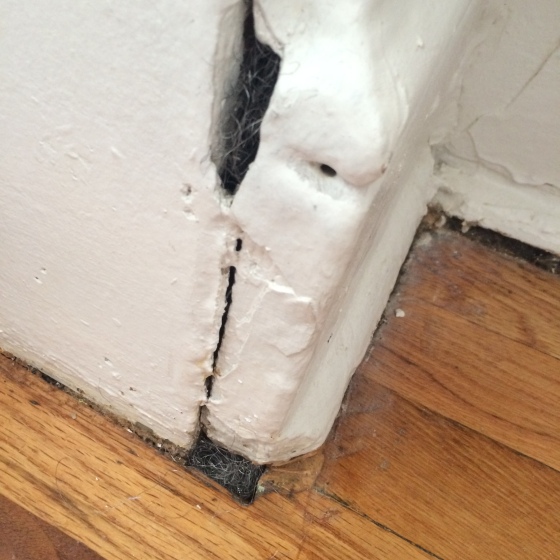
Then, you’ll want to stuff the steel wool into the holes. It can be sharp, it can cut through yoga pants (don’t learn that the hard way), and it can cause more of a mess. So use sharp scissors, or pull it slowly using your hands. Next, you’ll use the screw driver to help push the wool into the holes.

photo 3


Do you see the steel wool in both holes? You may find that the hole is actually larger than you thought. I know, this is terrifying. Keep adding steel wool ’til you no longer can. Then, and I mean technically you don’t have to do this, because  mice can’t get through the wool, but to make it visually attractive, and for peace of mind, you can then add the caulking, and cover up the holes. {insert caulking joke here]

photo 4


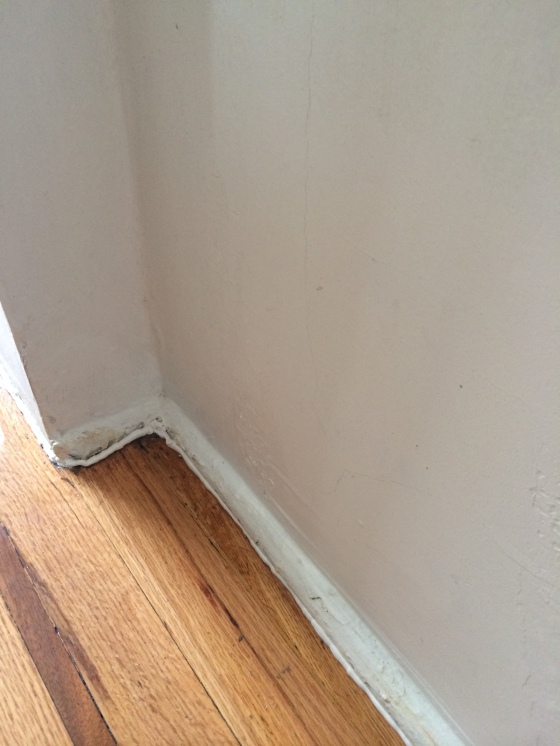
See how it kinda just squiggles out? You can use either your finger (since it’s water based) or a spatula (this is less of a mess), to smooth out the caulking gel and finish.

photo 5


It’s not perfect. But holler! no more mice. (let’s hope) In addition, even if the hole is so small that you can’t fit any steel wool into the crack, you can still using the caulking gun to seal the space between the wall and the floor. You may even enjoy this nasty little project. It’s quite satisfying! (just make sure to smooth it all out!)

photo 2-1


So keep your kitchen clean, fill in those holes, and you’re set. And please don’t use those inhumane traps – live or dead ones – because seriously, what are you then gonna do with a mouse?