That spare ‘room’ — is it an office or a guest room?

It’s actually both. At least in a teeny NYC apartment it is. Here’s how you make it work:

  1. Find a small desk (2’x4′ is drastically smaller than anything 5′ long. And it helps not overwhelm. I love this CB2 one.
  2. Light colors furniture makes it feel bigger
  3. Not everything needs to be wood! Get some metal in there. Scared? Make it clean white.
  4. Mirrors make everything feel bigger! And clear glass is clean and spacious. (Urban Outfitters has a relatively fair priced living section where you can find one)
  5. A beautiful day bed also serves as a sofa, takes up less space, and no longer has to be a weird trundle. (Though yeah, those are pretty great, too). I’m loving this West Elm bed in walnut.
  6. And a beautiful Turkish fabric pillow? That makes everything better. (ala Etsy)

Guest Room : Office

how to fix up a new, old find (and remove the rust!)

Earlier this week I was walking to get my laundry, and happened across this retro, tiny, “little red dinette set.” It was made sometime around the late 40’s, early 50’s we’re guessing. On average, they can cost up to several hundred dollars, but this one was being sold for $150. And while a Johnny Rockets theme wasn’t ever what I thought would look good in our apartment — think boho, vintage, Anthro-feel, it really spoke to me. There is something really unique about the orangey-red, aluminum,  and grey seats. Plus, the size was perfect as we don’t have too much space for a dining table. (Also, ugh, I hate snow.)

photoAfter walking back and forth like three times, I knew I would miss out as it were to likely be purchased soon. The antique shop selling it had just got it in earlier that day, so we went for it. There was rust and dirt all over it, but I figured I’d clean it up some how.

::insert complaint about walking it six blocks and up three flights of stairs::

I called my mom for advice on how to clean it. She quickly knew the perfect trick, going back to her motorcycle days (Ha!) And based on my last post, she said I already had everything I needed to clean it up.

What you need:

— Steel Wool! Yup, the same wool I used to stick in the  mouse holes

— Aluminum foil

photo 1-1


See what we needed to clean:

photo 2photo 3


photo 5


It’s pretty gross, right? Before you start, make sure you are working on a surface you can easily clean — the wool particles and excess rust will get everywhere.

So first, wipe it all down and clean it as best you can. I prefer a natural cleaning product. Then, you’ll start to scrub down all the rust with the steel wool. You’ll quickly see a difference, the rust scrubs off quite easily. But note: be careful because the metal fibers in the wool will hurt your hands!

The side on the left was scrubbed with the steel wool:

photo 3-1


Next, use the shiny side of the aluminum foil, and scrub once again. The foil will make the metal shine! (Notice which part was cleaned with steel wool and foil?)

photo 2-1


Then, wipe it all down again with a cleaning agent. Use a mild one to ensure the shine keeps it’s pop. You may also want to use a little hand vac to suck up all the rust particles that fell off. Now, do the whole thing! This actually takes quite a bit of time, especially because of all the nooks and crannies. Remember to clean up even the little parts, like the screws and upholstery tacks. Take your time, and the results will amaze you.

Whoop!

photo 1-2


To curve that ‘diner’ feel, I added a teal blue platter (from Ikea!) with a couple succulents, and made it feel like ours. Now, for a dinner party!

photo 4-2


photo 5-2


Hand Stitched Pillows

While traveling this past April and May, we made it to Kampala, Uganda. The main attraction was of course the mountain gorillas — absolutely amazing, you must go see them before they sadly become extinct. The second attraction, ok besides the chimps, was the fabric. A lot of the fabric is made in Uganda, and other pieces come from Nigeria. Our friends in Nairobi say that Uganda has the most gorgeous fabric in all of Africa. Can’t say I disagree. $30 later, I’m in heaven!

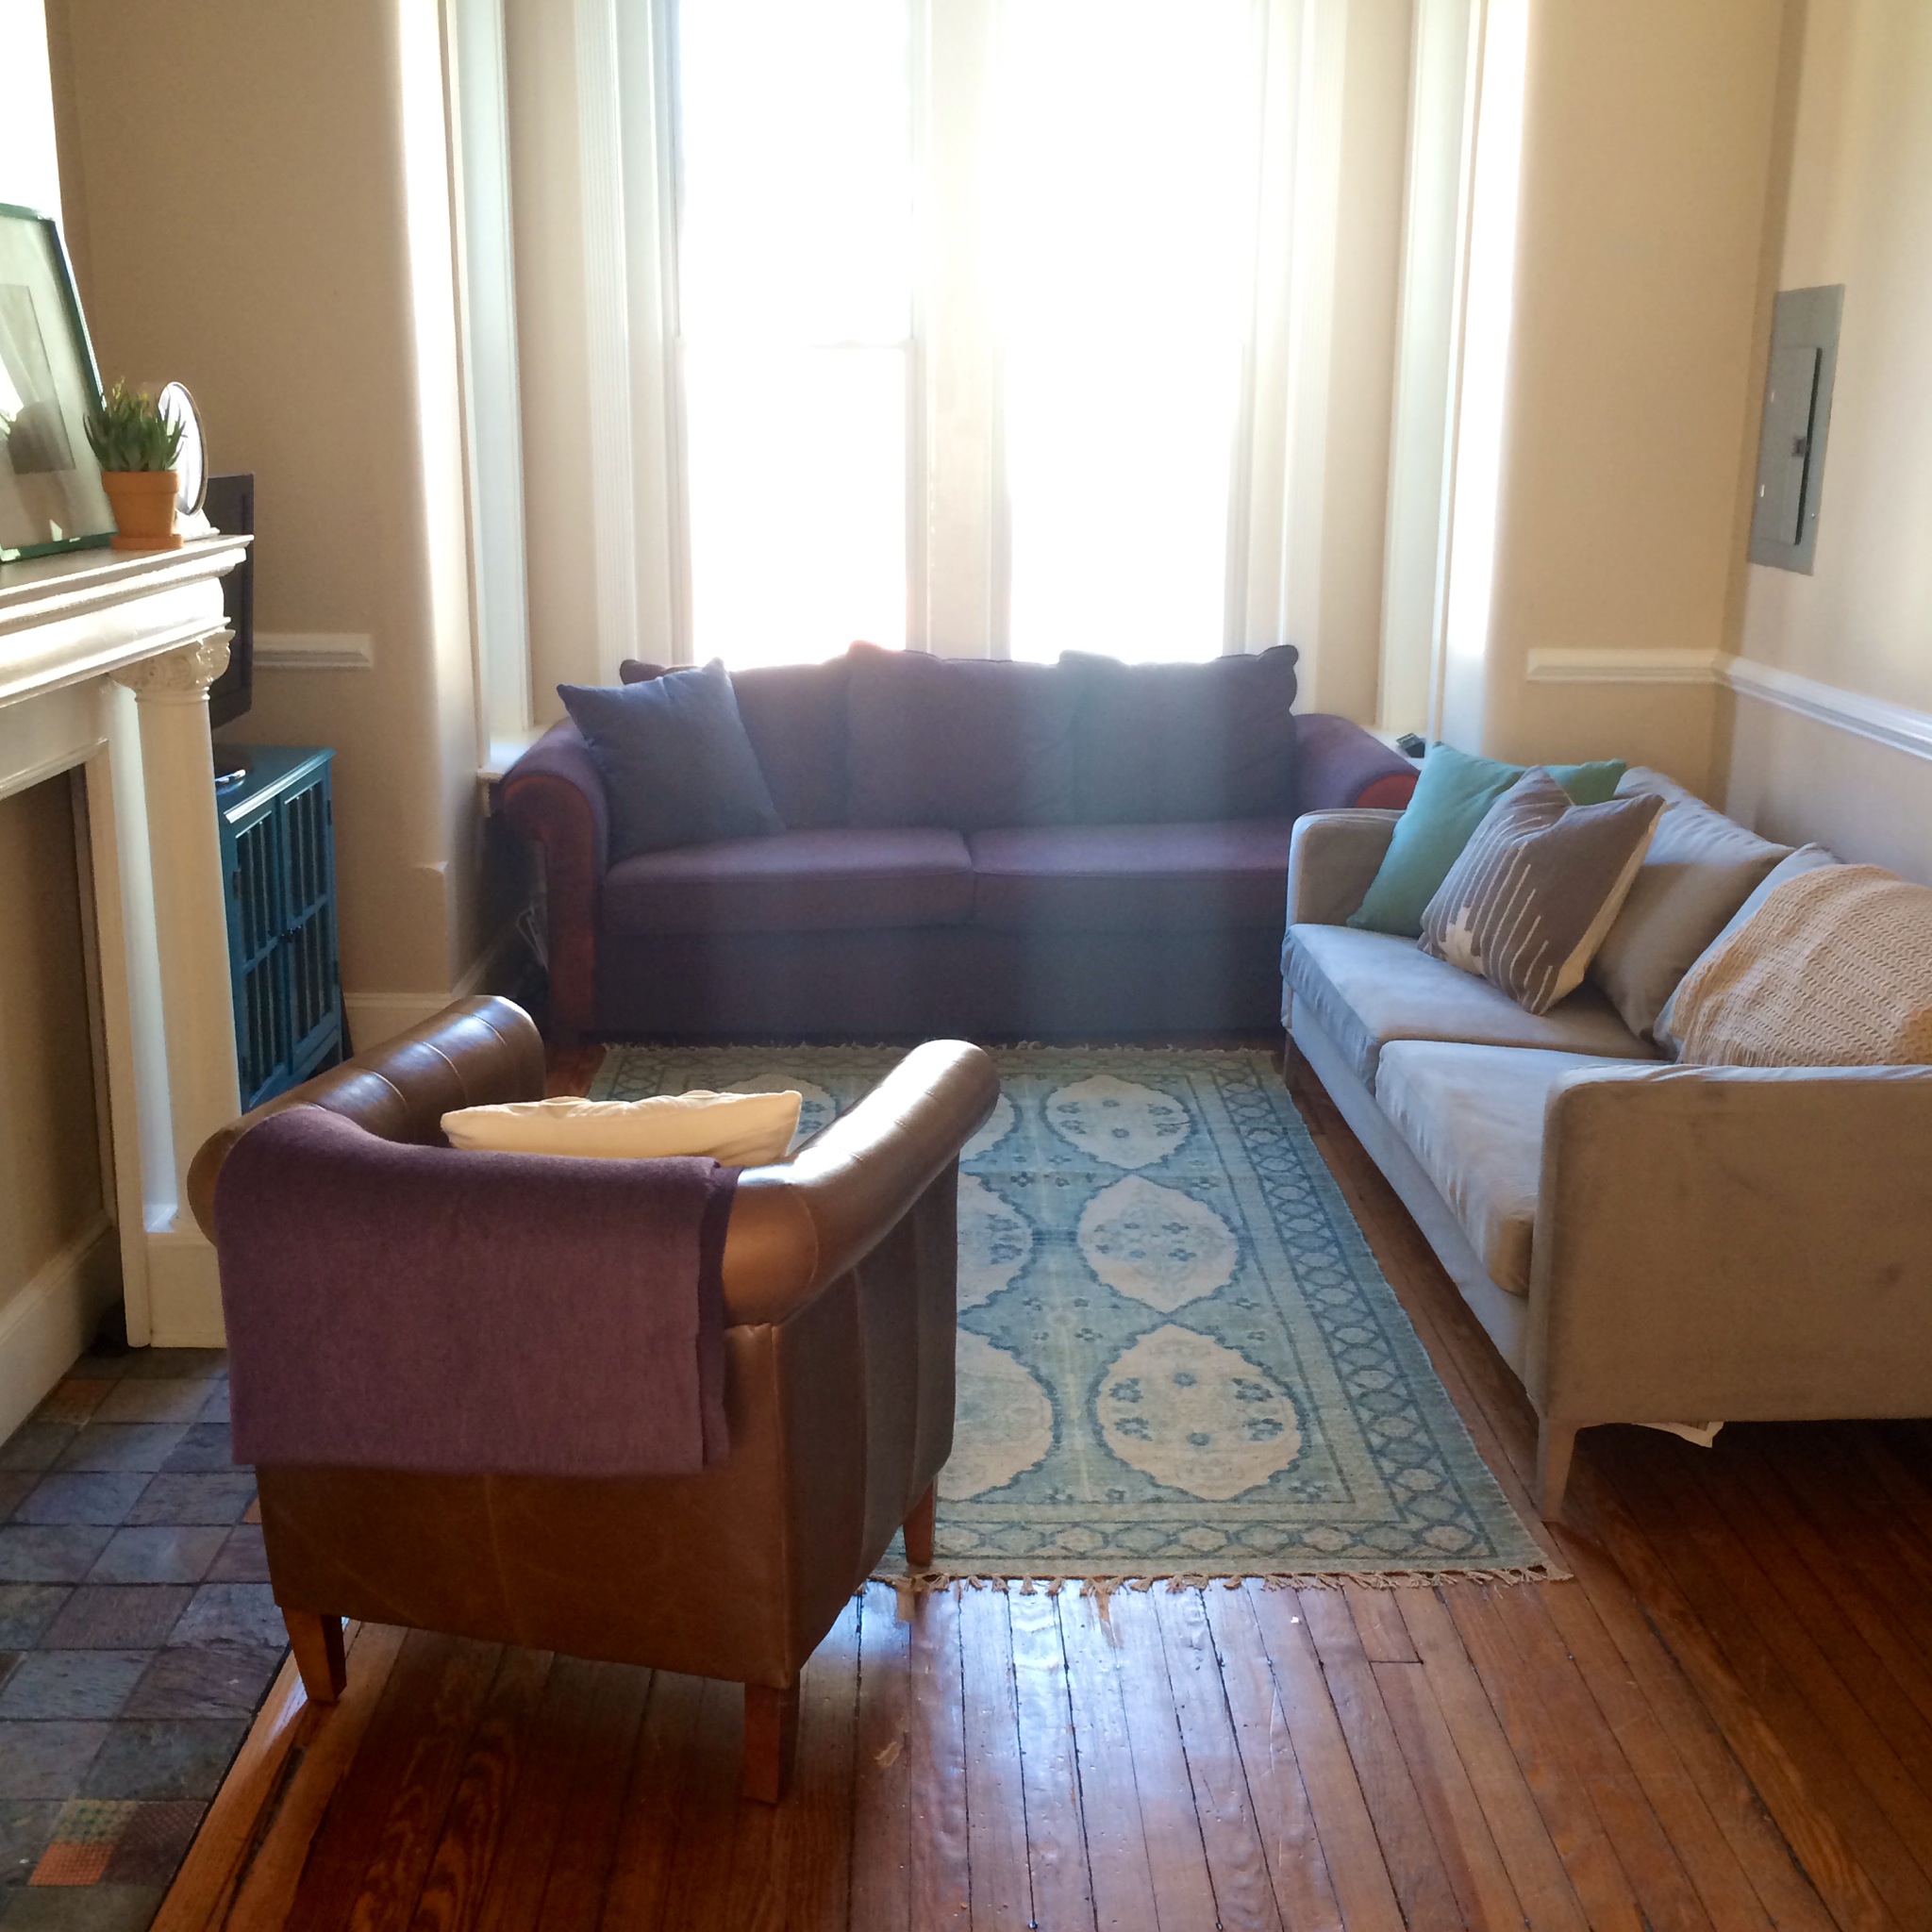
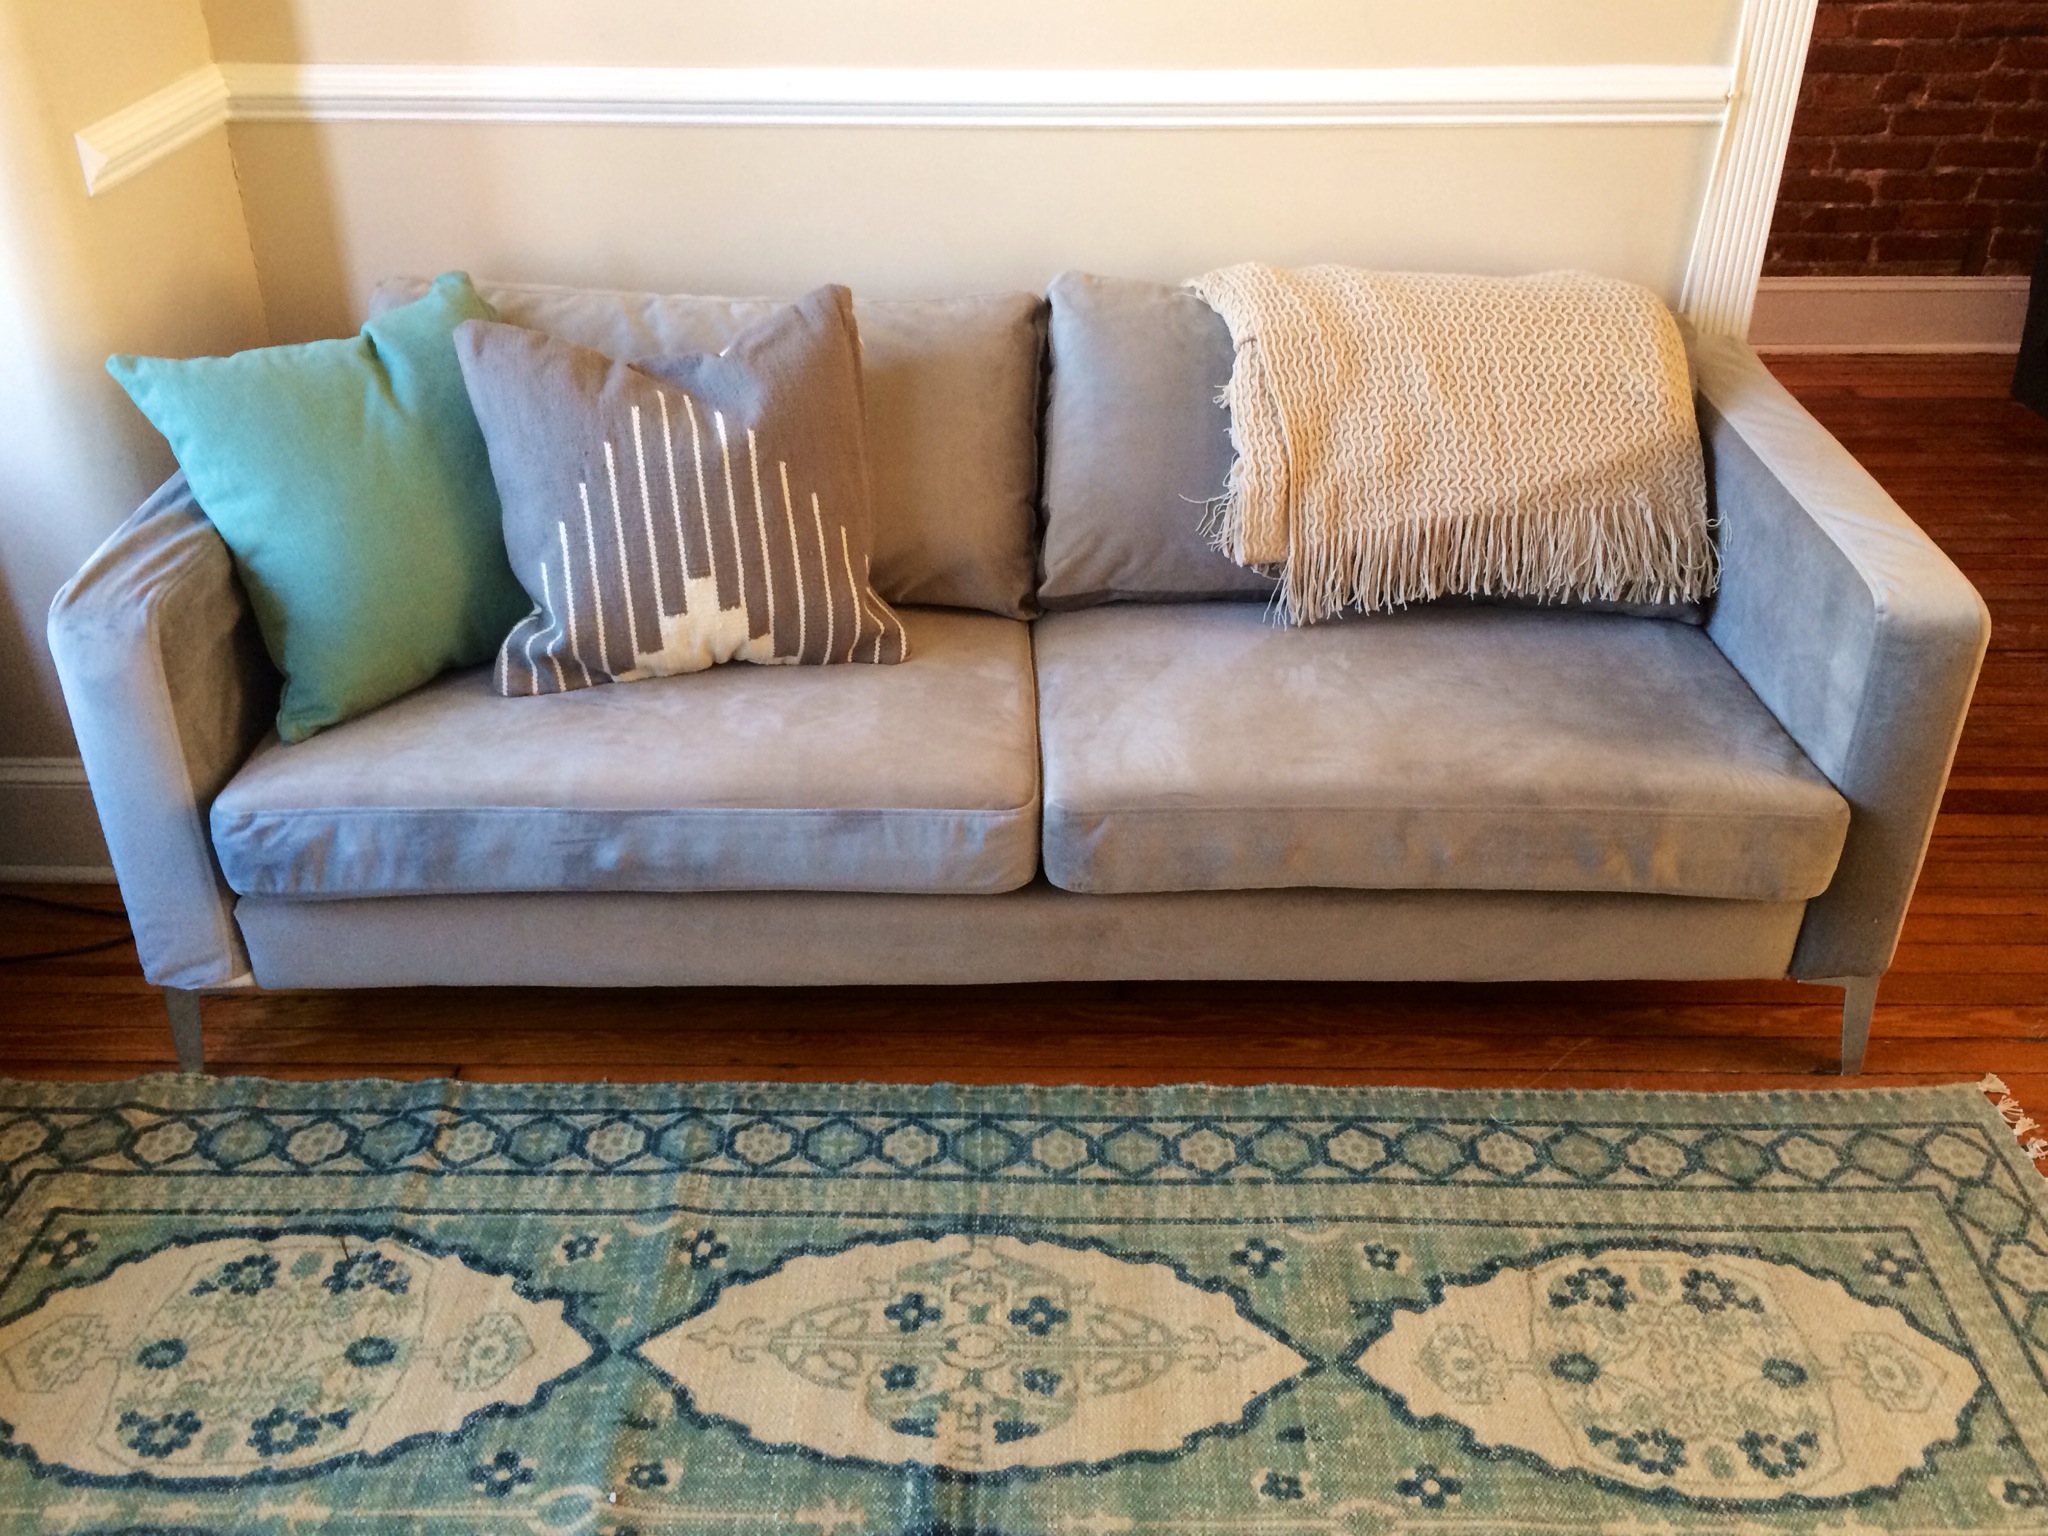
Recently we purchased the Karlstad, L-shaped sofa from Ikea, in isunda gray. It can be very big and plain, and I’ve been struggling to find pillows that are lounge-y, comfortable, beautiful, man-friendly, and inexpensive to go with it. So I thought making my own with purchased fabric would be the best bet. I purchased a couple various sized cushions from Ikea – like $7-$15 per pillow, that you can stuff in once stitched. If you’re like me and don’t have a sewing machine, these can be exceptionally time consuming… however…they’re SUPER easy to make, and Orange is the New Black Season Two was just released, so my guess is you have some time to kill.

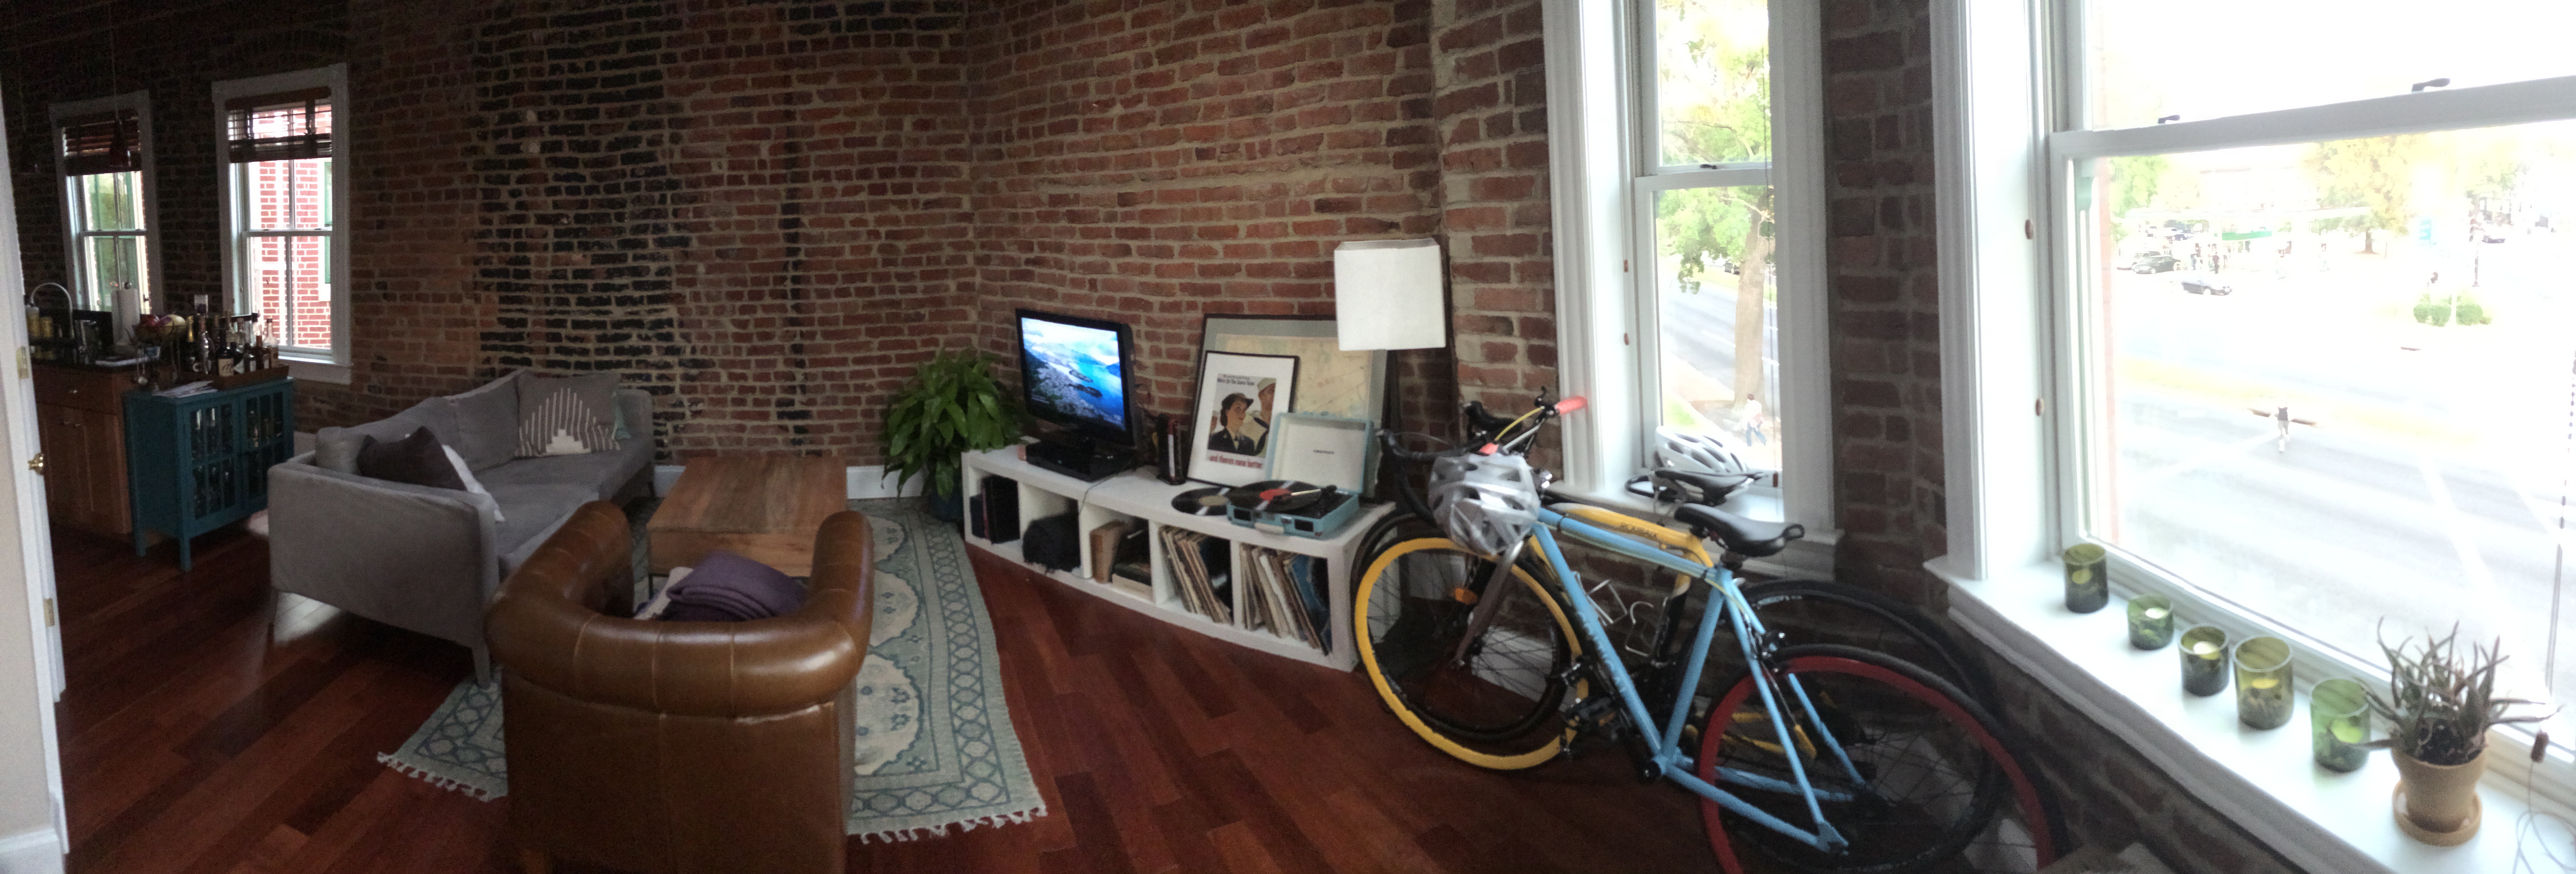
For your encouragement, a finished photo:

photo 3-2

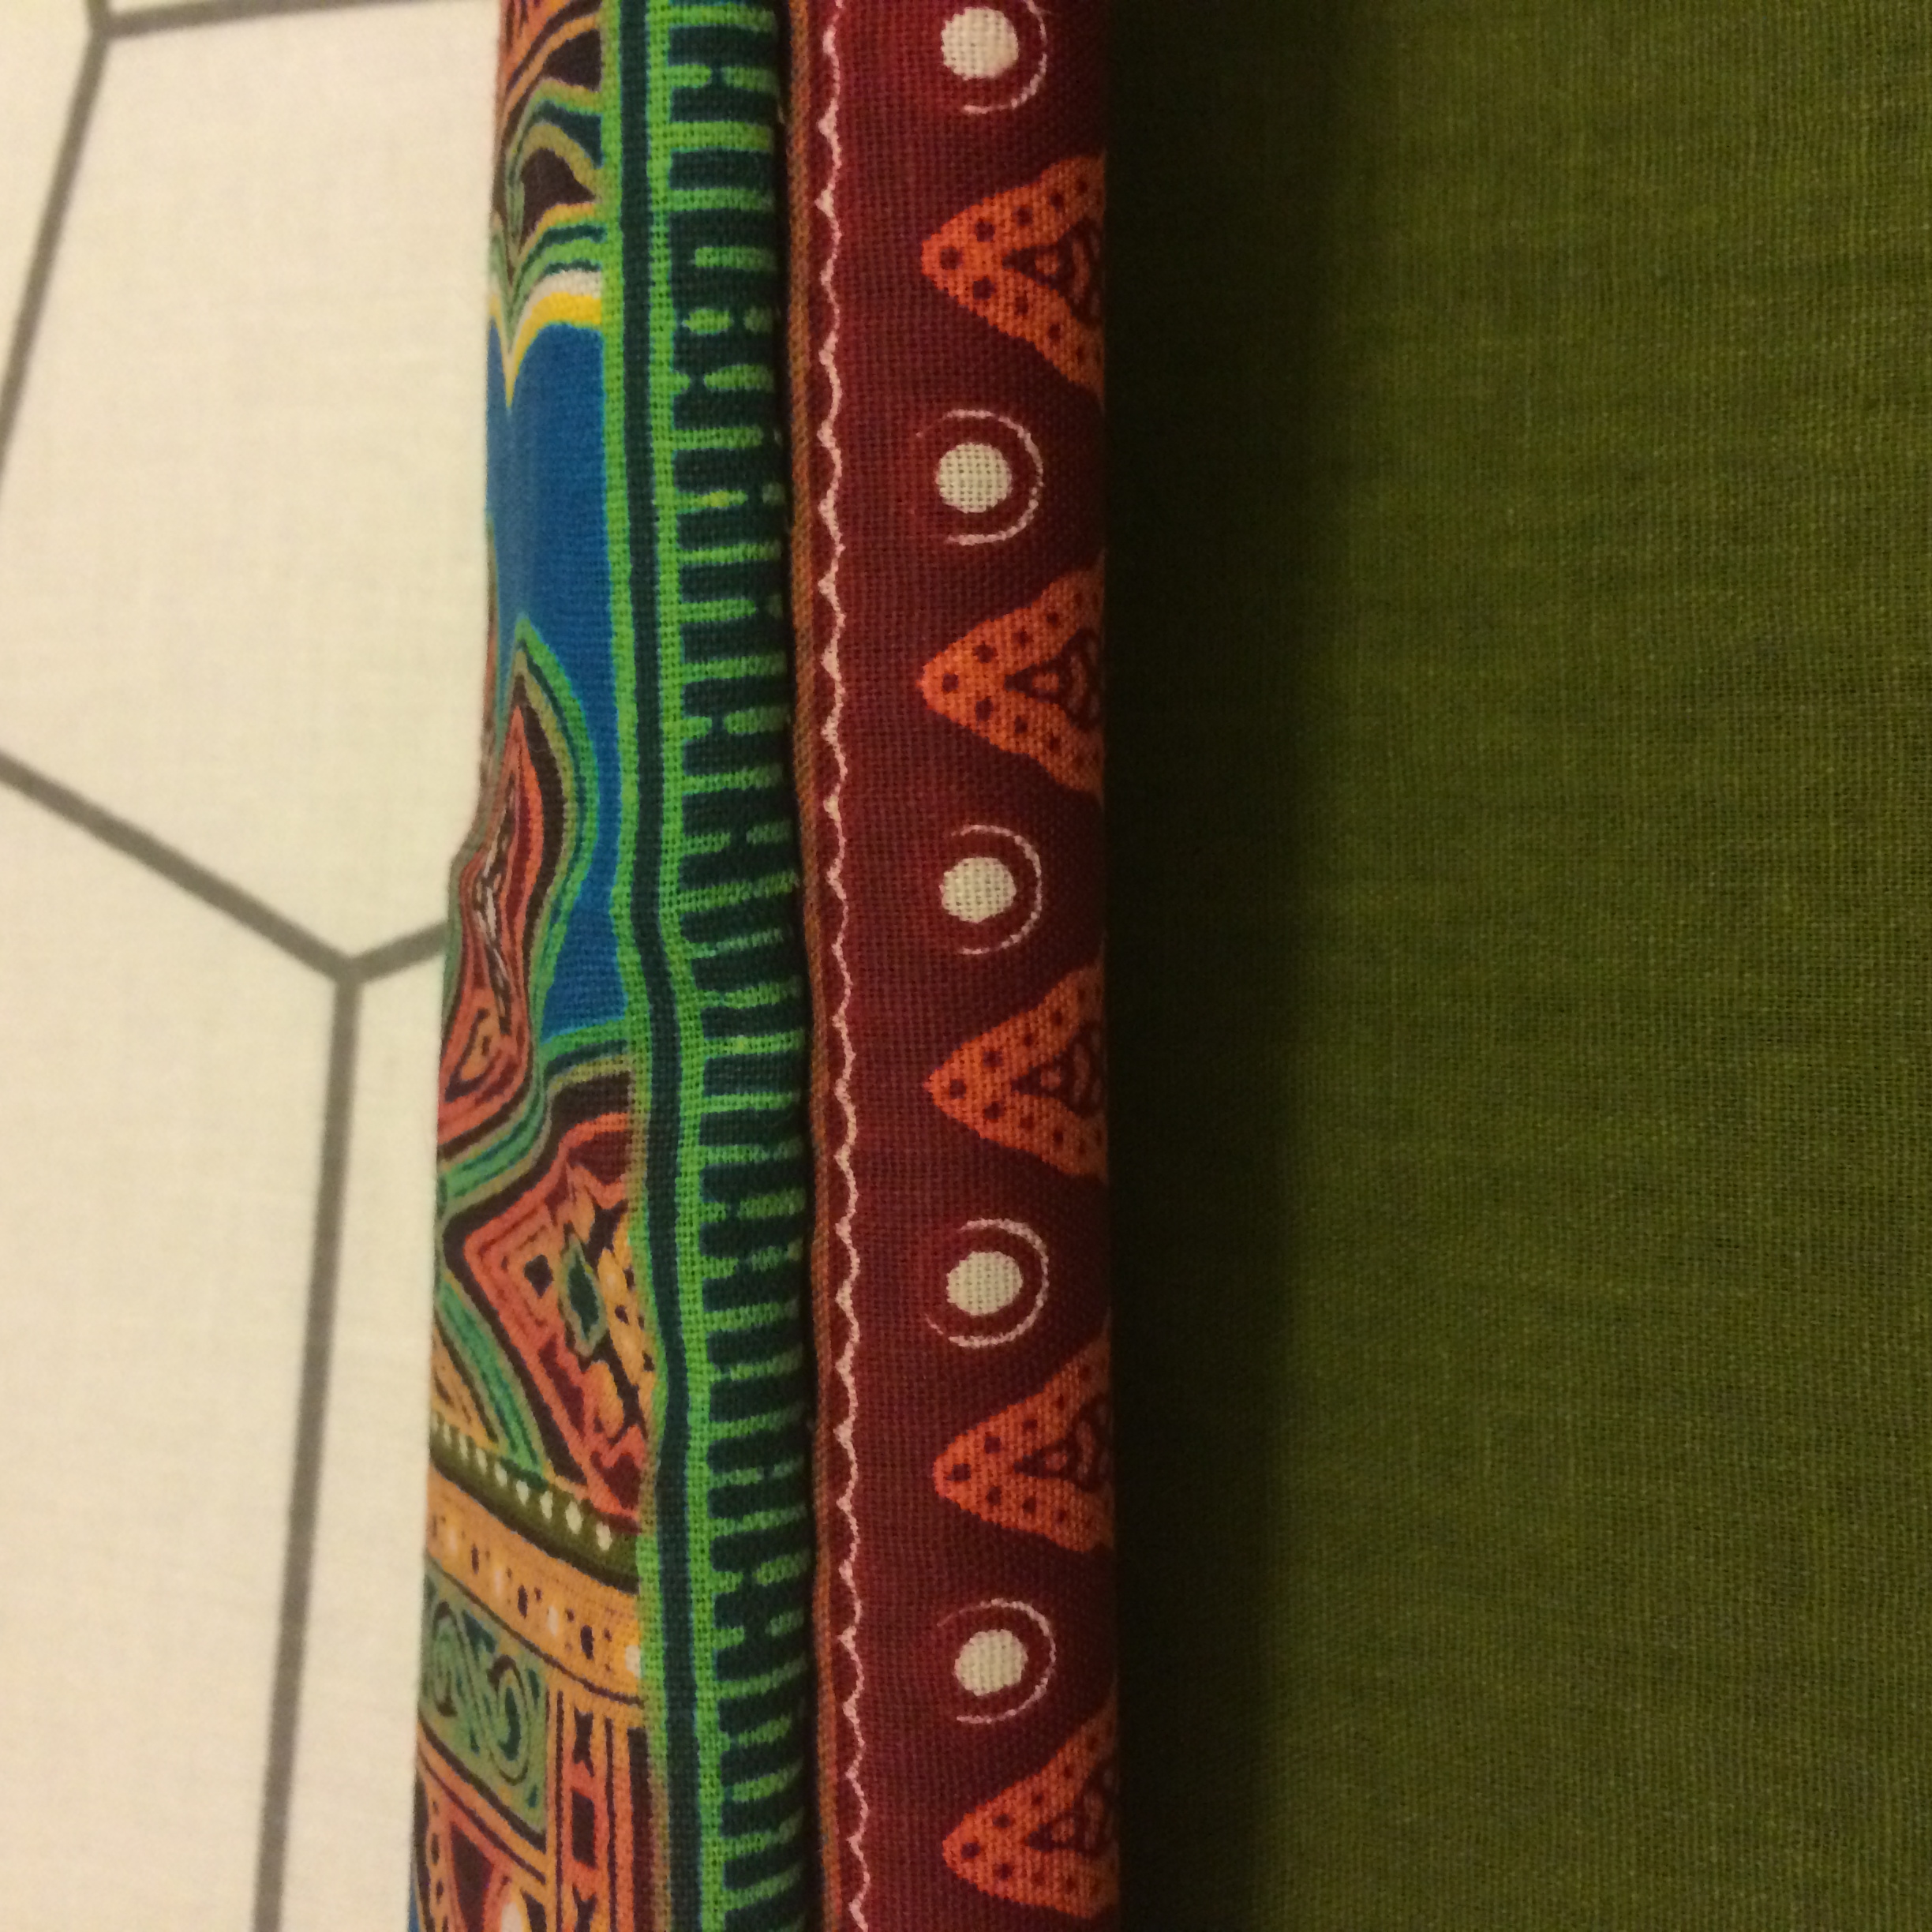
The black and white checkered one is from Ikea (actually went quite nicely with them!). The green and aqua are the fabric purchases I made in Kampala.

What You’ll Need:

  1. Scissors
  2. Measuring tape
  3. Fabric – really depends on the size you want your pillows to be. For the larger green pillow, I cut two pieces of 23X23 inches.
  4. The pillow or stuffing you want to use for the inside — Maybe you have an old pillow that you hate? Recycle it, and add new fabric!
  5. Needles and thread — I bought a basic pack of thread that offered a bunch of colors, and it included a couple needles ($5) I’d recommend a large needle if you can, they’re a bit easier to work with.
  6. Sewing pins ($3)
  7. Iron
  8. Patience, white wine, whatever gets you through it
  9. Scotch Guard (if you want to spray onto your pillows to prevent stains)

So first, cut two sheets of the size of fabric you need. I recommend cutting a bit smaller than the size that you measure when the pillow is fully fluffed. You will want a tight cover, and it’s ok to stuff the pillow in … will make the final fit tight, and create a better shape.

photo 2


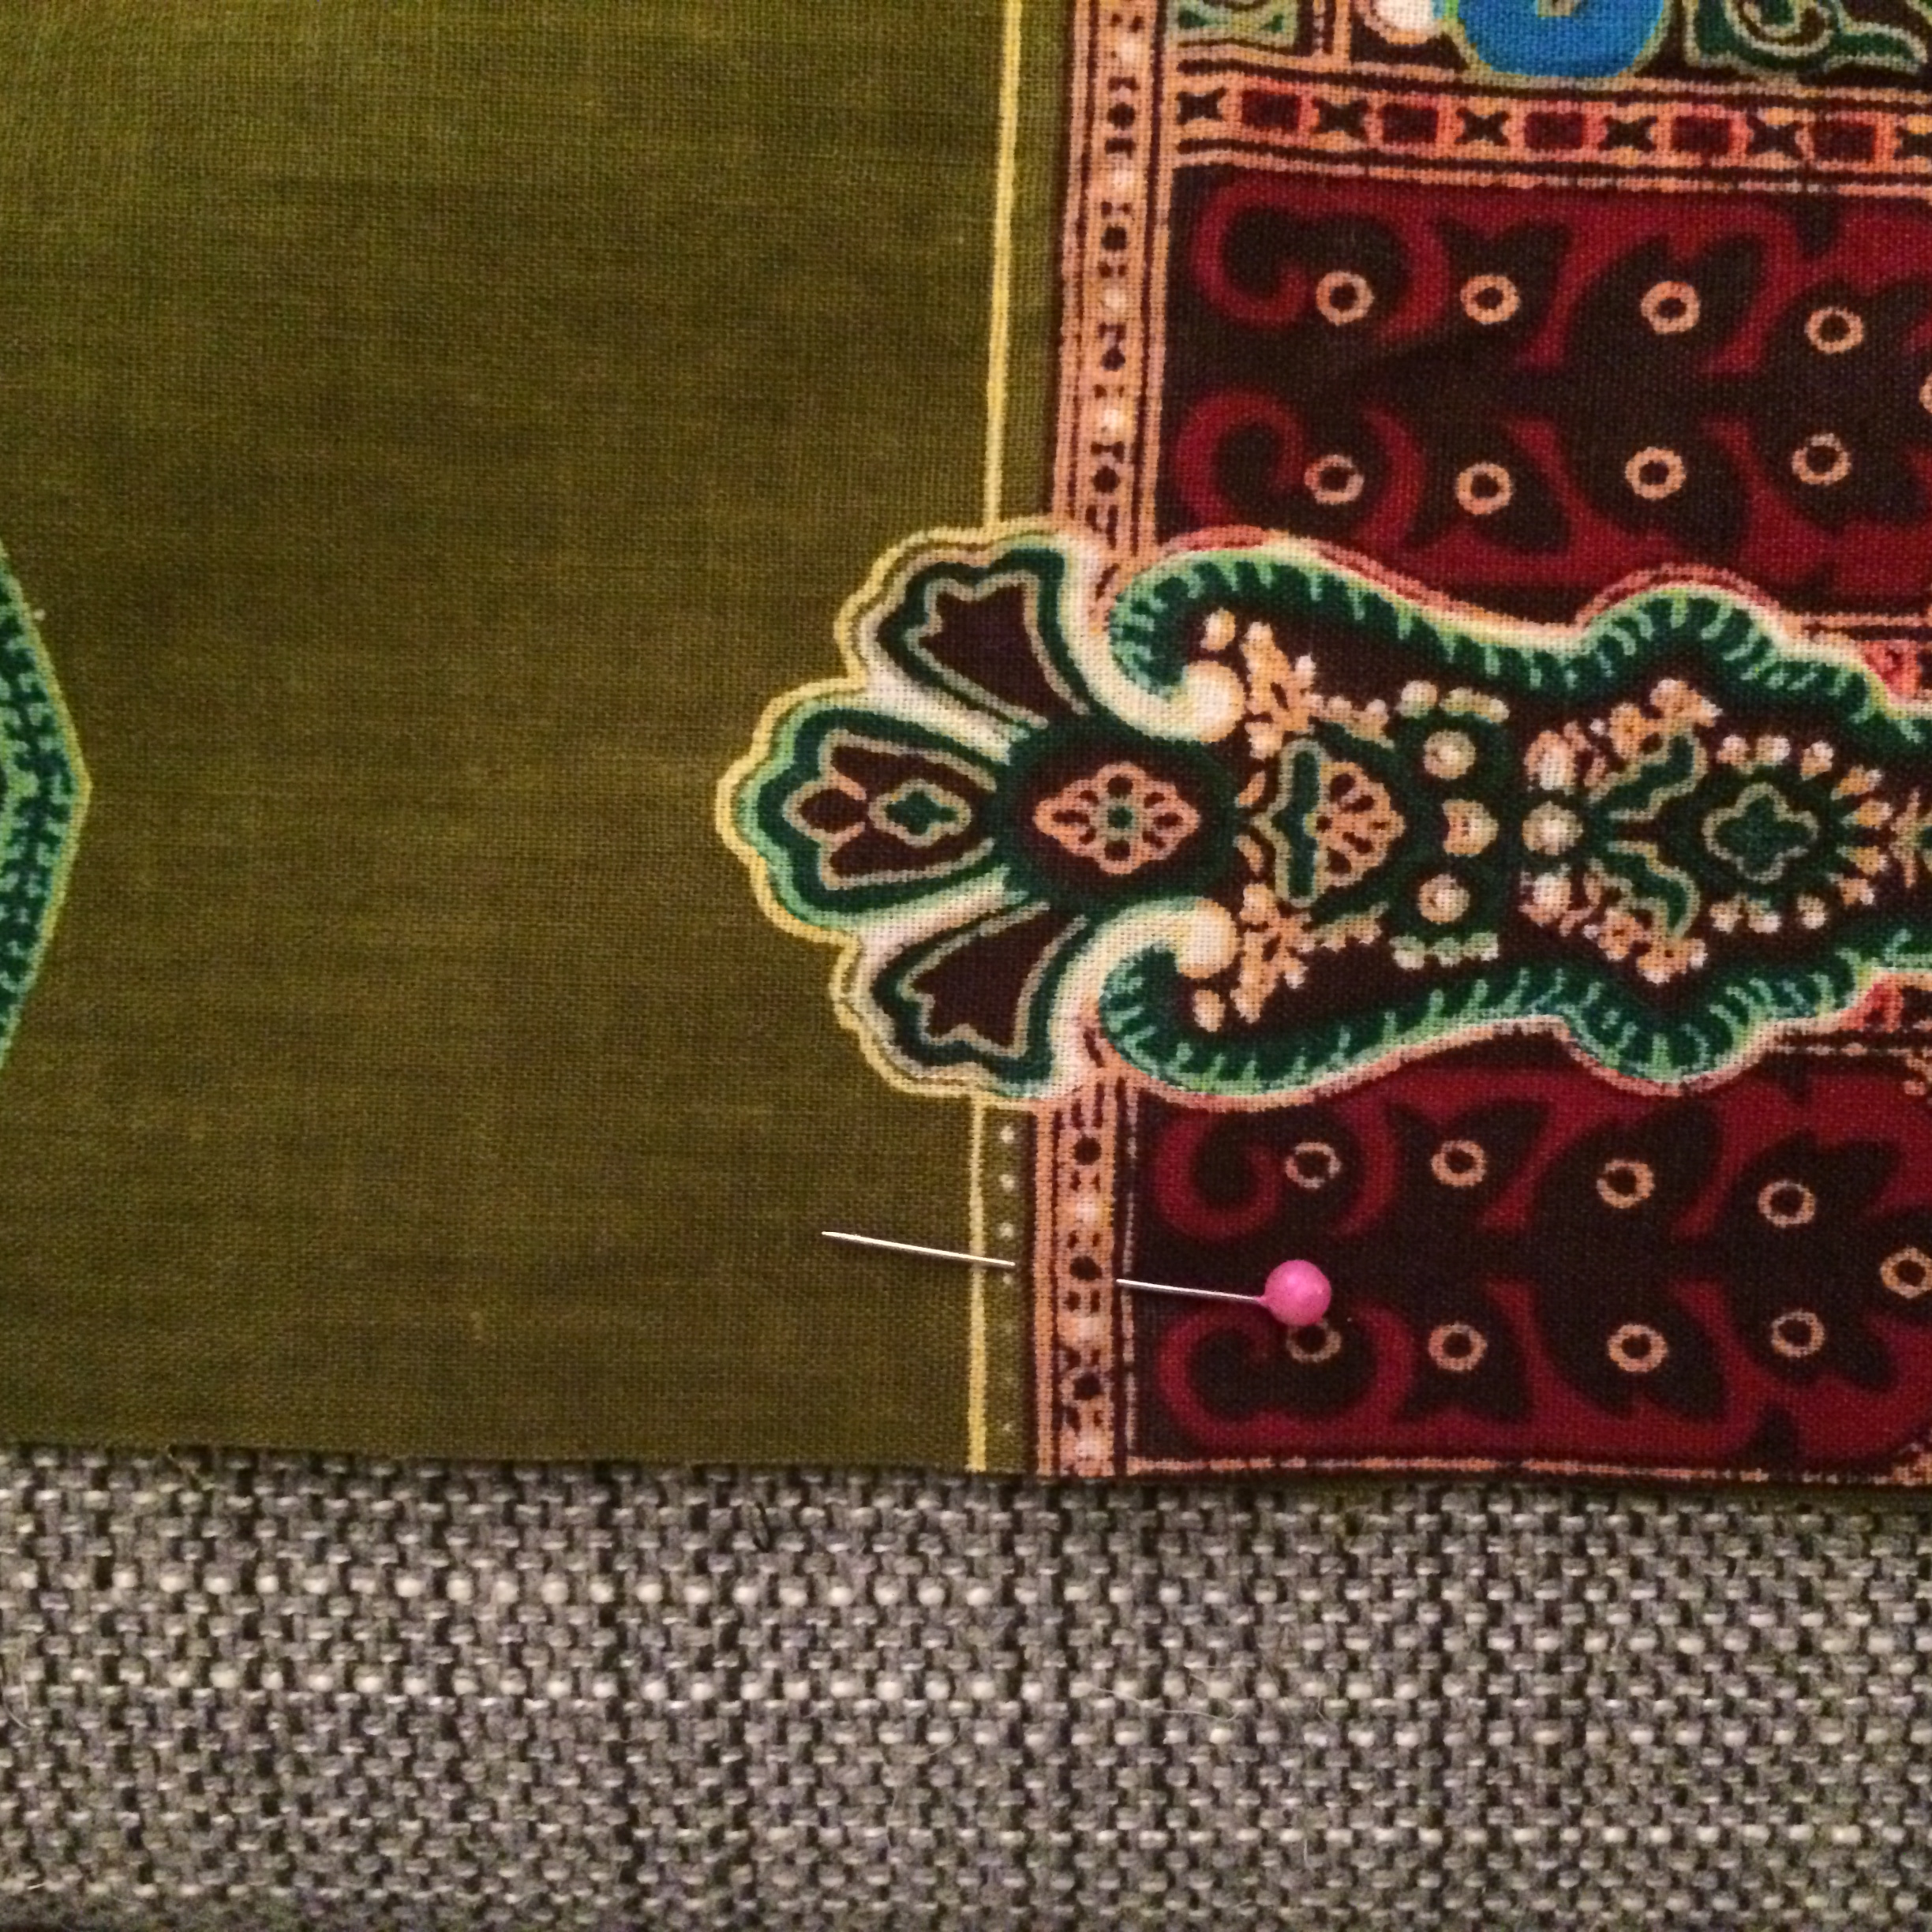
Once you have both sheets, turn them inside out — That way, your stitches are on the inside, and make for a cleaner finish. You’ll sew one side at a time. To keep your fabric lined up, and to make sure you’re stitching in a straight line, use your sewing pins. Roughly half an inch from the bottom of each side of fabric:

photo 3

After lining up your pins, use the length of the fabric to determine how much thread you’ll use. To make sure you don’t run out, and have enough to tie at the end, add about six more inches. Then, double over your thread. Stitching two pieces of thread at one time will ensure it keeps sturdy. Starting at one end, tie through your thread, and begin stitching in and out. Try to keep your stitches as close as possible — this will keep the pillow from ripping.

Do this for three of the sides. Remember, double your thread! (For real, it helps.)

Then, put the fabric the right way out, and you’ll see your stitches look great

photo 5


After turning the fabric right-side out, get out your iron, and iron out any wrinkles that may have developed… you’ll want to make sure to do this before stuffing your pillow, to ensure that it’s smooth and wrinkle free when finished. Then, for the side that has not been sewed, fold each piece of fabric about 1/2 an inch in — so that the cut line is hidden from the outside. This will be necessary when stitching the final side, and will make sure the pillow looks finished. (Insert photo, oops, my bad).

Next, stuff in your pillow or stuffing (insert 2nd photo I did not take).

For the final side, you’ll use pins once again to keep the fabric together, and to create a line you may follow. Double your thread, and stitch from side to side once more — this is the one side you’ll definitely see stitched, so take your time, and try to create a straight line. Again, make sure your stitches are small to keep the pillow from ripping.

photo 3-1When finished, shake our your pillow, let the stuffing move around a bit, and ta-da! Here’s the final look. I’m pretty sure these pillows would cost you at least $75 in stores like West Elm or Pottery Barn. Now, they may have been machine stitched and therefore more sturdy, but how fun is that?

photo 5-1


Jenna’s NEW Place

It’s been a while since my last post. Mostly because I’ve been traveling without a laptop. But even more mostly because I’ve been living out of a suitcase for four months. Just getting back, I’ve officially moved to New York, where my little one bedroom apartment is hiding in a storage unit. More on that soon. In the meantime, my friend Jenna, who’s row house mini-reno I shared with you here (or literally two posts below, oops), has moved! Typical of DC properties and rentals.  No worries though, because she found a sweet two bedroom apartment in a renovated funeral parlor. Creepy, perhaps. But whoever did the redesign left the exposed brick, old brick stains, wooden beams, and molding. I love this person.

After just recently updating her old space, Jenna was a bit bummed to move, but turns out everything we purchased and set up went even better in the new place. Check out her space,  and see how she did. I for one was incredibly impressed.

5

photo 1Brilliant and so rad. The girls turned the TV stand into a glassware cabinet and liquor stand. Looks so great at the end of the bar, and I love the pop of the color surrounding the hues of brown.

4

The girls didn’t actually need to buy anything, either. Jenna had this Ikea bookshelf in her room, and simply turned it into an entertainment center. Love the record display, too.

2

Unfortunately, they had to get rid of the second sofa, but this set up still looks warm, inviting and heaps comfortable. Check out that BEAUTIFUL West Elm coffee table that hadn’t arrived before I left the last time. Also good to see that sofa cover has kept it’s color and shape.

Nice job, Jenna. Love seeing how we can adapt and make our furniture and belongings work wherever we live.

jenna’s space

Screen Shot 2014-01-30 at 2.59.15 PM

A friend of mine moved into a gorgeous row house about a year or two ago, and after a roommate (and furniture!) moved out, she decided it was time to get a few things to furnish and decorate her home. The row house is BEAUTIFUL. Original molding and hardwood floors. Bay windows. A dining room and living space that’s open. Exposed brick. I could keep going…

Her budget was around $1500 for round 1. She wanted to update her sofa, add some small pieces, and make the living area and dining room a bit more communal and warm. Host brunches and groups, and make the place perfect for her and her new roommates.

Here are a few before pics:

photo 3

photo 4

photo 1

photo 2

We upgraded the green Ikea sofa by purchasing a new slipcover online. It’s now a velvet, light grey — Comfortable, neutral, but unique with its texture. We found a great overstuffed leather chair in cognac. A new updated entertainment center in teal blue. We will drill holes in the back to add all the cabled equipment. The rug was on sale at World Market, and the bench was from (ahem) Tar-get! We found a few bric-a-bracs and pillows throughout the adventure, and will continue adding pieces as we find them.

In the dining area, we found six eclectic, wooden chairs at her nearby flea market that will be washed white during round two, but for now, they’re great. The recycled wine glass candle holders were actually made by me from a previous DIY project, and some serving dishes and tea towels for the dining table were found at World Market.

Here’s how it looks

photo 1photo 5 copy 2photo 3 copy

photo 3

photo 4 copy

photo 1 copy

photo 2 copy

photo 5 copy

photo 2 copy 2

photo 1 copy 2

photo 2 copy 3

photo 4 copy 3

photo 5 copy 3

We have a coffee table waiting to be delivered, frames and curtains that need to be hung, chairs that need to be painted… but this is an excellent start and already the space feels warmer, comfortable and cheerful.

Stay tuned for round two.

i heart bottles.

Bottles and vessels. Different textures, colors, and heights. I love the eclectic, vintage yet modern feel they bring to a space. In my current place, I help use them as a room divider. My bed is behind the blue dresser in the last photo. (Ikea dresser, Anthropologie knobs.) What I also love, is that you can find bottles for 4 bucks. Or 20 bucks. It doesn’t have to be a pricey investment to add spunk to your home. Flea markets, garage sales, your favorite beer or wine bottle, West Elm, apothecary stores, even the grocery store where you can buy your favorite Mexican saint candle. Check out some of these images – let me know what you think!

make it a kitchen

I’m struggling with how in the world I’m going to not only cook and clean in what the realtor calls a kitchen, but how I’m going to organize all of it!

I don’t online shop for kitchen tools, I no longer even have one of those 1-800-Chop It’s! All I really have are the basics, but alas, three cabinets hold diddly squat. Check out what I’ve done to organize the space, utilize the cabinets to the best of my ability, and keep the itty bitty kitch lookin’ sweet.

1. While it’s all mismatched, I love my dishes. My mom’s made some of them, some are from Ikea, some were stolen from college roommates, and others were taken from free street sales. I figured I would need additional storage in the kitchen, so why not store my pretties — and not boxes of flax seed and canned beans — in the open space, leaving my food, what can quickly appear cluttered, in the cabinets. Check.

I made one purchase from Ikea. It’s a $40 shelving unit that I’m pretty sure is for storing towels and bathroom supplies, but hey, it works.

sadly the space is so small, it’s near impossible to get the whole unit in a photo

** Another trick — Use old jars to store your silverware. Those on top are the bruschetta jars from Trader Joe’s. Nice little addition, especially when you have no drawers.

2. Next, I needed somewhere to store my pans and colander, and heck, maybe some more space for mugs. I purchased a coat hanger for $10 at Ace Hardware, and reused a couple hooks I had purchased years ago from World Market (each were like $4). Since my apartment is way old, I needed to use my drill, and a drill bit for cement walls which you can easily buy at Ace for like $5. Not only are these handy things to have at home, but damn will you feel accomplished. Make sure you get the right screws, too.

3. Lastly, I must admit, I’m an old lady at heart, and try to save all my receipts, old cards, birthday cards, recipes, you name it. There was no space for my old desk (stay tuned for that project), so I decided to mount my paper holder to the wall. Find a magnetic one and you’ll be happy you bought all those cheesy magnets while traveling abroad. Again, get two cement friendly screws (30 cents a piece?) and begin!

Next up: the living room!

-Summer