mason jar bathroom organizing

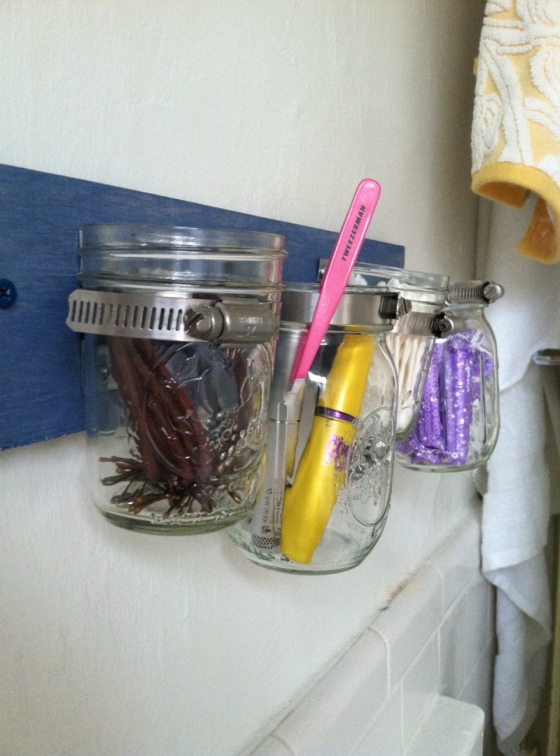
I hate finding bobby pins everywhere. Or Q-tips at the bottom of your bathroom cabinets. If your bathroom is small like mine, you probably don’t have a lot of counter space to hold hair clips, tweezers, cotton balls, etc. I saw this project done on a couple other blogs, and decided to take it on… turned out pretty great. Below are step by step instructions – and photos! – for how to do this. One note: I spent exactly $25 on everything. Next time, I’m going to use recycled jars, which should reduce the cost like $8- $10.

Final product:

for the record, living alone means not caring about having tampons out in the open. boom.

What you’re going to need:

1. A drill – if you don’t have one, buy one. Mine cost $60 – it plugs into the wall, which means crappy batteries won’t be an issue. Trust me.. invest in one, and you will not only be pleased with your purchase, but damn will  you feel independent.

2. A piece of wood – pick out the size you want. I bought everything I needed at Ace Hardware, and they actually sell scrap wood for $1 a piece. Perfect.

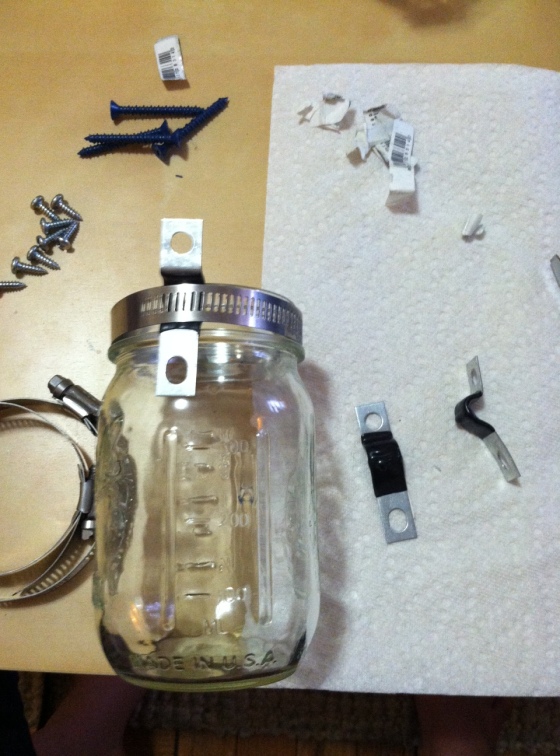
3. Rubber fixtures – one for each mason jar. These are what attach the jars to the wood. They are found in the plumbing section.

4. Mason jars! Use an old spagetti or jam jar. I chose to use different sized jars, because I knew I wanted to hold long items (like mascara) and small short items (like bobby pins).

5. Automotive circular hose clamps – one for each mason jar. Found in the automotive or plumbing section

6. 8 screws – two for each mason jar. These will be used to screw the fixtures into the piece of wood

7. 2 big screws – to attach the piece of wood to your wall. Because I have cement walls, I needed cement screws. Check with an employee at Ace to help you figure out which screws are best.

8. Paint – I used what I had left from a previous project (see bathroom cabinet)

9. Flat head screw driver

10. A good eye, a piece of string, or a measuring tape – to make sure you drill the screw in at the right level.

Here’s how to do it –

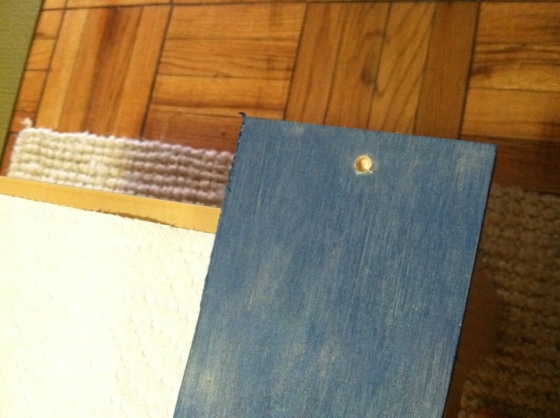
First, paint the piece of wood. I wanted  just a lite, rubbed-on coat. I took a paper towel, and lightly painted the wood in the direction of the grain.

Drill two holes in the wood – on the outer sides. This will be where you screw the piece into the wall. If you want to get fancy, and make your piece extra sturdy, use a large bit to drill into the wood a little bit, then finish with a smaller bit, and go all the way – this will create a holder for the screw.


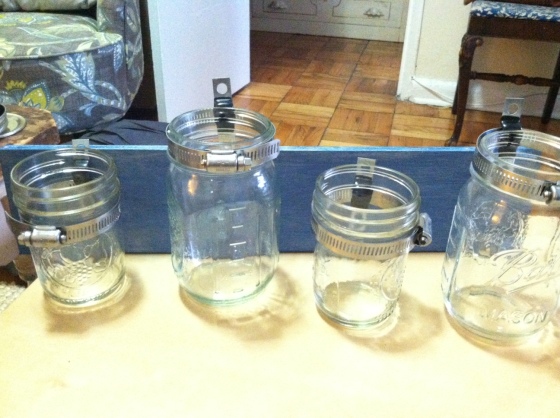
Next, organize each mason jar with a clamp and rubber fixture. Decide what order you want the jars to be placed on the piece of wood. At this time, use your screw driver to tighten the clamps around the jars. Remember: lefty loosey, righty tighty. 🙂


Stand them up, and put them in the order you want. Next, measure out the distance between each jar on the wood. You will use your drill to screw in the rubber fixtures.


Finish drilling in the fixtures. Helpful hint: It may be easier to do this with the mason jars OUT of the clamps. Simply loosen the clamps, and put the jars back in after you’ve attached the wood to your wall.

Attach the piece to your wall – mine is in the bathroom – and there you go! A pretty simple, and somewhat fast project that will create space in your bathroom, recycle jars (if you are smarter than me) and decorate your space in a unique and artistic way. Next, I’m going to make one for my kitchen to store utensils – mine are currently in jars as there is no drawer. Thanks!

squash and KEEN-WA boats!

My mother passed this along via WebMD and I was immediately excited to try it. Check out the recipe, and see the step by step instructions below. Very simple, super easy, delicious, and vegan! In an effort to buy sustainable, local food, this recipe is great to make in the fall – Squash and pears are available locally, and the summer season of fresh herbs is just ending…

perfect and festive for fall

What you’ll need –

1. 1-2  kabocha squash – if you can’t find kabocha, you can try acorn

2. Quinoa! about 1 cup

3. 2 cups low sodium vegetable broth (I cook quinoa in it, more flavorful)

4. honey

5. olive oil

6. 2 1/2 cups fresh spinach

7. 1/2 cup fresh basil

8. a pear

9. lemon juice from one lemon

10. a shallot

11. cardamom

12. salt and pepper

First, cute the squash in half, and then pull out the seeds. Make two parts honey, one part olive oil, and spread it around the open part of the squash. Lay them open-part down, on a foil-lined baking sheet. Bake for about 20 minutes at 425 degs.

While the squash is baking, put two cups veg broth, and one cup quinoa in a frying pan. Cook on high til it boils, stir, and let simmer – with it covered – for about 10-15 mins. Don’t let it stick to the bottom or over cook. It will fluff when done.

veggie broth adds nice flavor when cooking quinoa

After the squash are cooked, turn em the other way, open side up, maybe add a little more honey, some pepper, and cook for another 15-20 minutes. They’ll be done when they look a little caramelized on top. 

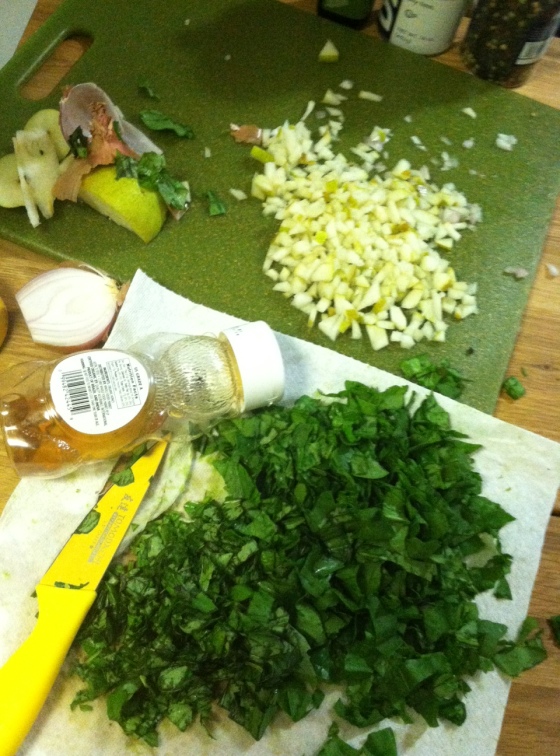
While the squash continue to cook, cut up the spinach, pear, and basil. In a bowl, combine the quinoa, lemon juice, minced up shallots (uncooked), and cardamom – to taste. Let the quinoa cool down a bit before adding the greens.

Add the basil, spinach, and pear to the quinoa. Add salt and pepper to taste.

When the squash are done cooking, let them set for just a second – they will be soft, and could brake open a little if you handle too quickly. Lastly, put the quinoa mixture in the squash, and serve.

I think this would be paired quite nicely with a piece of salmon, or rosemary chicken and garlic mashed potatoes. Great meal if you were hosting a dinner party. Maybe pumpkin-something for dessert. For one person, or two, these alone are great, and very filling… Eat the extra quinoa mixture cold for lunch, or cook up another squash the next day.

Enjoy, and happy fall!

hurricane cleaning

While I consider myself a Type-A clean freak, I too have clutter. Messy piles. And – shudder – hidden messes. Good thing Hurricane Sandy has come, and forced me to stay inside and clean!

Living in a tiny studio, I’m very fortunate to have two – that’s right – TWO closets. The one I worked on today is the storage/coat closet. I hold coats, my way-too-many-Christmas-decorations, cleaning supplies, cat food and litter, and everything else that is ugly, but needed, when living in a house.

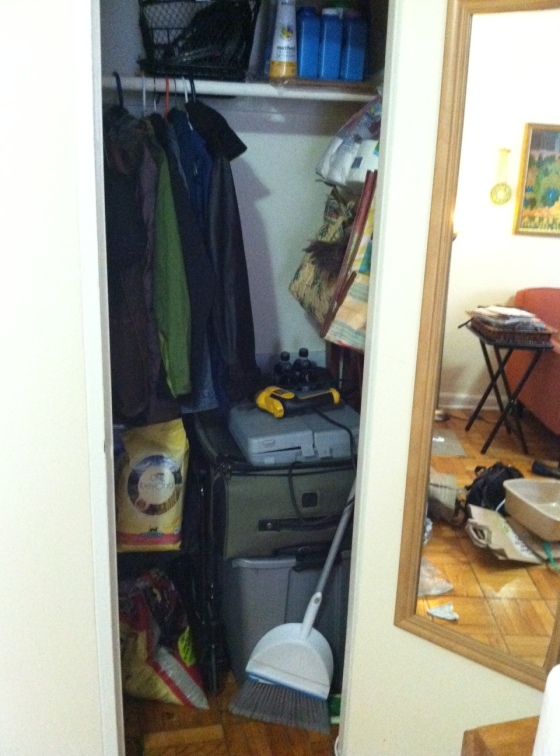
Here are the before and after photos. Let’s be honest, my goal wasn’t to make it pretty. And I spent NO money in this process. But here are a few helpful pointers to use when cleaning out your closet.

before

after

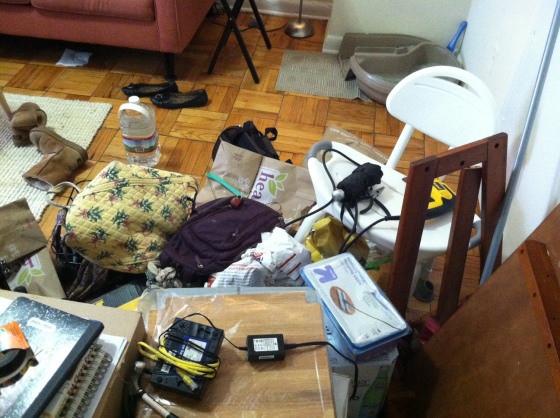
First off, dump out all the crap. Seriously, dump it out. And then sweep out the dust. Dust is gross. Spiders and bugs like dust. And spiders and bugs are gross. When you dump it all out, check out what you have.

1. Empty box of sparkling water from Costco – RECYCLE AND GET IT OUT.

2.The empty bag of paper towels – throw it away, and remember to buy more.

3. Tools and jars and bottles and cleaning supplies that are all over the place. Think about how to put them all together.

4. A brand new litter box that your crazy cat, Olive, never used.

4. Boxes and more boxes.

DUMP IT OUT!

it’s like showing strangers my dirty laundry

Now. Check out what you have. What I realized quick was that I wanted to build another shelf – that was reachable without a stool – to hold my cleaning and laundry supplies. I found the extra shelf I never used when building my Ikea cooking block, and rested it on top of the bar. Consolidated all of my supplies up there. No mess now on the ground.

Please. Here is a recommendation from someone who hates clutter and keeping crap for no reason. There IS a reason to keep the box from a Kitchen Aid. Or the box from your drill. Moving is a b*tch, and if you keep the boxes that hold things other boxes can’t, it will make moving a heck of a lot easier. Said boxes replaced the litter box, and are now on top.

I then cleaned and gave away the litter boxes. Consolidated all of my grocery bags and recycled bags into one, and hung it in the back corner. No one needs that many bags until you need that many bags. So put em all together, and keep the clutter out.

Think about the things you use each week. Maybe your drill. Tools. The broom. Make them available, so that you don’t have to rip everything apart to find them when you need them.

And yes! By organizing all your unwanted but necessary crap, you WILL realize you actually have not one but THREE umbrellas, and therefore need to no longer purchase them EVERY time it rains.

Cheers to that. And cheers to Hurricane Sandy. Well, not really, but you get my point.

happy halloween, y’all!

I love Halloween. Working as an office manager, I get the privilege of decorating our office… and you better believe I’m taking that opportunity. At some point I’ll blog about the space and how I’ve designed it. Until then, check out the start to decorating for our Halloween party next week. All items were purchased at either Amazon.com or Party City – all were on sale. Huge recommendation – before you EVER buy something online, Google coupons for that store. I searched for discounts for Party City and found a $30 off if you spend $100 – Plus free shipping. Discounts are out there, you just need to take a moment and look.

I love a great center piece. I  love bringing basic pieces together to create a nice, final display. Here I bought I basic black netted cloth, a couple paper lanterns, cob webs (most important), gourds,and a paper, sparkly candle piece. It’s a little cheesy – but it’s Halloween, and it’s fun. Add a few sparkly, black leaves… perfection. One tip on cob webs. A little goes a long way. The best cob webs are the spread out ones… fine strands, super creepy.

Normally, I prefer making crafts, getting creative… but let’s be honest, some years there is just no time. Instead, get creative with the cheaper Halloween decorations – no need for the $150 Vampire – and see what you can do.

I’ll soon be building a photo booth stage, layout the makings of a good pumpkin carving station, a couple recipes for amazing cider, and everything else that makes a Halloween party amazing.

succulents make a home go boom

I love succulents. They are green. They are cute. They are tiny. Most importantly, they are hard to kill. Scratch that. I’ve killed a couple. But if you plant them correctly, they can last decades.

There are several places you can buy succulents. Ace Hardware has great ones. You can buy them at the nearby plant store. In DC, there is a plant shop on 14th and R st (ish) that sells lovely succulents in great planters. Or, you can buy them in bulk online, where they ship the rooted plants to you in brown paper bags.

I’ve done all of these options. And pretty much, they all work.

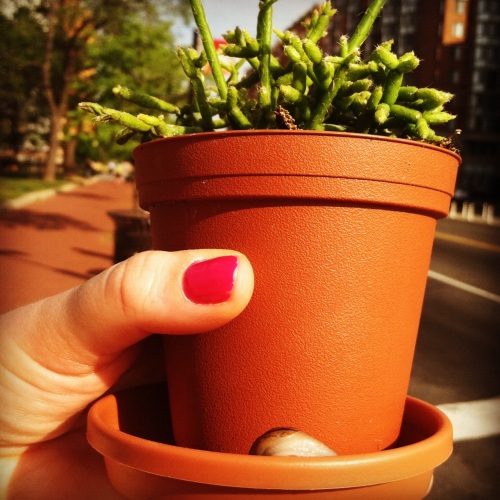
If you are going to plant your own succulents, you’ll need little planters with holes at the bottom. Make sure you have a plate to hold the excess water underneath. Here’s why. Succulents are cacti – but cacti aren’t succulents. While succulents require a tad more water, they’re still desert plants. They don’t need a lot. They live in dry climates, and need to be able to release the water around them. Also, the desert is full of rocks. So it’s important that you also have rocks in your planters. You can also buy nutrient-rich cactus soil. By the way, succulents are cheap! The fancy planters and expensive plant shops are what make them costly. You can buy small plastic planters at Ace Hardware for $4. A bag of soil for $9. If you can’t find rocks – perhaps you live in the city – you can buy them in the decorating section at places like Target.

In terms of watering – you can water just a little bit every two weeks. Or month. It depends on how much sun they get. It depends on the heat. Use your judgement. If you question yourself, know that in this case, less is more.

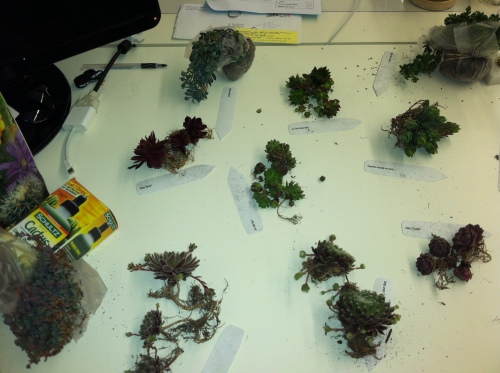
Check out some of the succulents I’ve planted.. hope it inspires you to add green to your life.

a quick bathroom update

In the old row house, I lived on the bottom floor and shared the house bathroom with guests and my other roommates. The bathroom was smaller than my kitchen now – so just about enough room for one person to stand. The shower alone was literally 2X2 feet. Teeny! Anyway, I wanted to clean it up, add a little color, and make it feel cleaner… all on my budget, of course.

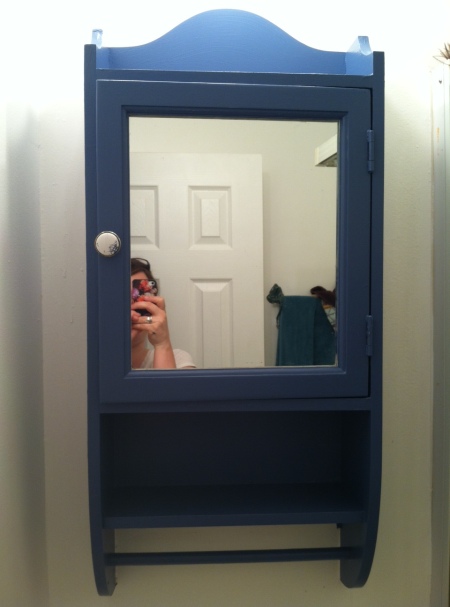
I decided – while I was at Home Depot buying paint for the front door – to also paint the medicine cabinet. I picked a grey blue. Similar to the door, I bought sandpaper. And to add a final touch, I went to the sale section at Anthropologie, and bought a knob for $3. Total price: $25. I couldn’t buy anything smaller than a quart size of paint, so I do have some leftover… maybe for a future project.

You’ll need to sandpaper down the medicine cabinet, take off the knob, and if possible, put masking tape where the cabinet meets the wall… this will prevent getting paint on the wall. Let the wall dry BEFORE adding the knob, or putting stuff in the cabinet. Again, patience is a virtue.

Check it out. Also – I added a couple more items to the wall in my new place, I’m liking it.

I need to get better at taking “before” pics.

i want fancy towels

I want Anthropologie towels. But I’m on a Target-towel budget. I think most people should. Anthro towels are fabulous. Lush, big, pretty colors. But damn. They are expensive. $48 a towel. $8 for a washcloth. Sometimes more. I would rather buy sweaters and boots and towels and Whole Foods groceries than spend over $100 for a set of towels.

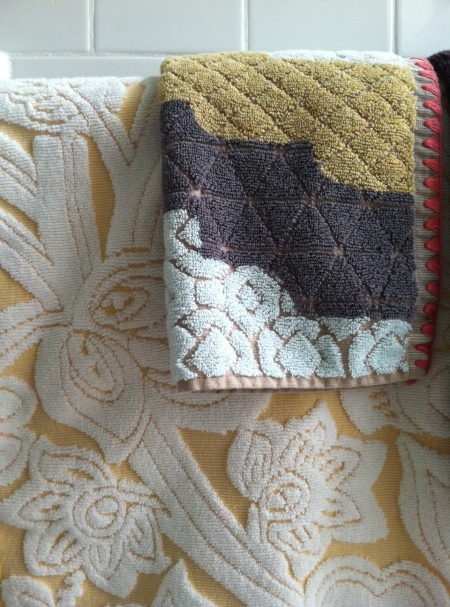
But I love that look. Please check it out to understand the inspiration I’m working with.

Anyway, you can buy nice towels, a couple nicer towels, and a couple basic towels. Mix n match and  you’ll have a lovely set. Plus, until you stop using the face wash that bleaches towels (ahem, no comment), it’s probably not worth spending too much.

See what I’ve purchased. A set of basic white, Taget Home towels, a set of yellow and white floral towels from Target – they were $12 each, and then I bought a washcloth from Anthropologie for, yup the actual price, $8. For everything – four towels, two hand towels, a fancy washcloth, and a few basic white washcloths, I spent under $60. That would be the same price for just two towels at Anthropologie.. I will say I like the outcome.

Tell me what you think!

paint a door

I get what it means to live in an old, mouse-friendly, a little bit run down, row house. I’ve lived in one, and I can appreciate looking for ways to make them feeling fresh, clean, and modern.

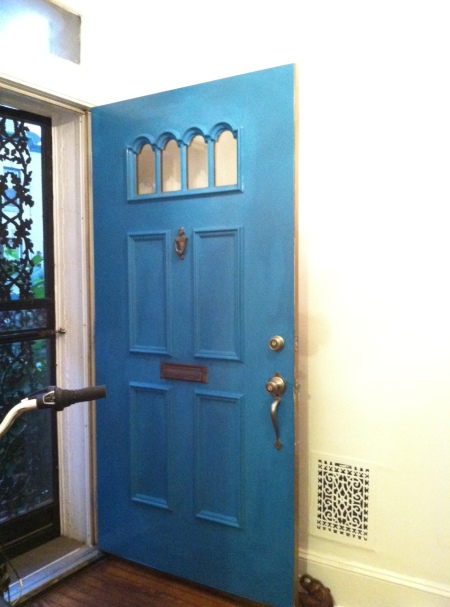
I used to live in a group house. There, I tried different things to make the house a little warmer, and homey. One  idea I had was to paint the yucky-poo colored door a fun, vibrant color that would spunk up the front space. Obviously turquoise was the answer.

** Someone told me after I painted the door that they were told a freshly painted door made burglars more inclined to rob you… I don’t think this is the case. And if so, I would’ve have offered them one of the mice **

before

Anyway, what you’ll need includes the following –

1. paint brushes – I would buy a basic brush  for the small corners and sides and also one of these guys –

It’s kind of one of the best things ever invented, and costs like $4 at Home Depot. There’s a paint brush pad on the other side. This tool makes painting edges, ceilings, and everything else a lot easier… and I like that it makes the paint go on smoother, especially nice when painting a door.

You’re also going to need sandpaper, take your pick at what kind. Maybe a medium thickness. And last but not least…paint!

Possibly because my weekends as a child included visits to Home Depot after soccer games, I would again recommend going to Home Depot to buy paint. Behr paint is effective, cheap, and comes in great colors. Because I was painting a front door, I bought the outdoor paint. I also just bought the primer/paint combo as there was no need for additional layers. Also, all I needed for the front and back of the door was one quart… that included two coats, and I had some leftover. Total for paint, brushes and sandpaper ~ $30.

Directions –

  1. First, wash the door. Simple enough.
  2. Use sandpaper to rub down the old nasty paint or wood or whatever you are painting on. This will clean up and smooth the door, and allow the raw texture to grab on to the paint a bit easier.
  3. Paint a coat – Put the paint in an old piece of Tupperware (recycle – no need to buy one of those paint trays). When painting, try to follow the grain of the wood. Also, paint kind of a “X” formation – this will make sure that paint sticks in every little crevice. Ew, that’s a gross word.
  4. Clean up any paint you spill – don’t worry, it will happen. Also, clean your brushes with soap and warm water – this will allow you to use them in the future. Win.
  5. Watch some TV – and LET THE PAINT DRY. If you lack patience like I occasionally do, this may be tricky. I recommend watching Dexter.
  6. Next day – paint another coat! I think after that dries, you should be good to go. Keep the door clean, and this should last you quite a few years.

Check out the final product:

After

i heart bottles.

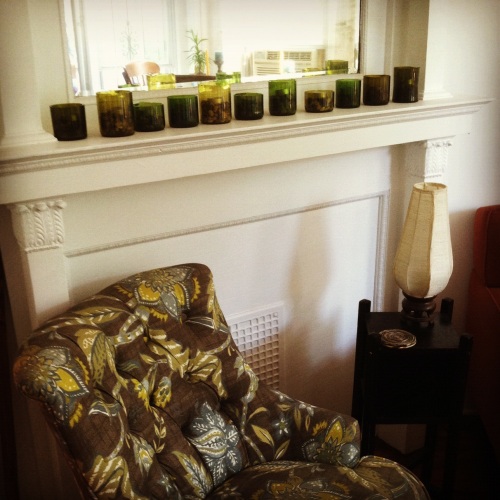
Bottles and vessels. Different textures, colors, and heights. I love the eclectic, vintage yet modern feel they bring to a space. In my current place, I help use them as a room divider. My bed is behind the blue dresser in the last photo. (Ikea dresser, Anthropologie knobs.) What I also love, is that you can find bottles for 4 bucks. Or 20 bucks. It doesn’t have to be a pricey investment to add spunk to your home. Flea markets, garage sales, your favorite beer or wine bottle, West Elm, apothecary stores, even the grocery store where you can buy your favorite Mexican saint candle. Check out some of these images – let me know what you think!

ginger carrot soup with chili-lime pepitas

I’m back. And I’m still eating! I’ve made this recipe a couple times and love it! Especially with cold weather approaching, this is a tasty, healthy, vegetarian, simple soup that’s super flavorful – and cheap! It’s also a festive color for fall. Ha! Possibly not most important, but a nice touch for holiday events and dinners.

What You’ll Need-

  1. 3 cups veggie broth
  2. 1 cup orange juice
  3. couple cups of carrot
  4. couple cups of potatoes OR cauliflower (if you’re goin low-carb)
  5. onion
  6. ginger
  7. garlic
  8. little butter or olive oil (up to you)
  9. 1/2 cup milk, rice milk, 1/2 and 1/2 – this will determine if you want to soup to be vegan or not
  10. turmeric
  11. white pepper (trust me – this adds a nice taste that is different from black pepper)
  12. nutmeg
  13. two cups of pumpkin seeds or pepitas – same thing, different name
  14. chili powder
  15. lime juice
  16. salt

In  a pot, melt the butter, cook the onions, ginger and garlic. dice up the potatoes/cauliflowers and carrots, add them to the pot. Add the veggie broth and OJ, turmeric and a little white pepper. Let it boil, then simmer for about 30 minutes. Next, pour half the soup into a blender, add half the milk/non-dairy product and blend. Then add the rest of the soup and milk. Blend and puree to the texture you appreciate. Put back in the pot, add more white pepper, nutmeg and salt – to taste.

At some point while the soup is cooking – toast up the pumpkin seeds in a frying pan, add some salt, lime juice and chili powder.

Serve the soup hot, with the toasted (and quite tasty) pepitas on top. Enjoy!

I served the soup at a dinner party a few months ago. Served it with crispy, garlicky brussel sprouts, cold gazpacho, avocado, and most important – white wine!