add a little lime to your powder room (and while you’re at it, get rid of that mold! )

Screen Shot 2015-02-28 at 3.41.14 PM

The walls in our apartment are all clean white. There’s original molding and glass,  simply, they’re beautiful. Growing up in a house where the walls were always changing colors, and even the ceiling was a “white lime” color, I’ve learned to appreciate the spaciousness that white creates, especially in a small New York apartment. That said, you can take the girl out of the eccentric home, but you can’t take the eccentric home out of the girl.

More so, I wanted to see what we plausibly could get away with in regards to rental rights. Because after moving in two sofas, we’re never leaving.

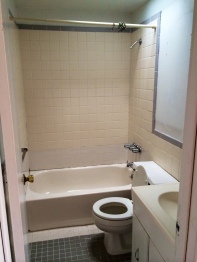
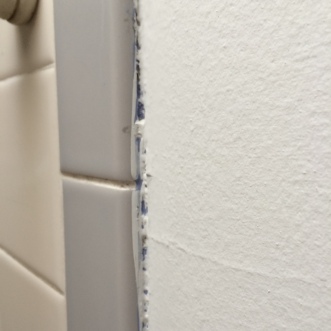
Our bathroom has a great sunlight, but other than that, it’s small. It’s mixed in white tiles where over time old ones must have broken off. There’s layers and layers of old paint, grey and white cements covering the tiles in illogical and messy ways. There’s also mold. A lot of mold. To top it off, the most recent paint job was one layer of white, so poorly painted you could see the lilac purple underneath.

I mean, it’s gross.

photo-1 photo-2

photo 5photo-3

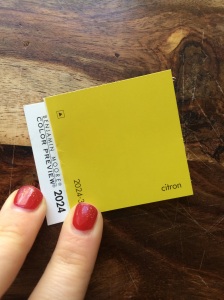
Originally I wanted to paint it a dark slate grey/blue. But who wants to poo in not only a small room, but a dark and small room? So we nixed that, and I went to, obviously, my favorite color in the world — chartreuse.

Adding a lick of paint to your walls not only brightens the space, it cleans it up, makes things feel fresh, and is an inexpensive way to redecorate.

What You’ll Need  (to clean, caulk, and paint your poo room) — 

1. a flat head screw driver

2. paint. our bathroom is teeny tiny, and the tiles cover a lot of the walls, so we only needed 1/4 gallon. I recommend making sure the paint is mold proof and bathroom friendly. We used a satin finish — not shiny, but not chalky-matte.

photo 1

3. a couple paint brushes. I used a 1″ one that I already had, as well as the brush I swear by, the shur line paint edger — it’s smooth, and helps with painting corners and edges.

photo 1-1

4. painter’s tape.

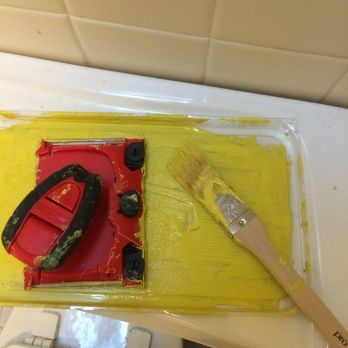
5. something to place the paint in. Incidentally, the plastic cover to a container of Swiffer mops works quite well (just make sure you don’t need to use it again!)

6. maybe a ladder, or you can do the little dance I did while painting on the edge of the tub.

7. brush or vacuum and cleaning all-purpose spray. I like Method.

8. Spatula and wall putty – in case you have old holes in the walls. Maybe some light sand paper.

9. bathroom caulk. This is different from caulk I used to cover mouse holes. But the practice is the same, so if you’re unsure how to use caulk, read this post.

Directions 

Before you paint, clean up the space. wash the walls down — there’s definitely a layer of grime and water from showering, which also means gross bacteria that you don’t want under a new coat of paint. Wash down everything including all the tiles with a cleaning spay.

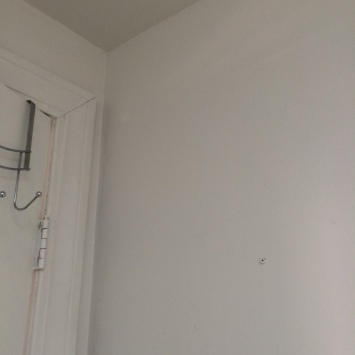
For us, there were holes all over the walls. And awkwardly placed HUGE screws, that of course were painted over from before. We patched them up, too. Once dried, I sanded them down just a bit with a light sandpaper to make sure the walls were smooth.

The bathroom tiles had old layers of paint and cement and caulk EVERYWHERE. Use a flat head screw driver to pull and scrape it up and off. Be careful to not make a hole into the wall. In addition, this is a great time to recaulk your tub. Where the caulk was once white  and water proof, it’s now black (mold) and gross. Use the flat head to scrape out the mold. Once you’ve scraped out everything nasty, make sure it’s clean and dry, and then use the caulk tube, and slowly squeeze out the paste. It will need 24 hours to dry, so don’t do this right after working out (note to self).

Before the paint pic, check out this beauty. After pic of recaulking the tub. Hallelujah, I’m not getting some weird growth on my feet!

photo

After you finish cleaning up the walls, removing old paint from the tiles, tape up where the wall meets the ceiling and the tiles. Oh yeah, remove the switch plates 🙂

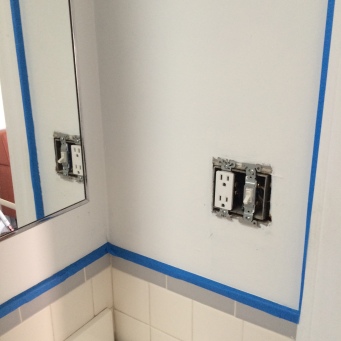
photo 2-2 photo 5-1 Then, start painting. If you choose a bright color like we (ok, I) did, you’re gonna need to paint two layers. Use the edge brush to get the main bits, then use the smaller 1″ one to finish the corners or hard to reach areas.

photo 3-2

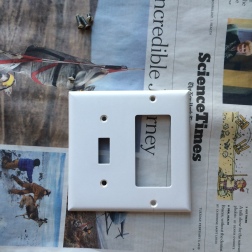
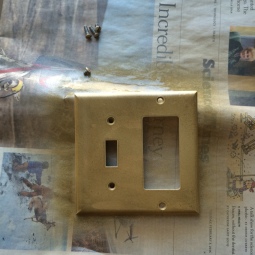
Between coats, spend your time getting crazy with spray paint. Just ask, would Beyoncé had a gold switch plate? Probably. (Make sure to spray by layer).

photo 2-1    photo 3-1

Then, after painting your second coat wait like 30 mins, and remove the painters tape. Waiting too long can sometimes pull up the paint if it’s dried on top of the tape.

Not only is our bathroom brighter, it’s cleaner, the tiles aren’t covered in decades of paint, and it’s mold free!

photo 5-2    photo 4-2  photo 1     photo 2

Next up, the kitchen!
final thoughts on studio living

Sooo I’m like three months behind. I should be ashamed, but damn I’ve been busy. Started new school programs, been traveling back and forth for work, and oh yeah… I MOVED again.

Oh yes, I said it. I have moved again. But before I get to that, here are my last thoughts on studio living. While it was only six months, I loved living on my own in a tiny shoebox. I will definitely take the sustainability and basic living along with my new space. Here it goes:

1. Don’t let a small kitchen prevent you from cooking. No really, don’t. Enjoy cooking, and figure out a way to organize all of your equipment. Check it:

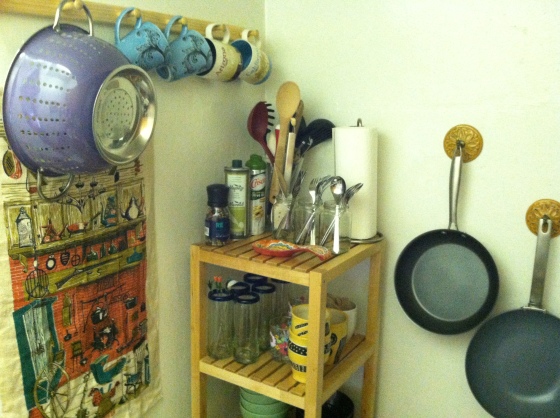
IMG_1210Here, I hung a coat/towel rack and embellished hooks onces used for jewelry to hang my pots and pans, mugs, colander, and dish drying rack (when I wasn’t using it). In the middle is an Ikea bathroom shelving unit that I used to store all of my dishes and baking sheets. On top, you’ll see recycled jars I kept to store my silverware.

IMG_3044

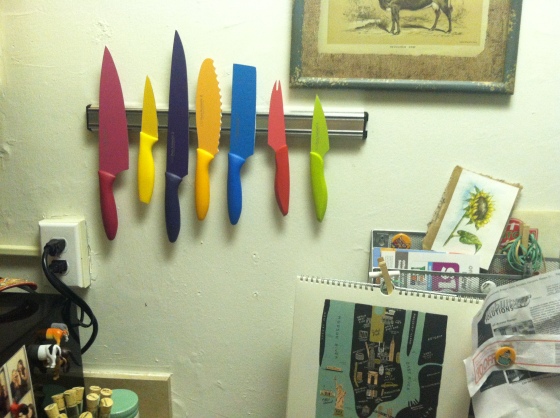
Magnetic knife strip: best. purchase. ever. Ok, maybe not best per say, but seriously, this saved space, and it actually got me using all of them, rather than than just a simple pairing knife. At the bottom right is a metal paper organizer I purchased in college for my desk. I hung it on the wall and actually kept mail, coupons, and recipes in it. Really helpful, and brought a little more personality to the space.

IMG_3301

So, that’s the kitch. See at the bottom right, my mini fridge. Perfect for one person. On the front is a magnetic hanging rack that I hung scissors, hot pads, and measuring cups on. It was purchased about a decade ago from the Container Store. Note to future self: Never age yourself by dating your kitchen equipment. Above the fridge is my favorite DIY item ever – spice rack in a mason jar.

Moving on…

IMG_3298When this studio was first built, a murphy bed was up in the closet where my bed is placed. As you can see, the perimeter insert is still there, making somewhat of a nook for my bed. It makes it private. Additionally, I placed my beast of an Ikea dresser as a room divider, between the bed and living area. When you walk in the front door, you can’t see the bed, and honestly, most assume it’s what’s behind the closet door. Win. For studios, less is more, and spacing things out the best you can will definitely help.

Lastly, you should definitely try and make one of these mason jar racks. They’re WAY fun, super easy to make, great storage, and just plain rad.

IMG_1854Cheers to fabulous studio living!


mason jar bathroom organizing

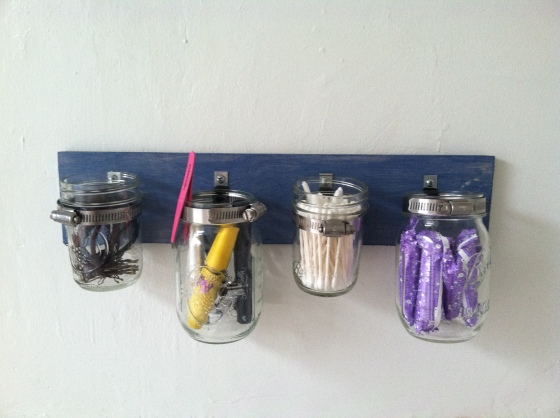
I hate finding bobby pins everywhere. Or Q-tips at the bottom of your bathroom cabinets. If your bathroom is small like mine, you probably don’t have a lot of counter space to hold hair clips, tweezers, cotton balls, etc. I saw this project done on a couple other blogs, and decided to take it on… turned out pretty great. Below are step by step instructions – and photos! – for how to do this. One note: I spent exactly $25 on everything. Next time, I’m going to use recycled jars, which should reduce the cost like $8- $10.

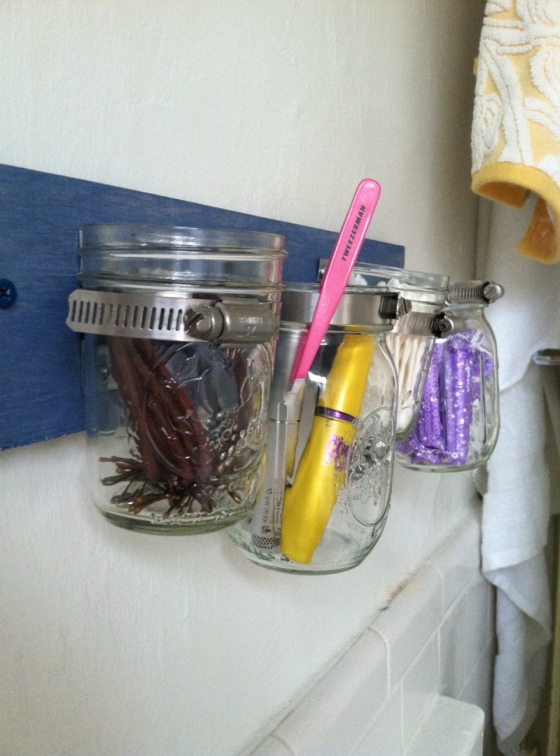
Final product:

for the record, living alone means not caring about having tampons out in the open. boom.

What you’re going to need:

1. A drill – if you don’t have one, buy one. Mine cost $60 – it plugs into the wall, which means crappy batteries won’t be an issue. Trust me.. invest in one, and you will not only be pleased with your purchase, but damn will  you feel independent.

2. A piece of wood – pick out the size you want. I bought everything I needed at Ace Hardware, and they actually sell scrap wood for $1 a piece. Perfect.

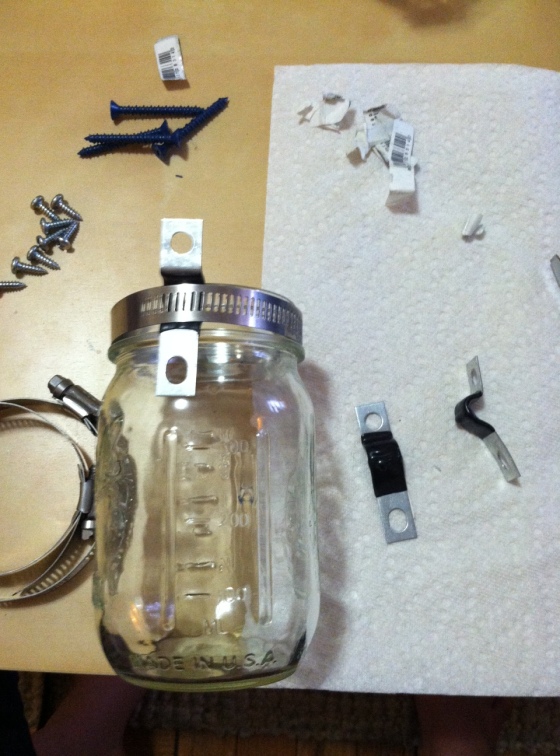
3. Rubber fixtures – one for each mason jar. These are what attach the jars to the wood. They are found in the plumbing section.

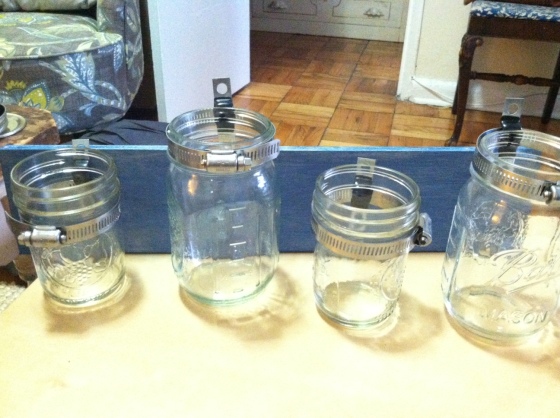
4. Mason jars! Use an old spagetti or jam jar. I chose to use different sized jars, because I knew I wanted to hold long items (like mascara) and small short items (like bobby pins).

5. Automotive circular hose clamps – one for each mason jar. Found in the automotive or plumbing section

6. 8 screws – two for each mason jar. These will be used to screw the fixtures into the piece of wood

7. 2 big screws – to attach the piece of wood to your wall. Because I have cement walls, I needed cement screws. Check with an employee at Ace to help you figure out which screws are best.

8. Paint – I used what I had left from a previous project (see bathroom cabinet)

9. Flat head screw driver

10. A good eye, a piece of string, or a measuring tape – to make sure you drill the screw in at the right level.

Here’s how to do it –

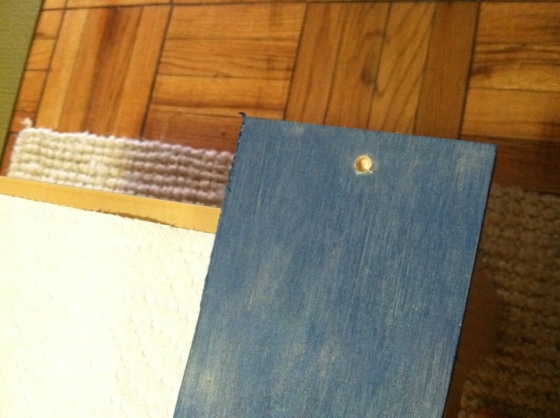
First, paint the piece of wood. I wanted  just a lite, rubbed-on coat. I took a paper towel, and lightly painted the wood in the direction of the grain.

Drill two holes in the wood – on the outer sides. This will be where you screw the piece into the wall. If you want to get fancy, and make your piece extra sturdy, use a large bit to drill into the wood a little bit, then finish with a smaller bit, and go all the way – this will create a holder for the screw.


Next, organize each mason jar with a clamp and rubber fixture. Decide what order you want the jars to be placed on the piece of wood. At this time, use your screw driver to tighten the clamps around the jars. Remember: lefty loosey, righty tighty. 🙂


Stand them up, and put them in the order you want. Next, measure out the distance between each jar on the wood. You will use your drill to screw in the rubber fixtures.


Finish drilling in the fixtures. Helpful hint: It may be easier to do this with the mason jars OUT of the clamps. Simply loosen the clamps, and put the jars back in after you’ve attached the wood to your wall.

Attach the piece to your wall – mine is in the bathroom – and there you go! A pretty simple, and somewhat fast project that will create space in your bathroom, recycle jars (if you are smarter than me) and decorate your space in a unique and artistic way. Next, I’m going to make one for my kitchen to store utensils – mine are currently in jars as there is no drawer. Thanks!

a quick bathroom update

In the old row house, I lived on the bottom floor and shared the house bathroom with guests and my other roommates. The bathroom was smaller than my kitchen now – so just about enough room for one person to stand. The shower alone was literally 2X2 feet. Teeny! Anyway, I wanted to clean it up, add a little color, and make it feel cleaner… all on my budget, of course.

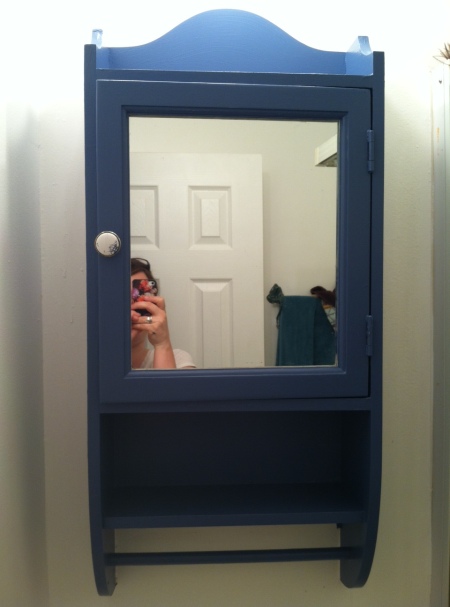
I decided – while I was at Home Depot buying paint for the front door – to also paint the medicine cabinet. I picked a grey blue. Similar to the door, I bought sandpaper. And to add a final touch, I went to the sale section at Anthropologie, and bought a knob for $3. Total price: $25. I couldn’t buy anything smaller than a quart size of paint, so I do have some leftover… maybe for a future project.

You’ll need to sandpaper down the medicine cabinet, take off the knob, and if possible, put masking tape where the cabinet meets the wall… this will prevent getting paint on the wall. Let the wall dry BEFORE adding the knob, or putting stuff in the cabinet. Again, patience is a virtue.

Check it out. Also – I added a couple more items to the wall in my new place, I’m liking it.

I need to get better at taking “before” pics.

i want fancy towels

I want Anthropologie towels. But I’m on a Target-towel budget. I think most people should. Anthro towels are fabulous. Lush, big, pretty colors. But damn. They are expensive. $48 a towel. $8 for a washcloth. Sometimes more. I would rather buy sweaters and boots and towels and Whole Foods groceries than spend over $100 for a set of towels.

But I love that look. Please check it out to understand the inspiration I’m working with.

Anyway, you can buy nice towels, a couple nicer towels, and a couple basic towels. Mix n match and  you’ll have a lovely set. Plus, until you stop using the face wash that bleaches towels (ahem, no comment), it’s probably not worth spending too much.

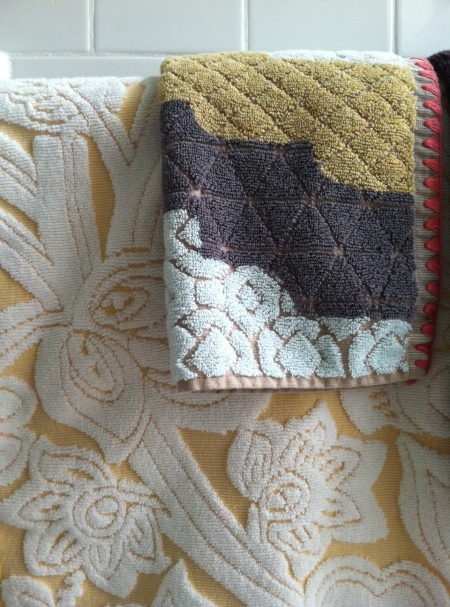
See what I’ve purchased. A set of basic white, Taget Home towels, a set of yellow and white floral towels from Target – they were $12 each, and then I bought a washcloth from Anthropologie for, yup the actual price, $8. For everything – four towels, two hand towels, a fancy washcloth, and a few basic white washcloths, I spent under $60. That would be the same price for just two towels at Anthropologie.. I will say I like the outcome.

Tell me what you think!