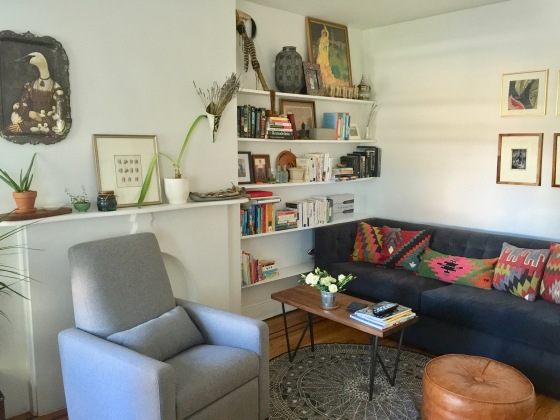
the evolution of a 100 sq ft living room

My style inspiration changes constantly. I want a scandi neutral space, then I want a bohemian, bright and luscious one. Mostly, I’m somewhere in the middle, because no way will I be able to survive without color, but there comes a point when I need to cool it, and opt for clean, white walls, and simple, hardwood floors.

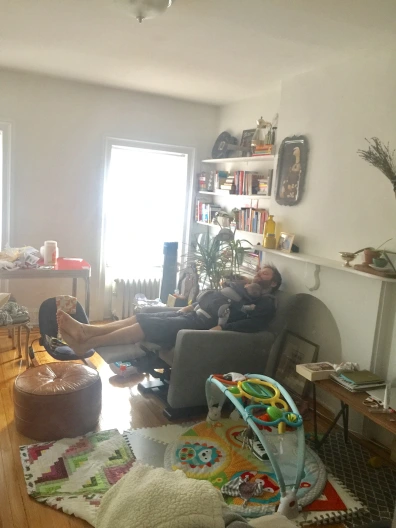
We just moved apartments in Brooklyn – same neighborhood, but a little more space. I should mention, having a baby was involved, and the deciding factor when our living room became baby central (see below).  We moved into Carroll Gardens apartment in 2015 as newlyweds, then transitioned to living again with our previous roommate (hence the ridiculous two sofas for football Sunday), to getting pregnant, living alone and realizing our sofa pre-2012 was full of flame retardant chemicals (insert increased levels of hormones + new parent freak out), to living with a newborn, to living with a (gasp) soon-to-be toddler who has taken over our lives, souls, and everything in between.

So without further ado,  in chronological order, the transformation of our living room:

winter/spring 2015 – the early years (I’m not happy about the two sofa squish either, but like I said, football Sunday > my need for open space (or, choose your battles).


IMG_8265

IMG_7656

fall 2016 – Bye, roommate, hello prego nesting + beautiful, hardwood floors

IMG_6043

IMG_9233

fall 2016 + two days – fuck, baby research + said prego hormones decided that spending more money ala one salary was fiiiineeee for a new + safe sofa.

IMG_6473 2

fall 2016 + two weeks – ah, that baby glider/recliner is actually pretty big. Nesting for the win. The glider is from Monte in Canada. Best. purchase. ever.

IMG_6672

IMG_6668

the nesting was intense.

IMG_0510

Ok, so this isn’t in the living room, but right?! How good (and clean!) did this place look with the help of all my hormones!!??

winter 2016 – ok fine, having a baby does change the scandi vs boho decision being my biggest dilemma.

IMG_0743

insert: a tired husband and baby. also insert: our attempt at plastic-free lasting 2 months.

summer 2017 – yea, it’s definitely time to move

IMG_2641

she crawled under that barrier in about t-minus 2 mins.

Next stop: that new two bedroom + two living room (Brooklyn, is this real life?!) apartment.

IMG_3155

dreaming big in tiny spaces

We’re going big with this tiny studio. It’s maybe, maybe, 300 sqft? It’s in Cobble Hill in Brooklyn, and simply put, this spot my friend Tyler found is, perfect. I won’t even start with how great a deal all these items cost us. Here’s a sneak peak. Until more…

IMG_0345

You have a fake fireplace in your bedroom too?

They’re charming. They’re horribly painted, with maybe marble here or there. They’re a free shelf. A fake bed frame. Character. Pretend or real. Maybe 120 years old. In any case, they’re here to stay, and you gotta figure out what to do with it. Here’s what we did with ours. Print is from the National Gallery of Australia. Bottles are from a flea market + and an old kale juice pressed. Salmon pot from Target. Books, sadly, and most likely, Amazon. Ooh lala.

21386682855_6f31ffe887_o

That spare ‘room’ — is it an office or a guest room?

It’s actually both. At least in a teeny NYC apartment it is. Here’s how you make it work:

  1. Find a small desk (2’x4′ is drastically smaller than anything 5′ long. And it helps not overwhelm. I love this CB2 one.
  2. Light colors furniture makes it feel bigger
  3. Not everything needs to be wood! Get some metal in there. Scared? Make it clean white.
  4. Mirrors make everything feel bigger! And clear glass is clean and spacious. (Urban Outfitters has a relatively fair priced living section where you can find one)
  5. A beautiful day bed also serves as a sofa, takes up less space, and no longer has to be a weird trundle. (Though yeah, those are pretty great, too). I’m loving this West Elm bed in walnut.
  6. And a beautiful Turkish fabric pillow? That makes everything better. (ala Etsy)

Guest Room : Office

add a little lime to your powder room (and while you’re at it, get rid of that mold! )

Screen Shot 2015-02-28 at 3.41.14 PM

The walls in our apartment are all clean white. There’s original molding and glass,  simply, they’re beautiful. Growing up in a house where the walls were always changing colors, and even the ceiling was a “white lime” color, I’ve learned to appreciate the spaciousness that white creates, especially in a small New York apartment. That said, you can take the girl out of the eccentric home, but you can’t take the eccentric home out of the girl.

More so, I wanted to see what we plausibly could get away with in regards to rental rights. Because after moving in two sofas, we’re never leaving.

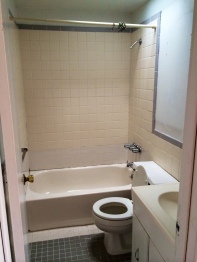
Our bathroom has a great sunlight, but other than that, it’s small. It’s mixed in white tiles where over time old ones must have broken off. There’s layers and layers of old paint, grey and white cements covering the tiles in illogical and messy ways. There’s also mold. A lot of mold. To top it off, the most recent paint job was one layer of white, so poorly painted you could see the lilac purple underneath.

I mean, it’s gross.

photo-1 photo-2

photo 5photo-3

Originally I wanted to paint it a dark slate grey/blue. But who wants to poo in not only a small room, but a dark and small room? So we nixed that, and I went to, obviously, my favorite color in the world — chartreuse.

Adding a lick of paint to your walls not only brightens the space, it cleans it up, makes things feel fresh, and is an inexpensive way to redecorate.

What You’ll Need  (to clean, caulk, and paint your poo room) — 

1. a flat head screw driver

2. paint. our bathroom is teeny tiny, and the tiles cover a lot of the walls, so we only needed 1/4 gallon. I recommend making sure the paint is mold proof and bathroom friendly. We used a satin finish — not shiny, but not chalky-matte.
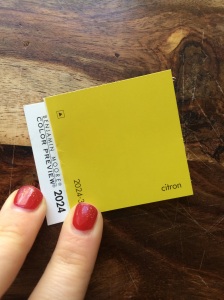
photo 1

3. a couple paint brushes. I used a 1″ one that I already had, as well as the brush I swear by, the shur line paint edger — it’s smooth, and helps with painting corners and edges.

photo 1-1

4. painter’s tape.

5. something to place the paint in. Incidentally, the plastic cover to a container of Swiffer mops works quite well (just make sure you don’t need to use it again!)

6. maybe a ladder, or you can do the little dance I did while painting on the edge of the tub.

7. brush or vacuum and cleaning all-purpose spray. I like Method.

8. Spatula and wall putty – in case you have old holes in the walls. Maybe some light sand paper.

9. bathroom caulk. This is different from caulk I used to cover mouse holes. But the practice is the same, so if you’re unsure how to use caulk, read this post.

Directions 

Before you paint, clean up the space. wash the walls down — there’s definitely a layer of grime and water from showering, which also means gross bacteria that you don’t want under a new coat of paint. Wash down everything including all the tiles with a cleaning spay.

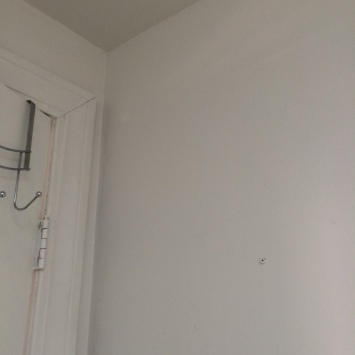
For us, there were holes all over the walls. And awkwardly placed HUGE screws, that of course were painted over from before. We patched them up, too. Once dried, I sanded them down just a bit with a light sandpaper to make sure the walls were smooth.

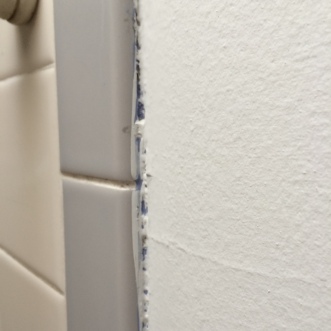
The bathroom tiles had old layers of paint and cement and caulk EVERYWHERE. Use a flat head screw driver to pull and scrape it up and off. Be careful to not make a hole into the wall. In addition, this is a great time to recaulk your tub. Where the caulk was once white  and water proof, it’s now black (mold) and gross. Use the flat head to scrape out the mold. Once you’ve scraped out everything nasty, make sure it’s clean and dry, and then use the caulk tube, and slowly squeeze out the paste. It will need 24 hours to dry, so don’t do this right after working out (note to self).

Before the paint pic, check out this beauty. After pic of recaulking the tub. Hallelujah, I’m not getting some weird growth on my feet!

photo

After you finish cleaning up the walls, removing old paint from the tiles, tape up where the wall meets the ceiling and the tiles. Oh yeah, remove the switch plates 🙂

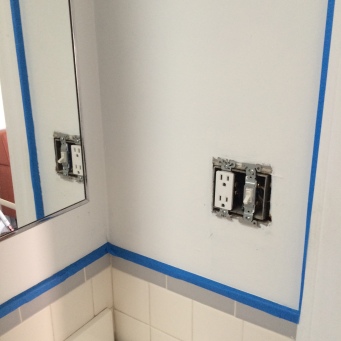
photo 2-2 photo 5-1 Then, start painting. If you choose a bright color like we (ok, I) did, you’re gonna need to paint two layers. Use the edge brush to get the main bits, then use the smaller 1″ one to finish the corners or hard to reach areas.
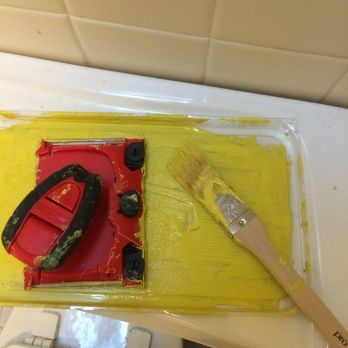
photo 3-2

Between coats, spend your time getting crazy with spray paint. Just ask, would Beyoncé had a gold switch plate? Probably. (Make sure to spray by layer).
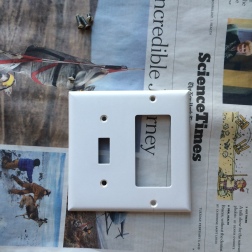
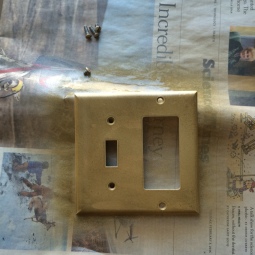
photo 2-1    photo 3-1

Then, after painting your second coat wait like 30 mins, and remove the painters tape. Waiting too long can sometimes pull up the paint if it’s dried on top of the tape.

Not only is our bathroom brighter, it’s cleaner, the tiles aren’t covered in decades of paint, and it’s mold free!

photo 5-2    photo 4-2  photo 1     photo 2

Next up, the kitchen!

how to fix up a new, old find (and remove the rust!)

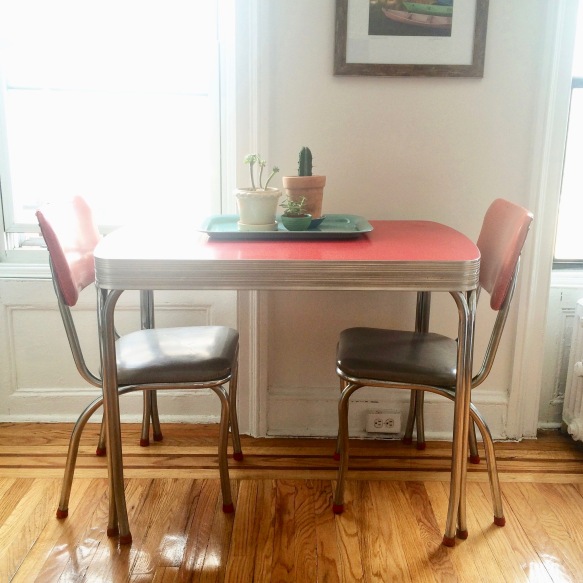
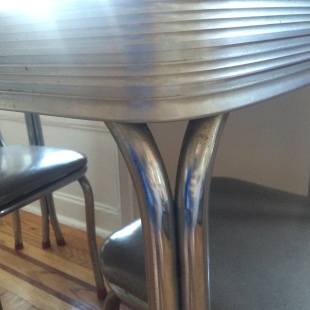
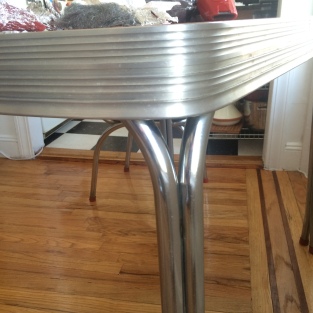
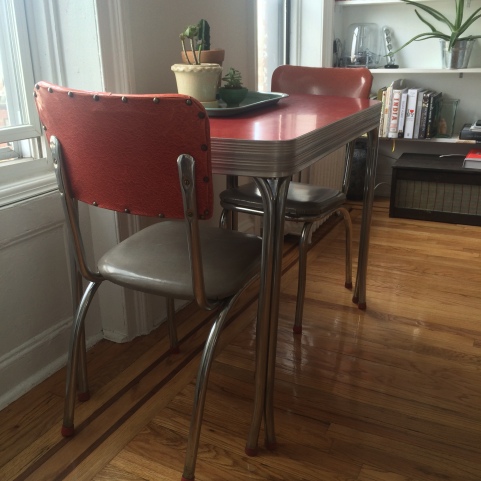
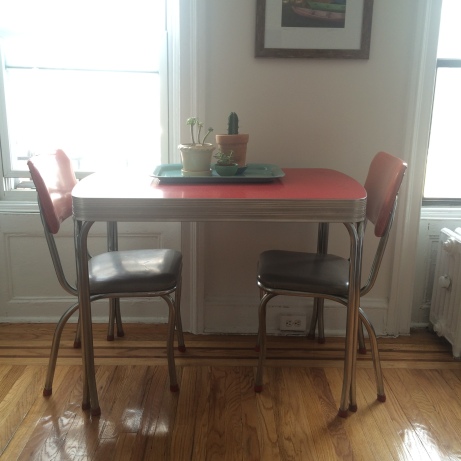
Earlier this week I was walking to get my laundry, and happened across this retro, tiny, “little red dinette set.” It was made sometime around the late 40’s, early 50’s we’re guessing. On average, they can cost up to several hundred dollars, but this one was being sold for $150. And while a Johnny Rockets theme wasn’t ever what I thought would look good in our apartment — think boho, vintage, Anthro-feel, it really spoke to me. There is something really unique about the orangey-red, aluminum,  and grey seats. Plus, the size was perfect as we don’t have too much space for a dining table. (Also, ugh, I hate snow.)

photoAfter walking back and forth like three times, I knew I would miss out as it were to likely be purchased soon. The antique shop selling it had just got it in earlier that day, so we went for it. There was rust and dirt all over it, but I figured I’d clean it up some how.

::insert complaint about walking it six blocks and up three flights of stairs::

I called my mom for advice on how to clean it. She quickly knew the perfect trick, going back to her motorcycle days (Ha!) And based on my last post, she said I already had everything I needed to clean it up.

What you need:

— Steel Wool! Yup, the same wool I used to stick in the  mouse holes
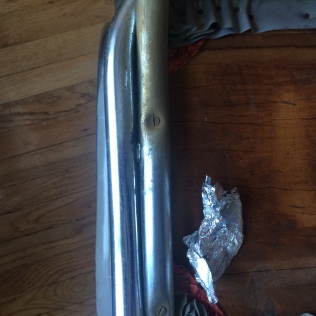
— Aluminum foil

photo 1-1


See what we needed to clean:

photo 2photo 3


photo 5


It’s pretty gross, right? Before you start, make sure you are working on a surface you can easily clean — the wool particles and excess rust will get everywhere.

So first, wipe it all down and clean it as best you can. I prefer a natural cleaning product. Then, you’ll start to scrub down all the rust with the steel wool. You’ll quickly see a difference, the rust scrubs off quite easily. But note: be careful because the metal fibers in the wool will hurt your hands!

The side on the left was scrubbed with the steel wool:

photo 3-1


Next, use the shiny side of the aluminum foil, and scrub once again. The foil will make the metal shine! (Notice which part was cleaned with steel wool and foil?)

photo 2-1


Then, wipe it all down again with a cleaning agent. Use a mild one to ensure the shine keeps it’s pop. You may also want to use a little hand vac to suck up all the rust particles that fell off. Now, do the whole thing! This actually takes quite a bit of time, especially because of all the nooks and crannies. Remember to clean up even the little parts, like the screws and upholstery tacks. Take your time, and the results will amaze you.

Whoop!

photo 1-2


To curve that ‘diner’ feel, I added a teal blue platter (from Ikea!) with a couple succulents, and made it feel like ours. Now, for a dinner party!

photo 4-2


photo 5-2


So many materials.

I visited the Material ConneXion library this afternoon. I’ve decided to take on the certificate program at Parsons, and one of the courses they offer is Showrooms — where basically, you have the opportunity to visit amazing showrooms throughout New York: Large ones, historical ones, hipster-Williamsburghy-ones, you name it. Today we visited the Material ConneXion library located in Mid-town. This place is INSANE. Basically they are a data collection (the world’s largest collection!) of every known material that’s out there — ceramic, fiber, metals, cement, processes, and polymers. Their collection is roughly 7500, and at any given time they display 2500 of them. Unfortunately you have to have a membership to the museum (which is crazy expensive), but as a student at Parsons you can go for free. Whoop! Check out some of these killer materials I captured. It’s a pretty inspiring and an interesting space. Plus: you’re allowed to touch everything.

photo 5-1Recycled skateboards – could be used for a wide variety of things, including rad wall coverings.

photo 3-1

This may be my favorite: handwoven wall coverings of recycled maps. Exceptionally expensive, I mean, it’s HANDWOVEN, but how cool would a bathroom, or wall in your office look with this all over it?

photo 2-1

This is also a natural material — made of cork and woven cotton. It could be used to reupholster a piece of furniture, shoes, clothes, the list is endless.

photo 1-1


So this one is kinda crazy — it’s a wood veneer with leather substrate. It’s flexible and therefore can be used again for many purposes.

photo 5

These. I want a belt made out of each one. Low and hold, it’s all mosaic wood veneer. So, no belt for me, but it could be beautiful trimming, paneling, or framing (so the details read!)

photo 4

I love this one! There’s glitter, there’s cork, there’s layers of paper. It’s really just cool. And it can be from recycled material which is even better.

photo 2

So many mateeeerriaaalllsssss!!!


christmas threw up in my studio last night

It happened. Earlier than usual this year, simply because I realized late last night that I didn’t need to ask anyone if it was ok to start decorating.

Boom.

Anyway, here are some photos of my little casa. I have had all the decorations for the last several years — some from when I was in college. They are from various places like World Market, Target, and some of the ornaments are from around the world – Russia, Mexico and France. Anyway, check it out. Here are some thoughts when decorating your own place –

– Keep your regular home designs out, and decorate them. Example: Where my bottles are, I added a couple Christmas trees. It just adds more color and liveliness. You can also see that I hung cinnamon sticks, pine cones and a cranberry wreath on top of my frames. I like the layering look. It’s fun, and not perfect.

– Mix classy with trashy. I love the shiny, tacky garland. And I love natural and earthy color ornaments and decor. Mix them just a bit (see my bits of garland), and I think the finished product looks good.

For this area, I hung strings of stuff- The flower-like ones are from Target, the other string is small pine cones, cranberries and cinnamon sticks I put together after seeing it done in a magazine several years back. I also love the little green bows and stockings that seriously date back to like 2006. The cranberry (alright, they are puff balls) wreath is from Target three years ago, and the ornament is from France. There was a time when I wanted an ornament from every country. That last lasted like half of one trip. Nice idea though.

These are some of my favorite Christmas decorations. I have an affinity toward Christmas trees (like bottles), so I have slowly collected different ones throughout the years. Similar to my original set up, they all share a warmth in color – while they may all be different, the sizes and mixed colors make for a nice balance. There’s also a photo of my college girlfriends and I. Nice memory to bring out each year.

The center piece is a mini cinnamon broom from Whole Foods. I LOVE IT! And it smells AMAZING. I had one a few years back from Trader Joes, one of the larger ones. But trust me, if you live in a studio, the tiny one is all you need. Again – gotta love the gold garland… that was purchased my sophomore year of college, and has lived in seven homes since. Ha!

sidenote: my cat just fell off the couch. hilarious.

My version of a Christmas tree. The little Russian dolls were hand painted in, you guessed it, Russia. I actually picked them up at the World Famous (I am actually not being sarcastic) Gem and Mineral show in Tucson, Arizona… one of the best places for amazing jewelry and random pieces like this. The wreath is fake, but I use it every year … maybe that’s sustainability in action?

Here is one big view. I love my cozy space, and I love Christmas decorations. Win. The garland balls 1- 12 represent the Twelves Days of Christmas. I bought them a few years ago from Target (seriously, they sell amazing decorations), and actually kept them up in my last place the whole year.. but not in that you-still-have-your-Christmas-lights-up-in-February sorta way. They’re pretty cool.

I’m going to check out new things this weekend, and see if I find anything fun to add to my collection. Woohoo.

I hope this inspires you to get decorating! (or have me come decorate your place!)

Summer 

happy halloween, y’all!

I love Halloween. Working as an office manager, I get the privilege of decorating our office… and you better believe I’m taking that opportunity. At some point I’ll blog about the space and how I’ve designed it. Until then, check out the start to decorating for our Halloween party next week. All items were purchased at either Amazon.com or Party City – all were on sale. Huge recommendation – before you EVER buy something online, Google coupons for that store. I searched for discounts for Party City and found a $30 off if you spend $100 – Plus free shipping. Discounts are out there, you just need to take a moment and look.

I love a great center piece. I  love bringing basic pieces together to create a nice, final display. Here I bought I basic black netted cloth, a couple paper lanterns, cob webs (most important), gourds,and a paper, sparkly candle piece. It’s a little cheesy – but it’s Halloween, and it’s fun. Add a few sparkly, black leaves… perfection. One tip on cob webs. A little goes a long way. The best cob webs are the spread out ones… fine strands, super creepy.

Normally, I prefer making crafts, getting creative… but let’s be honest, some years there is just no time. Instead, get creative with the cheaper Halloween decorations – no need for the $150 Vampire – and see what you can do.

I’ll soon be building a photo booth stage, layout the makings of a good pumpkin carving station, a couple recipes for amazing cider, and everything else that makes a Halloween party amazing.